![]()
![]()
![]() without headaches
without headaches
– About this manual –
“The beginner’s handbook” is a simplified manual to install and master the Debian system.
You will find in the following pages the answers to your first questions concerning the Debian GNU/Linux system ![]() , its history, how to obtain it, to install it, to master it, to configure and administrate it.
, its history, how to obtain it, to install it, to master it, to configure and administrate it.
You will be able to go further and obtain information concerning the privacy protection, the backing up of your data, and the various actors of the Free Software world.
Usually, the manuals begin by teaching you the theoretical basis and the usage of the terminal. This manual takes the very side of the “graphical environment”: it is designed to let you start quickly with Debian, screen powered on, fingers on the keyboard and the mouse nearby  .
.
– The mission of this manual is not to be comprehensive –
A lot of external links are available in this manual. Don’t hesitate to click on them in order to read more detailed information.
For a more detailed documentation, please visit the official Debian Wiki: https://wiki.debian.org/FrontPage or the Debian administrator’s handbook: https://debian-handbook.info/browse/stable/
– How to use this manual? –
It depends on the version you are viewing:
 Debian? What’s that?
![]() Distribution, free software, community, packages, source code … but what is Debian in fact?
Distribution, free software, community, packages, source code … but what is Debian in fact?
Debian is an operating system free (as in free speech) and gratis (as in free beer). Debian allows your computer to function and offers you a full set of Free Software for all the usual practices (surfing the Web, sending emails, playing multimedia files, doing office kind of tasks), and more …
This collection of Libre Software comes to a large extend from the GNU project, launched in 1983 by Richard M. Stallman. The Linux kernel developed by Linus Torvalds then came to complete this set of software to make GNU/Linux.
The Debian GNU/Linux distribution was started by Ian Murdock (rip) in August 1993. Everything started with a little, but solid, group of free software hackers, which grew up to become a large and well organized community of developers and end users. Debian is now developed by a thousand of volunteers spread around the world.
So, Debian is a complete set of free software.
A free software is defined by the 4 freedoms https://www.gnu.org/philosophy/free-sw.en.html : it gives the end users the freedom of using, studying, sharing and modifying that software, without breaking the law. To achieve this, it is necessary for the developer to distribute the source code and authorize the end-user to exercise its rights granted by a free license.

One of the major interests of the free software is that it allows skilled people to audit the program code, to insure notably that it does only what it is supposed to do. So it is an additional barrier to protect your privacy  .
.
Debian implements this principle in its Social Contract, and particularly in the Free Software Guidelines according to Debian. This contract states that the Debian project will contain only free Software. Thus, during the installation of a Debian distribution, neither non-free drivers will be install by default.
However the contract recognizes that some users might need “non-free” components to run their systems, like some peripheral drivers, or some applications decoding specific music or video files, for example. That’s why the distributed software is divided into three sections:
Debian is developed very thoroughly. Every new stable version is carefully tested by users before it is released. And this release happens when it is ready. Hence few maintenance work is required once the system is installed and facing problems is very rare.
Like numerous other free distributions, Debian is not very sensitive to malware (like viruses, Trojan horses, spyware…) and for several reasons:
 The back-up of you data on a regular basis remains the best insurance to protect them against potential viruses or technical issues, but also against your own mistakes (chap.9).
Do you need help? The first reflex, if you can, is to consult the documentation. Next come the various user’s forums, and then a GNU/Linux Group (LUG), if you are lucky enough to be located nearby. There are also several events dedicated to the free software in various associations: you will be able to schedule appointments not far from your home by consulting agendas of the Libre software https://en.wikipedia.org/wiki/List_of_free-software_events.
The self-help and support GNU/Linux community mainly consists of passionate volunteers ![]() who share their knowledge with great pleasure. They are also very technical persons, friendly called the geeks (usually wearing a beard), with several years of computer practice behind them. This experience leads them to master the terminal, which is the most efficient tool to manage a GNU/Linux system: therefore, the very first answers found on the forums will naturally be given in the form of a set of command line operations. Don’t be scared: in most of the cases a graphical solution (using the mouse within a window) exists also. Ask kindly and you will get an explanation.
who share their knowledge with great pleasure. They are also very technical persons, friendly called the geeks (usually wearing a beard), with several years of computer practice behind them. This experience leads them to master the terminal, which is the most efficient tool to manage a GNU/Linux system: therefore, the very first answers found on the forums will naturally be given in the form of a set of command line operations. Don’t be scared: in most of the cases a graphical solution (using the mouse within a window) exists also. Ask kindly and you will get an explanation.
To be able to ask a question on a self-help and support forum you should usually register first. You need a valid email address to register with, then receive a confirmation request message and, once registered, the notifications of the answers you got.
Before you ask a question, please remember to look first into the Questions/Answers already solved: most of the forum include a search function by keyword, which will help you find out if your problem is already described in there and has a documented solution.
Don’t forget that a forum is usually maintained by volunteers, not to be confused with a post-sales customer service organization  .
.

 A simplified introduction to computer
We begin here a scary page…
Let’s start with a simple statement: Software developers and end-users do not speak the same language…
But then … how are we going to make it?
Easy: we read the beginner’s handbook! 
Within a short period of time, computers became essential tools of the modern life. One issue is that information and education don’t follow the technical progress at the same pace, nor the needs of the users.
Therefore, it is difficult for a “new user” to discover the full capabilities of its computer. Moreover we use generally only few applications.
We will try to simplify this universe as far as possible, in order for you to make the most of your computer and to enjoy the capabilities of Debian.
How does a computer work ?
One launches applications, clicks on icons, types some text in … One needs a computer, a screen, a keyboard, a mouse.
In this handbook, we will show you the basic manipulations in order to use your mouse  and your keyboard
  .
.
What use for a computer?
It seems difficult to summarize in few sentences the whole scope of the information technology field. However its usage is somewhat clear :
And this is exactly the know-how you are going to acquire with the beginner’s handbook .
Keep in mind that this manual is not cast in stone… Our advices are only suggestions regarding your computer knowledge …
First of all, you are free!
Importantly, be as honest as possible: we are all beginners in one domain or another (personally, I am unable to change the injectors in the carburetor of my car) and it is not a fault. The issue is raising only because computers are taking a large space in our lives, and penalize the newbies. But we are here to change all that!
The goal of this manual is not to transform you in GNU/Linux sysadmin (short for system administrator), but simply give you the tools to utilize your computer as you want !
Outright beginner?
You never or rarely used a keyboard? You still wonder why you must “open a window” and what is this “drag and drop” concept? Please continue reading this manual and follow its guidance. You will learn how to use your mouse and keyboard (the tools to directly interface with the machine), and to recognize the basic elements of your desktop environment (menus, panels, windows, virtual desktop …)
Then discover Debian and its functionalities.
Novice user?
You are a Windows® user and/or you have a little experience with GNU/Linux, but you never installed it: it is the right time to choose your flavor of Debian (chap.4) and discover the interface of your future system.
Basic user?
You have already used a Debian derivative and/or another free distribution, and you know exactly what you need. Let’s jump directly to the serious stuff with the actual installation (chap.5).
The mouse is the physical interface which let you move the pointer on the screen:
the mouse moves are synchronized with those of the little arrow (the pointer)  on your desktop.
There are different types of mouse; we will take here the example of the classical mouse with two buttons and a scrolling wheel.

The left-click (or simple-click) is the most common opearation and is used to point to (or select) either a folder, or a file or an image, which can then be open with a double-click (pressing twice the mouse left-button). This left-click is also used to send commands to the computer (by validating a choice) when one presses on the “button” or something else sensitive to the click (i.e. the cross closing a window).

The right-click is used to open a contextual menu (a variable list of options, depending on the software used and the “object” pointed at by the mouse) in order to modify a file, a folder, a configuration …

The middle-click or scrolling-wheel is used for scrolling and quick copy. If your mouse has neither a middle button nor a scrolling wheel, the “middle-click” can be emulated by pressing on the two (left and right) buttons at the same time.
The main action of the mouse is to point out an item to open it (in the case of a document for example) or to launch it (in the case of a link to an application or a menu entry). For that, nothing very complicated, just place the pointer on the element and then double-click with the left button of your mouse.
One thing that you SHOULD NEVER DO is to click several times on a button if you think that nothing happens. It is very possible that an application won’t start “immediately”, it is very depending on your hardware and the application being launched. As an example, a web browser takes significantly more time to start up, than the file manager.

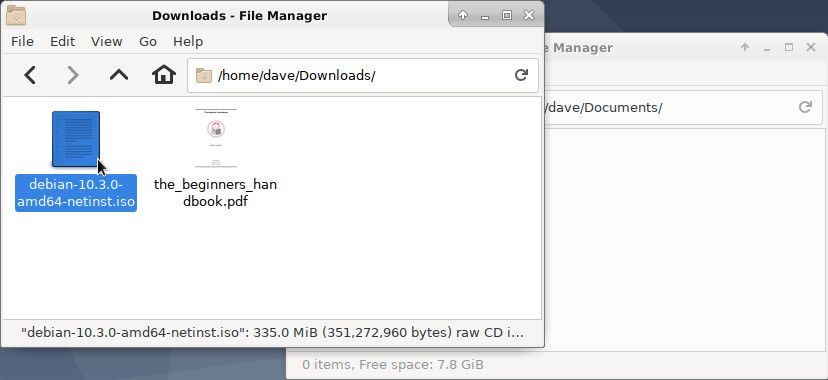
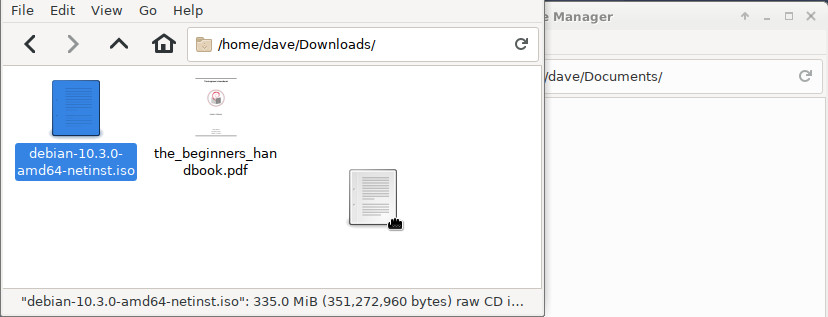
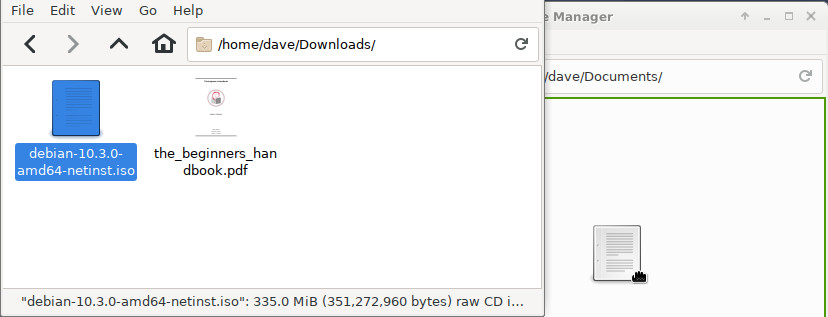
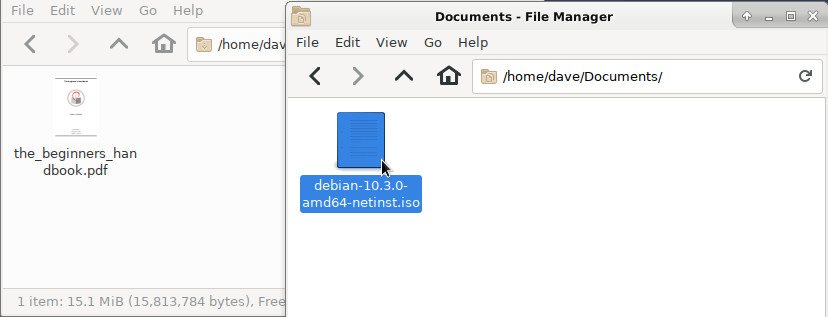
To graphically move or copy your data, it is enough to “drag” them across the screen and “drop” them where you want (this is the graphical equivalent of the mv command).
Example: to move a file you just downloaded into another folder, press the left-button on the file in question, and while you hold the right-button, you move the mouse into the destination folder and then you release the mouse button:
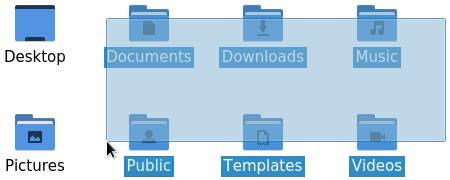
If you need to move, copy or delete several items, you can select them together.
To select a group of contiguous items: press and hold the left-button, move the mouse to drag a frame around them and release the button when they are all selected. Then you can act on the selection like explained previously (copy/paste or contextual menu):
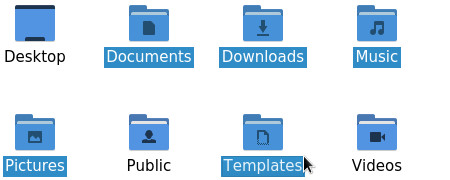
To select non contiguous items you can:
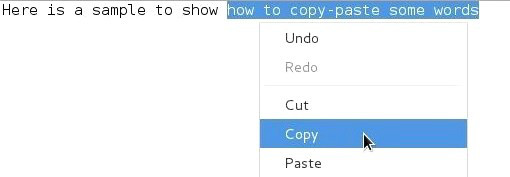
Put the cursor at the beginning or at the end of the text segment you want to select, then hold the left-button, and move the mouse over the text you want selected. Then release the mouse button.
You can also double-click (click twice quickly on the mouse left-button) on the first word you want to select and then move the cursor over.

If you are fast enough, a triple-click will select the entire line or paragraph.
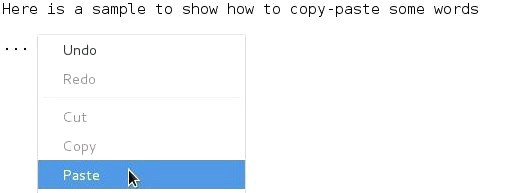
With the right-button: a right-click will display a contextual menu giving you the choice among several actions, one of them being the requested copy/paste. Put the cursor within the selected segment, right-click and choose the “copy” action. Then move the cursor where you want to paste the selected text, right-click again and choose “paste”.

With the middle-button: once the text segment is selected, you just need to move the pointer where you want to paste the selection and do a middle-click. The copy is immediate.
The keyboard is the main physical interface to enter data in your computer. But it is not the just the device which let you enter some words in the Internet search bar, or work with a word processor.
It includes also some special keys, called modifier keys, which allow you to execute quick actions by modifying the behavior of the “normal” keys.
The combinations of some “special” keys with other “normal” keys form the keyboard shortcuts (chap.2.3.2).
Default QWERTY keyboard layout
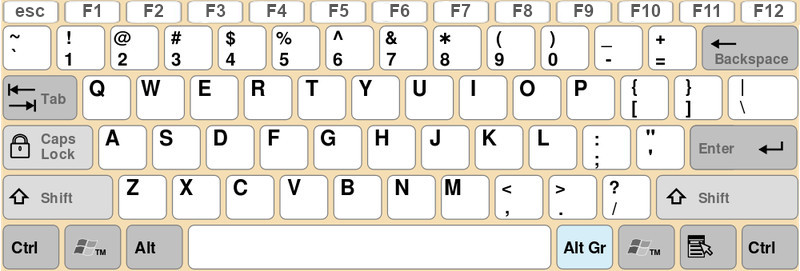
The “non-alphanumeric” keys of the keyboard give you access to extended functionalities during action or edition phases. From the simple carriage return within a text editor with the [Enter] key, to the launch of a Help window with the [F1] key, find hereafter some descriptions of these special keys:
Why bother? Because it’s much faster!
Note that the shortcuts are triggered by pressing down the keys together, at the same time: to copy a selection, press and hold the [Ctrl] key, then press the ‘c’ key. You can then release both keys, a clone of your selection is stored in the “clipboard” (a special buffer located in the memory of the operating system).
Hereafter a short summary of the most useful keyboard shortcuts:
| Shortcut | Action |
|---|---|
| [Shift] + arrows | Make a selection |
| [Ctrl] + ‘c’ | Copy the current selection (in the “clipboard”) |
| [Ctrl] + ‘x’ | Cut the current selection (and save it in the “clipboard”) |
| [Ctrl] + ‘v’ | Paste the latest copy/cut selection from the “clipboard” |
| [Ctrl] + ‘f’ | Find a word or an expression |
| [Ctrl] + ‘+/-’ or Mouse-scrolling-wheel | Zoom in/out of the screen display |
| [Alt] + [F4] | Close the active window |
| [Alt] + [Tab] | Jump from an open window to the next one |
| [F1] | Open the Help function of the active application |
| [F11] | Switch to full-screen mode |

Note that some functionalities are not only available on text segments (like copy/paste), but on files also: if you select several pictures in your ‘Pictures’ folder, make a [Ctrl]+‘c’ and then a [Ctrl]+‘v’ on your desktop, your selected pictures will be copied there. In the same way, [Ctrl]+mouse-scrolling-wheel will zoom in or out the content of your Internet navigator, as well as the content of a file manager window.
Keyboards can’t contain as many keys as available characters. In order to write the particular characters in English, it is necessary to combine the keys like the shortcuts (simultaneously pressing of the keys)
First, a preview of the QWERTY’s “hidden” keys:
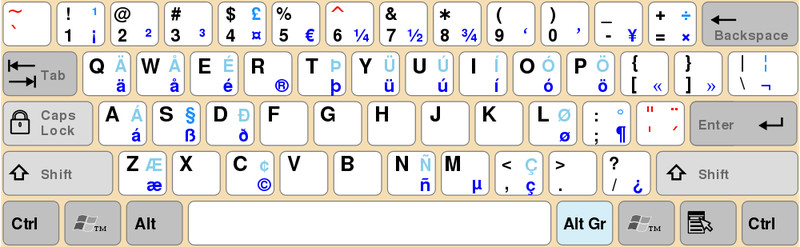
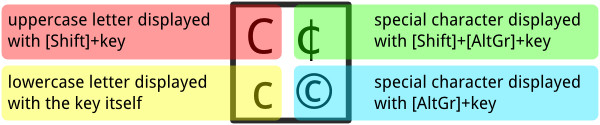
Each symbol is associated with a key combination. So to write “©”, you’ll have to simultaneously press [AltGr] + ‘c’.
mouse exercises:
keyboard exercises:
One of the great strengths of the GNU/Linux systems is their user management. The separation of rights and responsibilities provides a better security level when executing system administration tasks or exchanging data on the net. Small explanation …
![]() Generally YOU are the user, of course. Sometimes one talks about the Chair-To-Keyboard interface (abbreviated CTKI), since it’s very true that you are sitting between the chair and the keyboard, or the mouse. When you work on your computer, it does not see you. It feels only the actions made by a user with a login-name and sometimes a password.
Generally YOU are the user, of course. Sometimes one talks about the Chair-To-Keyboard interface (abbreviated CTKI), since it’s very true that you are sitting between the chair and the keyboard, or the mouse. When you work on your computer, it does not see you. It feels only the actions made by a user with a login-name and sometimes a password.
Each user is allowed to perform a certain number of actions. Your user can, for example, use the keyboard and the mouse, read and write some documents (files), but not all of them. We call that rights: to execute administrative tasks, one must obtain the root administrator rights (chap.3.8.3).
![]() Only one user has all the rights, it is the administrator. This special user is able to execute some tasks (in particular for the system administration) that other normal users cannot perform by themselves. But a single mistake in an operation made by this root user could potentially break the whole system.
Only one user has all the rights, it is the administrator. This special user is able to execute some tasks (in particular for the system administration) that other normal users cannot perform by themselves. But a single mistake in an operation made by this root user could potentially break the whole system.
At home, on your desktop computer, you can use your system both as a normal user and as an administrator. Some well defined actions have to take place in order to switch from one role to the other, like typing the root administrator password (chap.3.8.3).
![]() This clean distinction, which, by the way, does not always exist under other operating systems, strengthens the stability and security of the Debian GNU/Linux system, as mentioned at the beginning of this manual. When working as simple/normal user you cannot make your computer unusable (brick it), and the potential viruses cannot infect the whole system.
This clean distinction, which, by the way, does not always exist under other operating systems, strengthens the stability and security of the Debian GNU/Linux system, as mentioned at the beginning of this manual. When working as simple/normal user you cannot make your computer unusable (brick it), and the potential viruses cannot infect the whole system.
More details on rights and permissions in the chapter 3.7.
 The graphical environment
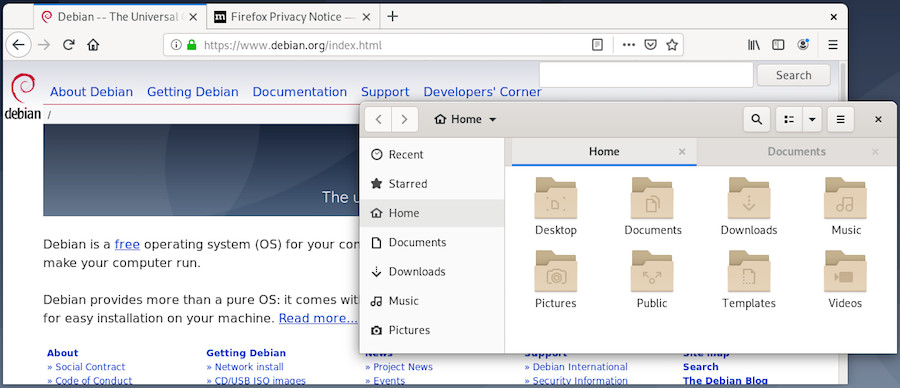
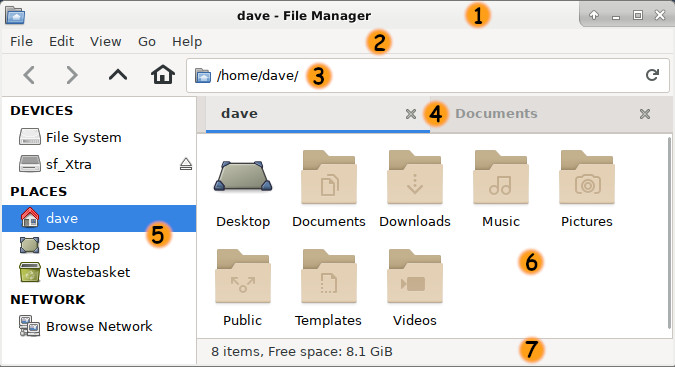
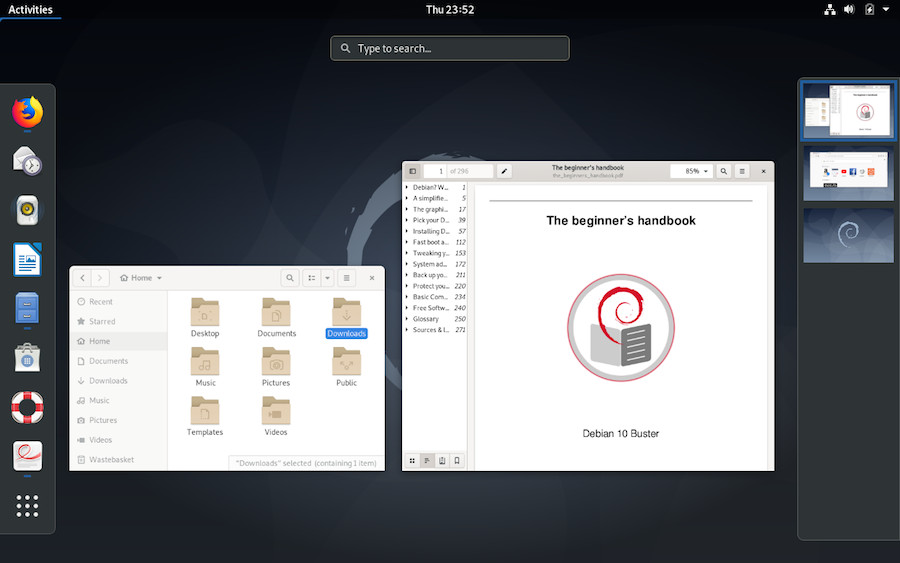
Let’s start by looking at the various elements displayed on the screen. On this simple image, you can already identify the first elements which are explained below in this handbook:

The “panel” or task bar (at the bottom of the screen, in this example, but it can be moved wherever you wish) which could include the “application menu” listing your installed software, a collection of launchers (small icons) for your favorite applications, the list of the currently open windows, the time, the notification area…
A file manager window which displays the folders contained in your home directory.
You will discover other interfaces and layouts in the chapter dedicated to desktop environments (chap.4.2).
The “panel”, the task bar, the notification area… all these words to talk about the information and launcher interface of your system.
Usually, it is a banner located at the top or the bottom of your screen, displaying several types of information, launchers, menus to quickly access your data or your applications, but also informing you (new email has arrived, what time it is, a USB disk was just plugged in…) via the notification area.
Here after a quick overview of the various “panels” on the Debian desktops: Gnome, Xfce, LXDE, MATE, Cinnamon, KDE and LXQt:


Irrelevant of the type of desktop, the task bar displays, at least, the following elements:
Like almost all the elements of the GNU/Linux desktops, the task bar can be configured and embellished by plug-ins (little specialized modules) or simply removed !
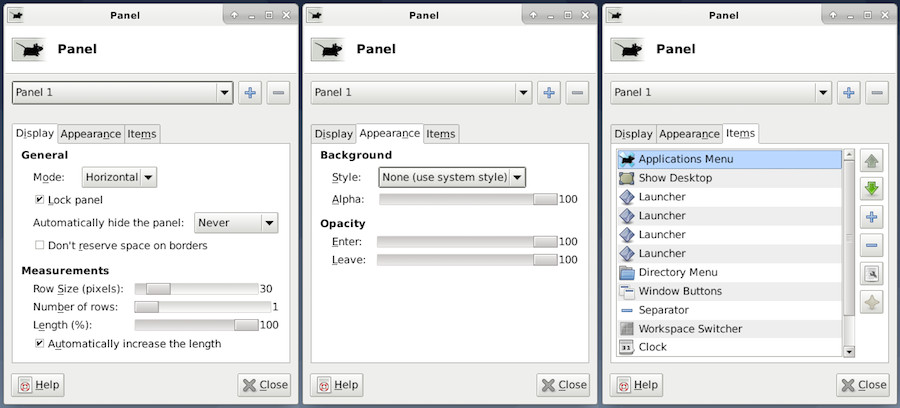
A right-click on the “panel” opens a drop down menu allowing you to change its configuration (except for the Gnome-3 desktop). Hereafter an example of configuration for the Xfce panel:

More details in the GNU/Linux desktop discovery section (chap.4.2).
The various applications installed in your system are available through several vectors: launchers on the desktop, or in the task bars, and more generally using the menus.
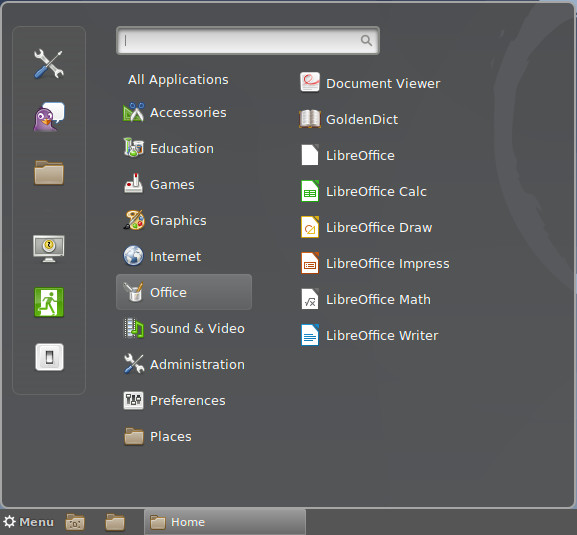
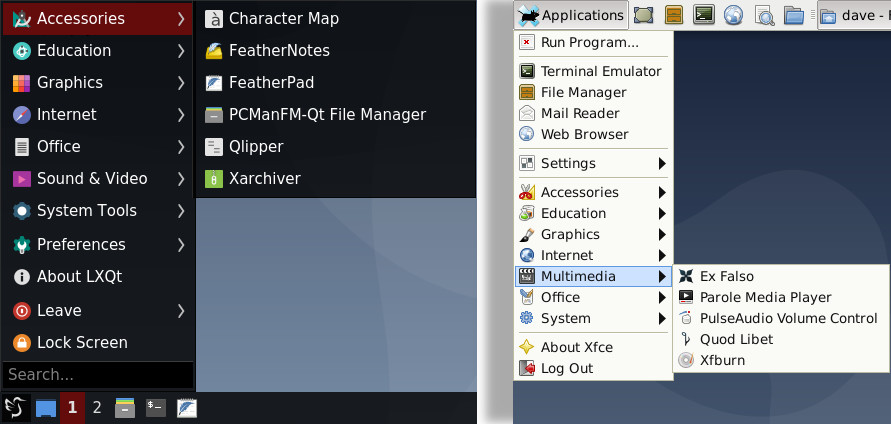
In the menus, your programs are listed and sorted by categories. A left-click on the menu icon displays the application and section entries. A left-click on a program icon launches the corresponding application. Each desktop has its own specific menu:
Your applications, your data, your USB keys, are usually displayed within a decorated frame. Each desktop environment decorates windows its own way, but most of the times they implement the same functions:
Actions on windows are possible with the keyboard: either directly with a function key, or by using a keyboard shortcut (chap.2.3.2), but generally your mouse will do the job. 
To close a window, left-click on its “close” button, usually symbolized by a cross in the top right corner of the window.

To move a window on your screen simply move your pointer on the title bar (the top banner of the window) then press and hold the left-click. The pointer will then change its usual look:
from to 
The window will then follow the mouse motion until you release the left button.
If you don’t have access to the title bar, you can use the special [Alt] key on your keyboard.
Put your pointer on the window you want to move, then press the [Alt] key together with the mouse left-click to grab and move your window.
Windows are automatically open on the screen with a certain size. To close them, we have seen already that we need to click on the close button symbolized by a cross.
To resize a window, you need to move your cursor on the borders of the window or, even better, on one of the bottom corners.
The pointer will then change its usual look:
from to  or
or  depending on its left or right position. When the look of the pointer changes, press the left-button and move the mouse to resize the window like you want.
An alternative solution consists in using the special [Alt] key on your keyboard. Move the pointer inside the window, then press together the [Alt] key and the right-button of the mouse. Then you will be able to resize the window.
To maximize the window, double-click (click twice quickly with the mouse left-button) on the title-bar (when using the GNOME environment) or use the maximize button located next to the close button, if present (and it is the case on most of the desktops).
To avoid overloading your workspace, the Debian GNU/Linux environments support, since several years, the virtual desktop concept: the elements displayed on your screen lay upon a “desktop”. You can have several of them, which means that if you move to another “desktop”, it will be empty at first. If you return back to the previous desktop, you will find it in the same state as when you left it (with your open applications on screen).
… “Several desktops” … What do you mean exactly ??
Well, it’s like having several screens for your computer, lined up behind each other, with the capability to change their order at will.
You open the Internet navigator full screen on the first virtual desktop, then you feel like having a look at your latest family pictures. So you go to the next desktop which happens to be empty, and you can then display there your pictures also in full screen mode, and return back to the first desktop and enjoy the full real estate for the comfort of your navigation.
It is also a nice mean to get organized with your tasks: the first desktop is reserved for the Internet applications, the second for the multimedia, the third for the office work and so on, allowing you to leave open your work in progress, for future modifications, without impacting the other activities.
Each environment has its own way to represent the virtual desktops:

All your data, your videos, your documents, your pictures, are regarded by Debian GNU/Linux as files, and these files are organized into folders.
Debian is an operating system (the big piece of software making your computer functional) which organizes the data according to their respective addresses, that is the path to follow, in order to access them, from the top level starting point (the system root identified by the “/” symbol).
… the picture of grandma is a “file” having an “address” relative to a “root” ???
Imagine your computer is like your house. If your favorite book is located in a certain place, this “place” is like an address relative to the “house”. For example, if the book is stored in the second drawer of your nightstand, one can define its address (the path to follow in order to reach it) like this: home,bedroom,nightstand,2nd drawer,favorite book.
To separate the various “items” we use the “/” symbol, which gives the following address in computer language: /home/bedroom/nightstand/2nd drawer/favorite book.
The “root” of the system is symbolized by a simple “/”. The main folder containing all the users data is symbolized by “/home/”, and your personal folder is named “/home/alice/”.
If we come back to the favorite book example, its address could be:
“/home/alice/Documents/books/my_favorite_book.pdf”
Your personal data are stored within your personal folder, whose address is “/home/your_user_name”. They are organized within folders to ease the finding and consulting of the various files, by yourself or by some programs (it is very logical for a photo viewer to look first at the “Pictures” folder).
Some items within your personal folder, relate to your interface configuration, the various fonts you are using, your passwords stored in Firefox, etc.
This type of data does not need to be always displayed on the screen when you consult your photos or documents: this is why these items are usually hidden.
They are identified by the form “/home/your_user_name/.hidden_file”. Please note the “.” (dot) symbol in front of the file name.
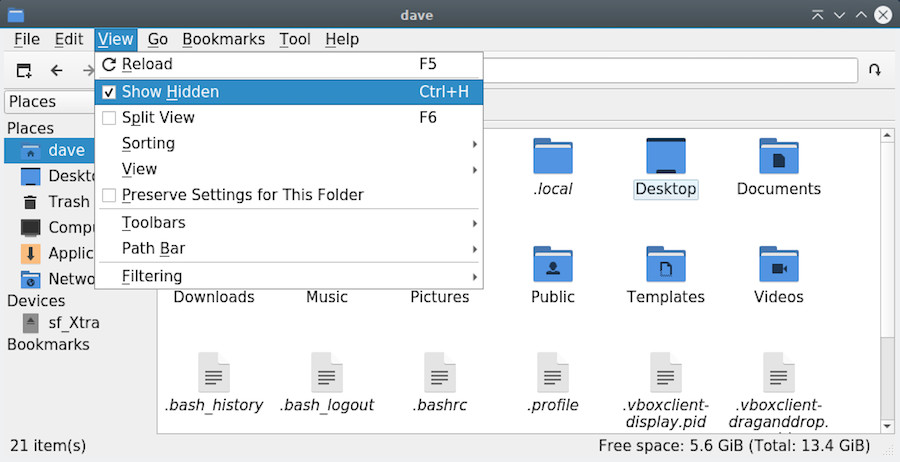
When you want to unveil them, press together [Ctrl]+‘h’ (h obviously for “hidden”), or from the menu of your file manager window goto “View” > “Show Hidden Files”:
Debian GNU/Linux includes a collection of programs to navigate on the Internet, or inside your personal folder, or among all your photo albums, etc. These programs are stored inside “system folders”.
These folders are write-protected and some are also read-protected: this means that you can consult some of them, but you may not modify any of them, as being a simple user.
In order to modify these items, you need to use the system administrator account: “root” (chap.3.8.3).

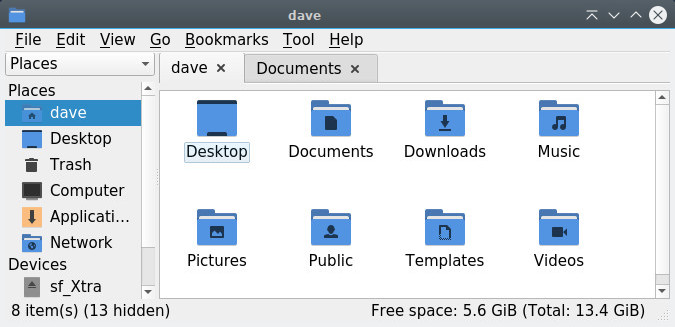
Thunar is the file manager by default with the Xfce desktop. This program lets you navigate through your various folders, “Pictures”, “Documents”, etc. by using the mouse (double-click on a folder to look into its content) or the keyboard (navigate among the folders with the arrows keys, and press [Enter] to open the selected one).The role of a file manager is to display on screen the content of these folders: your personal data. Thunar is accessible from the Xfce application menu in the task bar, under the name “file manager”.
Each GNU/Linux desktop environment has its dedicated file manager (otherwise it’s not funny) that has a slightly different interface than Thunar. However, they all support the same functions of consultation, search and modification of the data.
When Thunar displays your personal folder, a number of information and tools are already available:
Thunar will let you consult your data, sort them, and modify them.
Note that other file managers have a different look and feel (GTK3), like placing the application menu directly in the title bar like Gnome for example (chap.4.2.1).
Consulting your data is very easy. Launch Thunar which, by default, opens your personal folder. You can then decide to open another specific folder depending on the type of data you are looking for.
To open or explore a folder, put the mouse pointer over it: a double-click with the left button will open this folder in the same window. A middle-click will open the folder in a new window tab.
You can also click on the shortcuts located in the left side pane of the Thunar window.
To open a file, put the mouse pointer over it: a double-click with the left button will open this file with the application assigned to it by default. A right-click will display a contextual menu which, among other things, allows you to open the file with another application of your choice.
To select several items move the mouse cursor in an empty area of the window, left-click,hold and simply move over all the items that you want selected. Then release the button.
After this, you can remove one or several items from the selection using the shortcut [Ctrl]+left-click on each of them.
More details in the simplified initiation (chap.2.2.4.2).
Once selected, you can apply some modifications to these items as detailed in the “Modifications” chapter below.
You are going to say:
I can do whatever I want with my own data
… and you are damn right !
However some applications will access your data more easily if they are stored in their specific folders. Thus, the screen capture program will record its shots in the “Pictures” folder, the Internet navigator will store your downloaded files in the “Downloads” folder, the music player will look into the “Music” folder … And so on.
Thunar allows you to create shortcuts to ease the access, the classification and thus the retrieving of your data.
To create a shortcut, just “drag and drop” the desired folder in the side pane. This folder will then be always accessible with a simple click.
A contextual menu shows up when right-clicking on an item (I.E. either a folder or a file), and then, let you make a number of actions/modifications on this selected item.
Note that if you selected several items, modifications will then be applied to the whole selection.
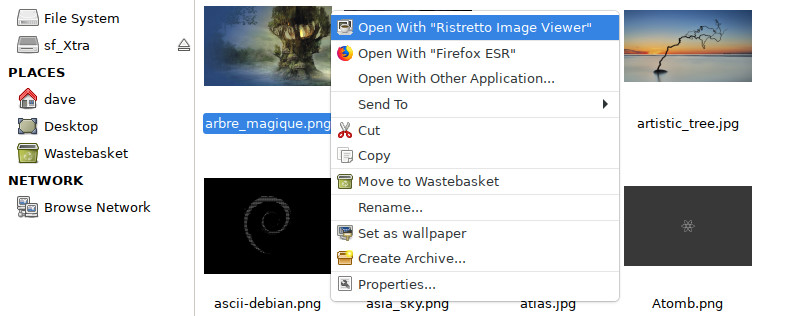
In our example the contextual menu proposes the following actions:
The famous “Trash bin” (or “Wastebasket”) is reachable directly from the side pane of the Thunar window. The “full bin” icon indicates that some items are currently in the wastebasket.
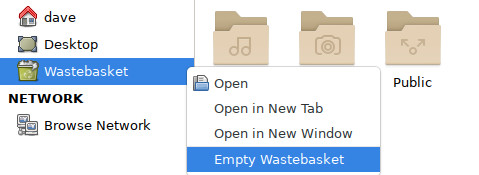
To empty the Wastebasket and remove definitively all the items in there, left-click on its proper icon and select the “Empty Wastebasket” action. You can also use the “File” menu and then click on “Empty Wastebasket”.
Sometimes the context menu has the “Delete” entry. Be careful because this menu entry will not move your files to the recycle bin: they will be deleted immediately and definitively.
Debian is a multi-user GNU/Linux system. It is therefore necessary to put in place a mechanism to protect the items belonging to each user, so that user alice could not modify the “tax & due” list of user arp, for example.
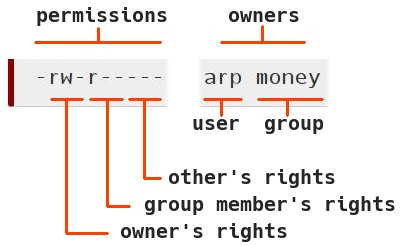
To achieve this goal, each file and each folder belongs to one owner and to one users group.
For each item, one can give Read, Write and eXecute rights distinctly to its owner, its group or all the others (I.E. persons which are neither the owner nor a member of the proprietary group).
To display these information, one can use the “ls” (list directory content) command, with the option “-l”, within a terminal window (that you will discover in the next chapter):
ls -l
-rw-r----- 1 arp money  1794 Nov 20 14:46 tax-and-due.txt
Here, one can see that the user arp has the “read” and “write” rights, on the file ‘tax-and-due.txt’, while the members of the money group (which user alice is part of) can only “read” this file, but not modify it, and the others cannot even open it (“-”, means no right).
The file managers integrated in the various Debian desktops let you also display and/or modify the rights and permissions of your system folders and files “with the mouse only”. To do so, you need to open the contextual menu with a right-click on the file/folder you are interested in, and click on “Properties”. In the new window which opens, click on the “Permissions” tab:
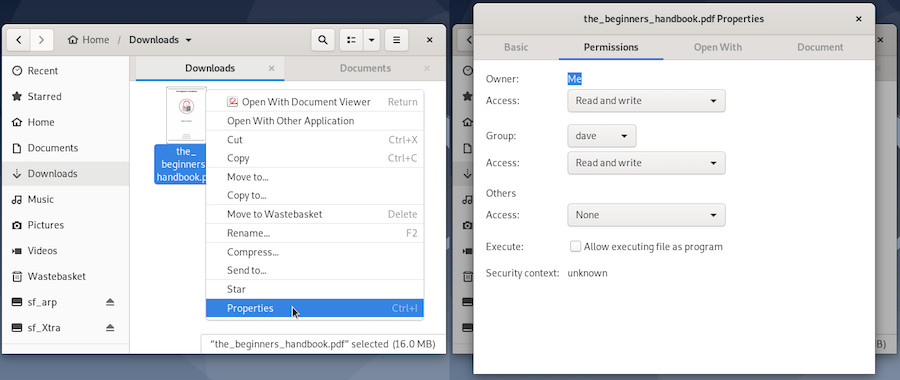
In this example, the file belongs to “Me” (dave), who has the Read and Write access, like my group “dave”, while the other users have no access at all.

When you launch an application from the menu, or when you move a file from a folder to another by using your mouse, you send instructions to your computer in graphical mode.
These instructions can also be sent directly, without going trough a menu or launching an application, thanks to the Terminal which gives you access to the command line. This tool is more powerful than the graphical interface because it let you use all the options available in your application. It is also your last resort when the graphical session is gone.
The only concern is that this little black box, full of strange signs, is somewhat frightening … But we are going to demystify all this and show you that the terminal can become your new friend .
In case of doubts, don’t hesitate to ask your questions in the support and help forums (chap.1.2).

Never run terminal tests in administrator mode !! : some very useful commands like “rm” (remove) allow you to bypass the “wastebasket” principle, but could be devastating on the entire system when you are running them in administrator mode.
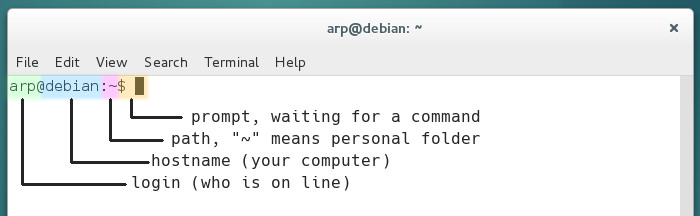
Let’s simply start with what you see written in this terminal window:
The configuration of the full prompt string resides in the ‘~/.bashrc’ (hidden file in your personal folder) “bash” interpreter configuration file. The bash program is handling the commands entered in the terminal (to make a long story short); it enables you to send commands, typed in the terminal, to the computer system in order to give it various instructions or obtain some information back. Please note that you can also customize the Terminal display with the menu “Edit > Preference”.
To tame the beast, we are going to start with a simple “cd” (standing for “change directory”), which let you walk through the file system.
When you open a Terminal, you are located by default in the personal folder of the user logged-in (here it is the /home/arp/ $Home folder). This folder includes the sub-folders Pictures, Downloads, etc.
To go down into the ‘Pictures’ sub-folder, I type in the words “cd Pictures” - without the quotes - (and the uppercase is of importance here, hence the necessity to clearly identify the item names one is looking at…) then I press [Enter] to send the command. To reach this ‘Pictures’ folder from anywhere in the file system, you would need to provide its full path ‘/home/arp/Pictures’ (replace ‘arp’ by your user name):

You can see here that, within the command prompt prefix, the path “~” has been changed to “~/Pictures”, because you changed the folder you were in, and this is exactly like opening a folder by using your graphical file manager.
However, when you open a folder with the file manager, you “see” all the items in there. Within a terminal you need to list the items with the “ls” command:

… easy, isn’t it ? See, you did not break anything. Yes, but you are going to tell me that this stuff is rather useless…
OK, lets move on to cooler commands:
‘uname -r’ gives the version of the active Linux kernel.

‘uptime’ gives the elapsed time, since the system is up and running, how many users are currently logged in, the system load average for the past 1, 5, 15 minutes, in order to see if the process waiting list is not too long. If the load is over 1 (for old computers) or 2 (for dual-cores and +) this means that one process is running while another one is waiting.

You want to return back in your personal folder ? Just a small and simple ‘cd’ and you are @home.

Your screen is a bit crowded ? A small ‘clear’ will empty the console.

On a GNU/Linux system, an administrator is a user who has the right to manage the system, install or remove applications and modify “normal” user accounts (among other tasks). You can get administrator rights via the “root” account or substitute yourself to it thanks to “sudo”.
If the Debian installation was done by creating both “root” superuser and “normal” user account (for a regular system usage), to place an order in administrator mode when the session was opened as a “normal” user, Debian uses the “su -” command. You are then asked to enter the superuser password, nothing is displayed on the screen when typing the password in, this is normal.
Example: Debian system opened by the “normal” user: “user”
user@debian-pc:~$ su -
Password:
root@debian-pc:~# apt update
You note that the “$” sign (the command prompt delimiter), as been replaced by the “#” sign, indicating that you are now using the “root” administrator account.
Once connected as “root” in the terminal session, you can launch system administration commands, for example here, a package repository update within a Gnome terminal, using the command “apt update”.
If the Debian installation was done with the superuser account disabled (the root password was left empty during the installation process), the “normal” user is able to gain the superuser privilege by using the “sudo” command. When using sudo you will be asked to enter your own password.
Looking for update example:
user@debian-pc:~$ sudo apt update
[sudo] Password for user :
Get :1 http://security.debian.org/debian-security buster/updates InRelease [65,4 kB]
Hit : 2 http://deb.debian.org/debian buster InRelease
Get :3 http://deb.debian.org/debian buster-updates InRelease [49,3 kB]
Hit :4 http://security.debian.org/debian-security buster/updates/main amd64 Packages [185 kB]
Get :5 http://security.debian.org/debian-security buster/updates/main Translation-en [98,9 kB]
Fetched 399 kB in 4s (97,0 kB/s)
Reading package lists... Done
Building dependency tree
Reading state information... Done
3 packages can be upgraded. Run 'apt list --upgradable' to see them.
Look again at this package list update example, that is the retrieval of the latest information concerning packages and potential updates. After the completion of this package list update (verifying the repositories), we launch “sudo apt upgrade” to execute the available updates for the software you have installed. This is what you will see in your terminal window :
user@debian-pc:~$ sudo apt upgrade
Reading package lists... Done
Building dependency tree
Reading state information... Done
Calculating upgrade... Done
The following packages will be upgraded:
  bluetooth bluez libicu63
  3 upgraded, 0 newly installed, 0 to remove and 0 not upgraded.
  Need to get 9 374 kB of archives.
  After this operation, 3 072 B of disk space will be freed.
Do you want to continue? [Y/n] Y
Please note the “Y” character to accept the update.
On Gnu/Linux, when a process must modify the system, it usually asks you for a confirmation. Here the terminal informs you about the various types of expected changes and wait for your agreement, either by simply pressing [Enter] if you accept the default option (here “Yes”) or by typing “y” to accept or “n” to decline.
Let’s continue the download of the packages from the Debian servers:
Get :1 http://security.debian.org/debian-securit.....
Get :2 http://security.debian.org/debian-securit.....
Get :3 http://security.debian.org/debian-securit.....
Fetched 9 374 kB in 1min 1s (154 kB/s)
Extracting templates from packages: 100%
Preconfiguring packages ...
(Reading database ... 123419 files and directories currently installed.)
Preparing to unpack .../bluez_5.50-1.2~deb10u1_amd64.deb ...
Unpacking bluez (5.50-1.2~deb10u1) on (5.50-1) ...
Preparing to unpack .../bluetooth_5.50-1.2~deb10u1_all.deb ...
Unpacking bluetooth (5.50-1.2~deb10u1) on (5.50-1) ...
Preparing to unpack .../libicu63_63.1-6+deb10u1_amd64.deb ...
Unpacking libicu63:amd64 (63.1-6+deb10u1) on (63.1-6) ...
Setting up libicu63:amd64 (63.1-6+deb10u1) ...
Setting up bluez (5.50-1.2~deb10u1) ...
Installing new version of config file /etc/bluetooth/input.conf ...
Setting up bluetooth (5.50-1.2~deb10u1)
Processing triggers for systemd (241-7~deb10u3)
Processing triggers for man-db (2.8.5-2)
Processing triggers for dbus (1.12.16-1)
Processing triggers for libc-bin (2.28-10)
user@debian-pc:~$
If you accept the changes, you will see the complete process of downloading, configuring and installing the concerned packages. Then the terminal will “give the control back to you” by displaying the command prompt, “user@debian-pc:~$”
That’s it, you just updated your system using the terminal!
You must be extremely strict when you send commands in administrator mode. To avoid errors, use the auto-completion feature. This mechanism allows the computer to complete the commands you started typing (3 characters are enough), or their corresponding arguments. This is accomplished by pressing on the [Tab] key. If several choices are possible, they will be proposed to you as well.
A short summary of the GNU/Linux commands is proposed at the end of this manual (chap.11).
 Pick your Debian
Debian is an operating system offered in several flavors, and you will need to make a choice depending on your tastes, your needs and your hardware.
There are a lot of Debian derivatives out there, more or less stable and/or supported (Linux Mint Debian Edition, AntiX, MXLinux, etc…) . This manual and the indications in there can be used for all the Debian Stable “Buster” derivatives.
The GNU/Linux distributions are not all supported by a community the same way Debian is. Sometime, a single person handle the entire distribution. The different distributions do not provide the same level of documentation and support. They also do not offer the same durability. Choosing a “mother” distribution like Debian insures you to receive stable and regular updates.
If you want to test other distributions based on Debian, we suggest you consult the Debian derivatives official page (https://wiki.debian.org/Derivatives/CensusFull).
If you want to consult a more comprehensive list, visit Distrowatch.com which enumerates almost all the available active distributions.
Because no, life is not just about “Debian”
Other projects develop systems for beginners in the GNU/Linux world. If you want to try another system, let’s take a look at the GNU/Linux distributions dedicated chapter in the Software Directory (chap.12.3).
Let’s go ! The rest of this manual will help you to:
The processor, which is the compute and control unit of your computer, functions under a specific type of architecture, that is it handles data according to its own type (32 or 64 bits, PowerPC …).
We encourage you to use an ISO image of type “netinst” (chap.5.2.1.1), which gives you access to the most up-to-date software versions by downloading directly the applications during the installation process (you need an active and stable Internet connection during the install). This version will let you install the desktop of your choice.
You can also use an ISO image already including a ready-to-use environment (Gnome, KDE, Xfce …).
But you must choose an ISO corresponding to your processor architecture. In other words, decide between a 32-bit or a 64-bit version, or again between an i386 or an amd64 version.
Note that the “32-bit” version will run on a “64-bit” computer, but not vice-versa.
Using a GNU/Linux distribution in an autonomous “live” session (chap.5.3.1), open a terminal, and in order to find out the 32 or 64 bits compatibility, type the following command:
lscpu | grep -i "mode(s)"which returns the explicit result, here an example when using an ‘amd64’ processor:
CPU op-mode(s): 32-bit, 64-bitUsing a Windows® system, your processor model is displayed in the “General” tab of the menu Start Button > Configuration Panel > System. It is then necessary to carry out a research on Internet to check if this processor is compatible with a 64-bit system (for example, the indication under Windows Vista with the heading “Type of system: 32-bit”, does not mean that the processor is not also compatible with a 64-bit system).
Debian let you adopt one or several desktop environments directly from the installer interface: Gnome, KDE, Mate, Cinnamon, Xfce, LXDE and LXQt.
… But why several Gnu/Linux “desktops” ?
The computer is only a tool, and even if we ask you sometime to learn a couple of tricks to make an effective use of it, it is still your tool, and as such it must be highly adaptable to your taste, your working habit, and to your own way to have fun.
With this perspective, each desktop has its own organization, its setting method, its various functionalities. And it is not a superfluous diversity, designed by the brain mazes of some bearded geeks (although…), but rather a strength of the free software: knowing how to propose rather than to impose!
Hereafter the description of the main characteristics of this various environments, to help you decide which one to use. And then you will be able to add more of them, according to your needs and preferences.
The two main desktops are Gnome and KDE, but they are also the more “resource-hungry” solutions, so don’t hesitate to test other environments.
– Integrated applications –
Each desktop environment is designed to offer a minimal functionality for the personal usage of your computer.
So, within all the desktops presented here, you will find the Firefox Internet browser (chap.6.6), a file system manager, a text editor, the LibreOffice suite (chap.6.9), a multimedia player (except on MATE DE, but it’s easy to add one) and an access to a software library in order to maintain, update or make changes in your installation.
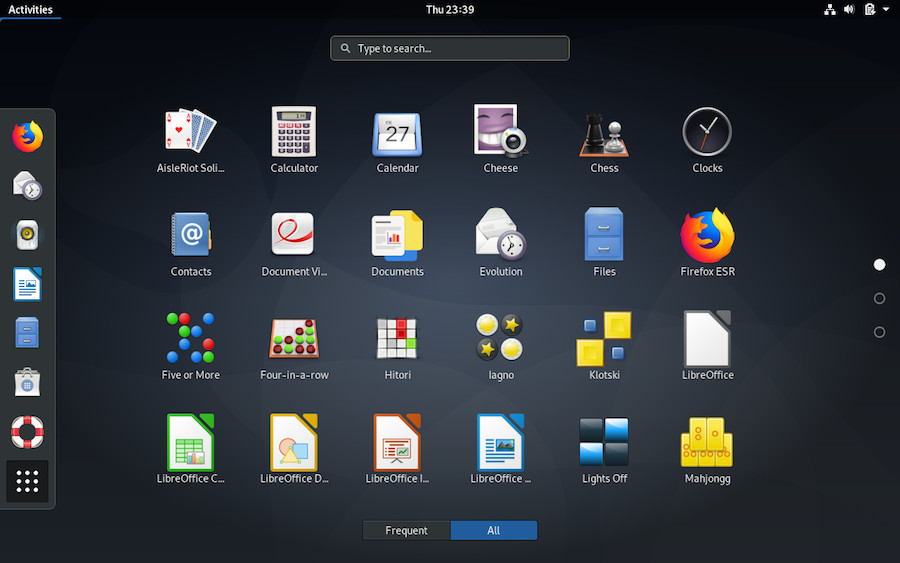
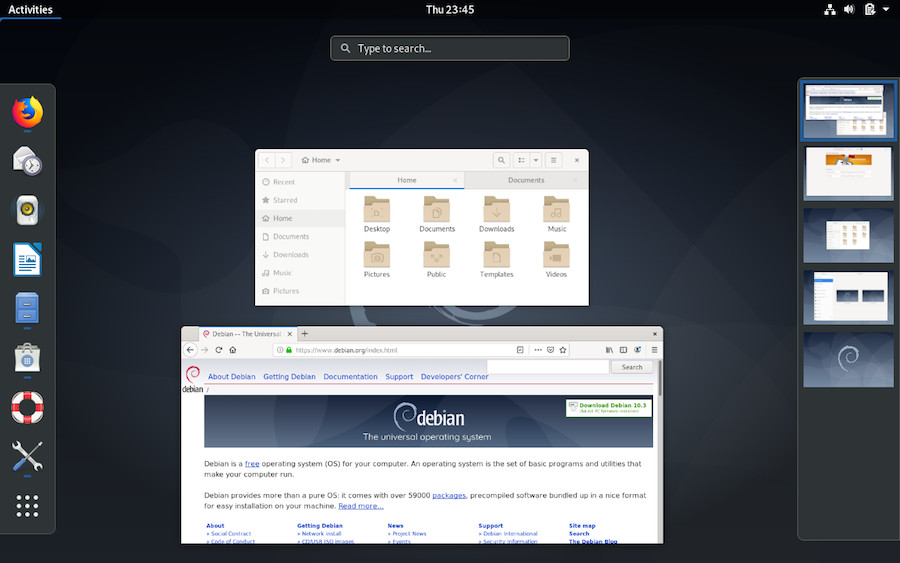
The Gnome-Shell interface is the default desktop for Debian 10 “Buster” and offers:
The Activities Overview, which is a separate view designed to enable users to get an overview of their current activities and to enable effective focus switching. It can be accessed via the activities button at the left of the top bar or by pressing the “Win” key of the keyboard. This view includes:
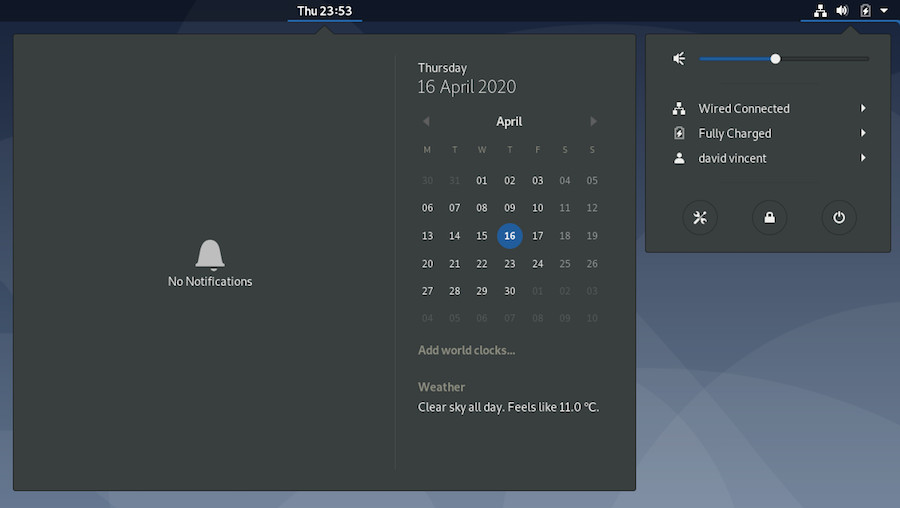
The Time manager, at the center of the top bar, has an on click calendar, linked to the mail client, calendar and contacts.
A system settings manager at the top right, giving access to the different parameters regarding the screen brightness, the sound, the network, the session, and some other system settings.
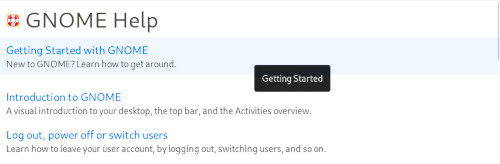
Gnome includes a general detailed help mechanism, that you can access via the dock, by default, and this should reassure all the beginners, and make them a lot more comfortable:
Main applications:
Minimum user level: complete novice / beginner
Gnome project home page: https://www.gnome.org/
More details in the dedicated section of this manual (chap.7.1.1).
KDE is a project delivering a graphical environment (called “Plasma”) and a full set of applications. KDE is highly configurable, both in terms of desktop environment and supported applications. KDE has so many capabilities that some people even find difficult to deal with it. Note that you can use KDE without any particular configuration tuning. It can be fully functional with its “out-of-the-box” settings.
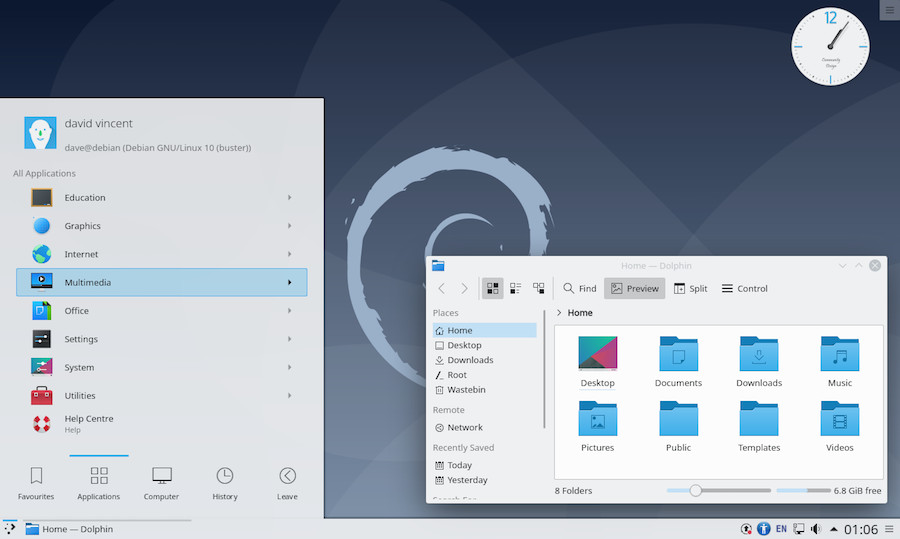
The KDE environment is visually close to Windows®, and offers:
More than any other GNU/Linux desktop, you can transform KDE according to your needs and desires.
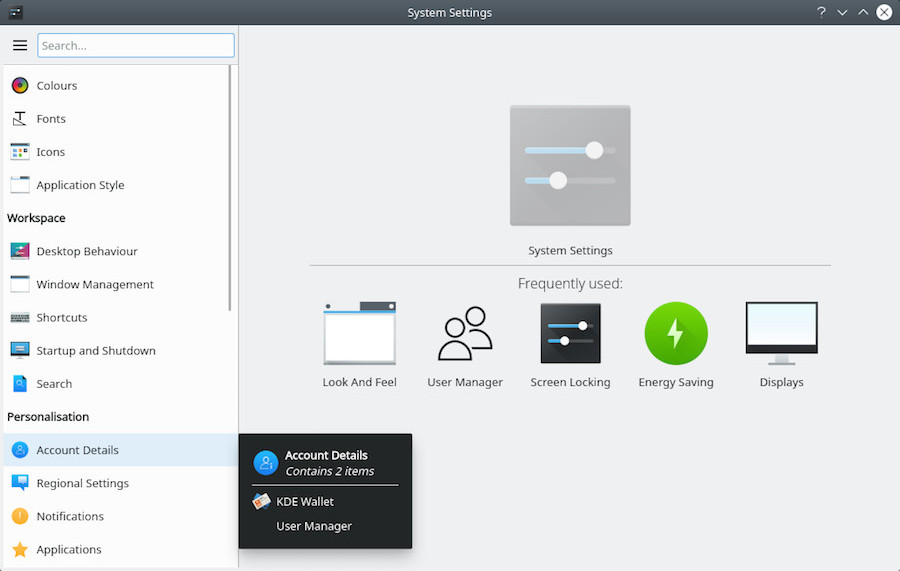
KDE is a very complete environment and has a configuration center, as well as a built-in help center.
To launch the control center, navigate to the main menu > Applications > Configuration > System Settings.
If you cannot find an application, you can enter its name or function in the search box of the main menu.
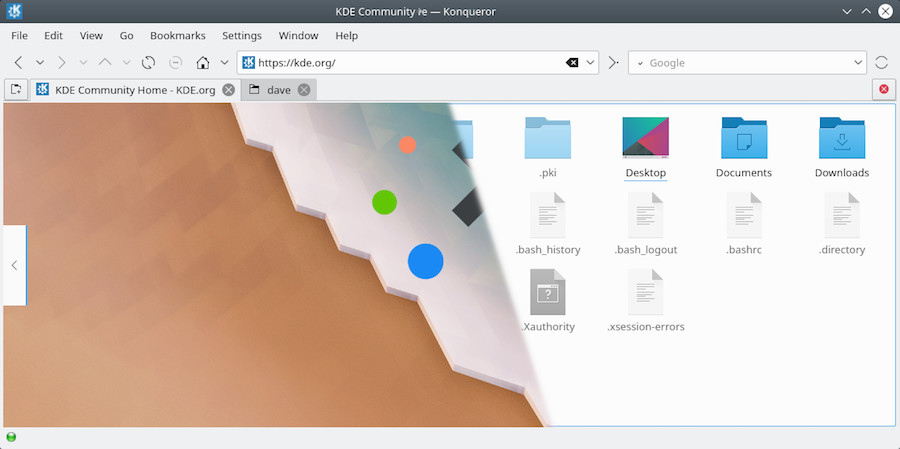
KDE uses Konqueror, a file manager that is also able to surf the Web… No need to open several applications to consult, view, classify, etc. Here after, a split view of Konqueror in action:
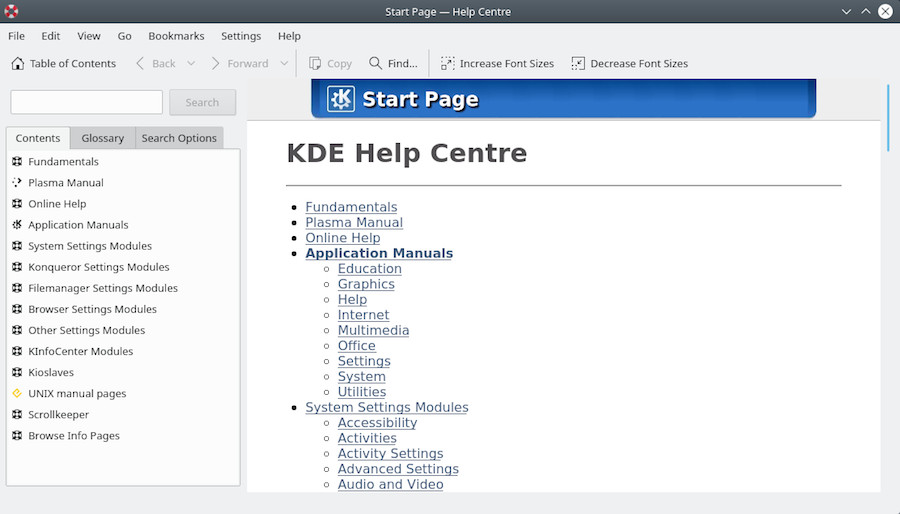
KDE, like Gnome, integrates a very comprehensive help center directly available from the main menu > Applications > Help Centre. So even if KDE is full of widgets, panels, activities… you’ll find your way around.

Main applications:
Minimum user level: beginner / experienced
KDE project home page: https://www.kde.org/
An introduction to KDE: https://userbase.kde.org/An_introduction_to_KDE
More detailed information in the dedicated section of this manual (chap.7.1.2).
MATE is a fork of GNOME 2. This means that this desktop environment was started from a copy of GNOME 2 and then modified independently.
This is the perfect environment for people who do not want to change all the work habits they acquired when using GNOME 2. This is also a good system for the computer aided music and the resource-intensive applications going with.
Mate aims to be lighter than GNOME 3, and as such, is more suitable for aging or resource limited computers. It’s clearly a good compromise between GNOME 3 and Xfce 4.
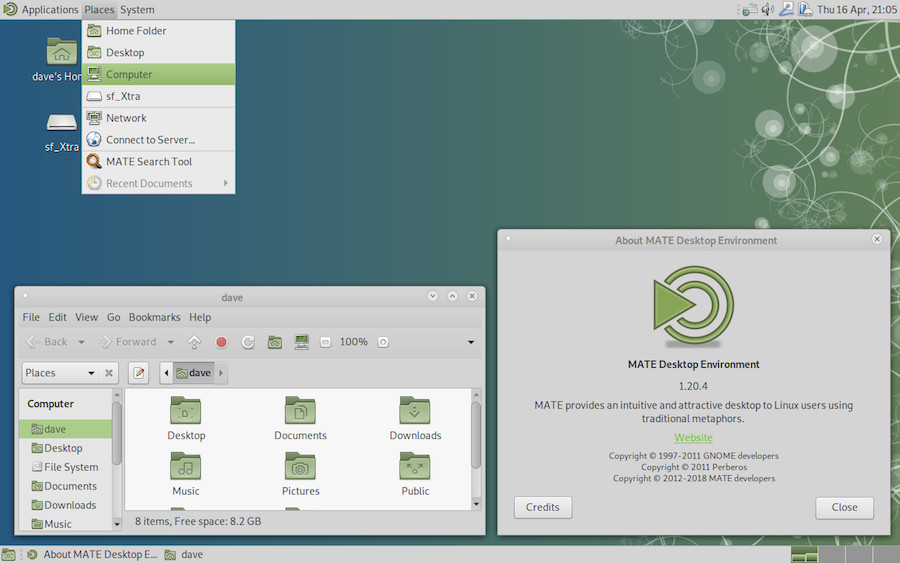
Mate offers a “traditional” interface with its two task bars:
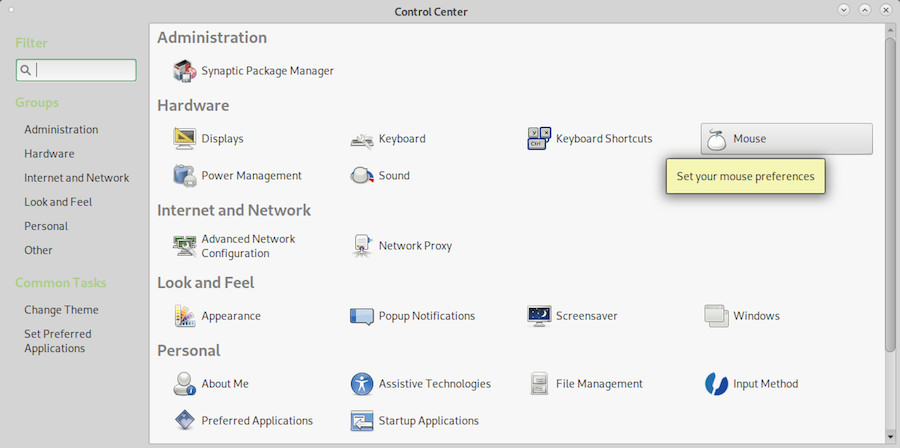
To configure Mate you open the control center (“system” menu > Control Center) and you have access to the various components of this interface:
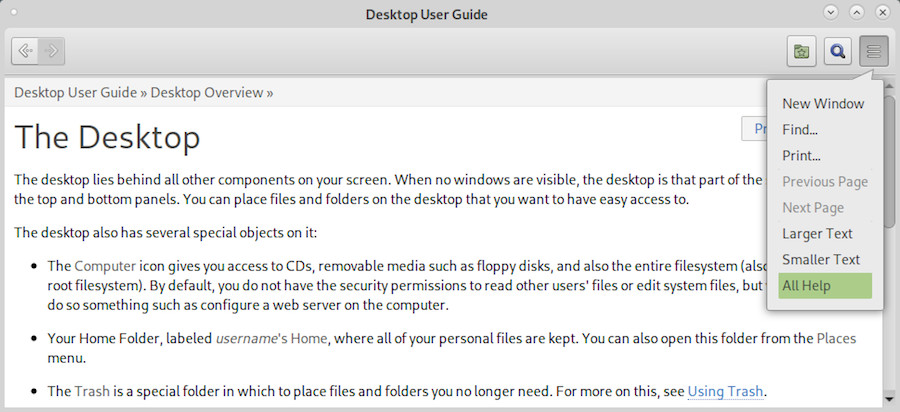
Mate is a minimal environment which ships with few applications by default. You would be able to pick your favorite tools later on. However, Mate embeds its own file system manager, Caja, which is a fork of Nautilus (Gnome file manager), as well as a rather well designed Help Center.
Minimum user level: complete novice / beginner
Mate project home page: http://mate-desktop.com
More details on the Mate Debian wiki: https://wiki.debian.org/Mate
Cinnamon is a desktop environment derived from the Gnome-Shell project. It moved away from the all-in-one interface of this latter, to adopt a more traditional interface (dash board along with a menu where Icons are sorted by categories).
Cinnamon is developed by the Linux Mint team (https://linuxmint.com/), and is one of the leading desktop environments of this specific GNU/Linux distribution.
Cinnamon uses the Nemo file system manager, a fork from Nautilus, which reinstates some functionalities removed by the latter: compact view, open in a terminal, open as root, capability to manually edit the absolute file path, etc.
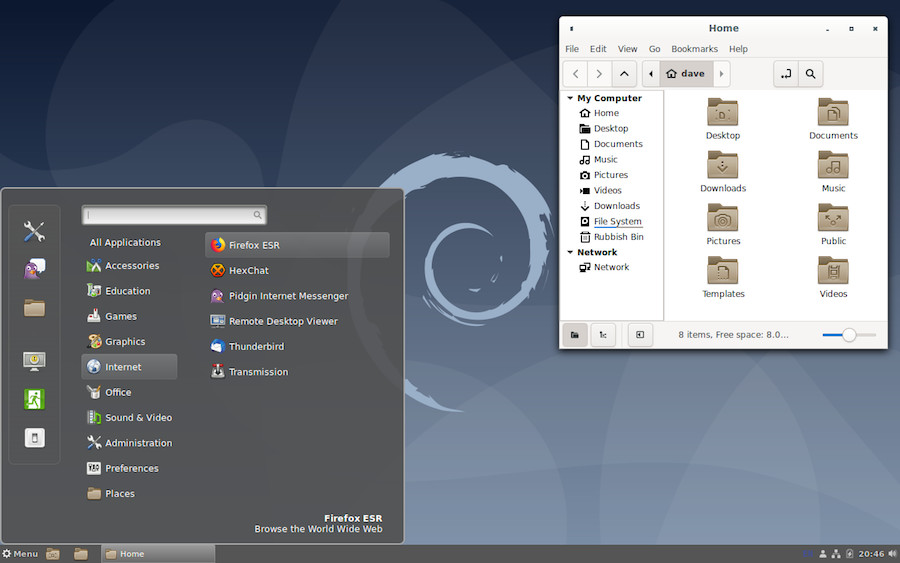
Cinnamon offers a complete desktop with all the helpful (or not) applications for your daily usage: in the screen capture above, you can see the graphical applications, and under the Internet category, for example, you will find the Firefox navigator (chap.6.6), the email client Thunderbird (chap.6.4.1), the multi-protocol chat client Pidgin, the BitTorrent Transmission client and a remote desktop access software.
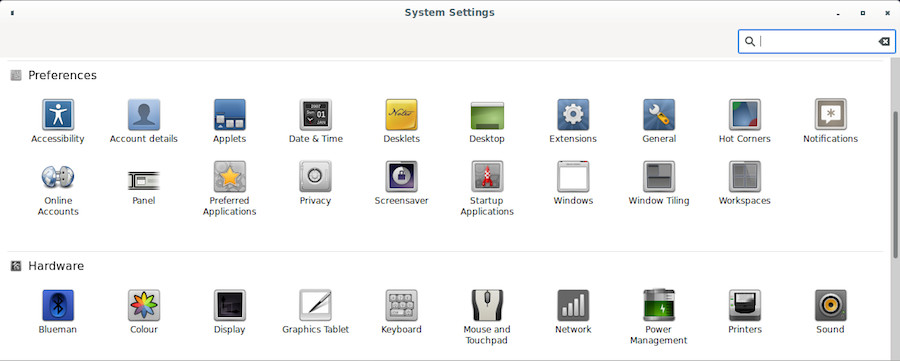
The Cinnamon configuration is delegated to the system settings pannel which centralized all the system and user settings:
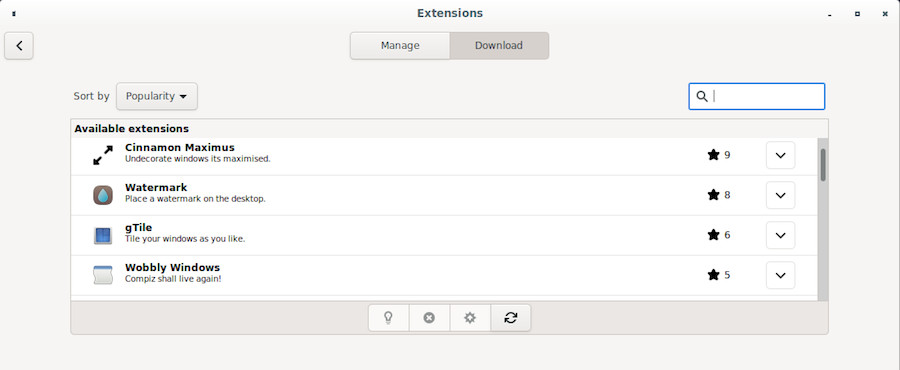
Cinnamon is a Gnome-Shell derivative and supports extensions which let you decorate your environment with little gadgets.
Main applications:
Minimum user level: complete novice / beginner
Cinnamon project home page: https://github.com/linuxmint/Cinnamon
More detailed information on the CinnamonTeam: https://wiki.debian.org/CinnamonTeam
Xfce is a lightweight desktop environment for Unix type operating systems. Its goals are to be fast, little greedy in machine resources, but visually attractive and user friendly. It is expandable, thanks to numerous available plug-ins, and embeds a volume control application (xfce4-mixer), its own window manager supporting transparency, shades … (xfwm4), an integrated archive manager (thunar-archive-plugin), and disk, battery network, processor and memory monitoring tools, as well as various themes and miscellaneous plug-ins.
This interface is clear and traditional: you won’t be surprised during your first encounter with it.
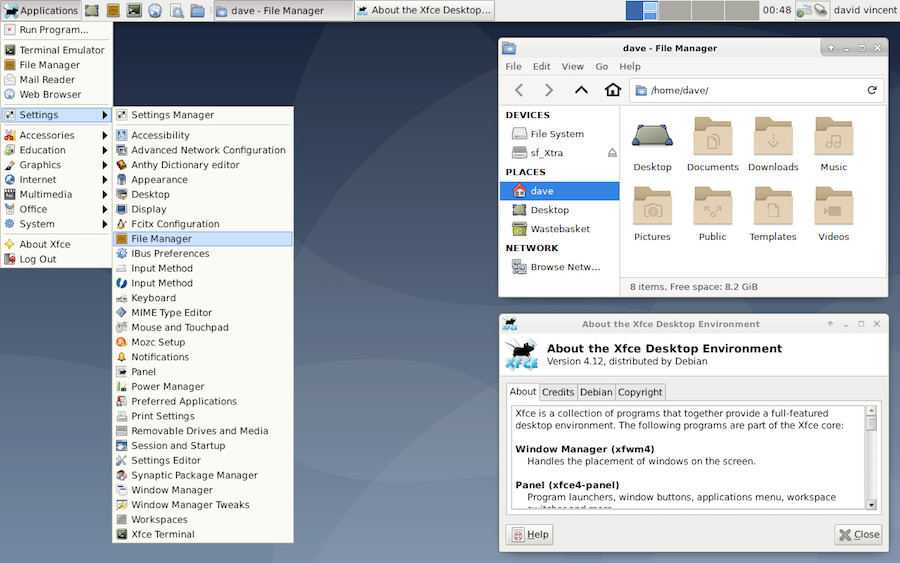
Xfce has the significant advantage of being fully modular, because it is released with different independent plug-ins. Xfce also allows the integration of applications coming from other environments, and is able to launch, during the system start-up, the Gnome and/or KDE services by default.
It is a perfect environment for beginners, offering a great stability, a complete graphical handling (“with the mouse only”), and evolution capabilities with no real limit.
Like the other previously seen environments, Xfce centralizes its configuration settings to ease the customization. Note that each elements can also be configured from its specific interface (like a right-click on the panel to add a new launcher, for example).
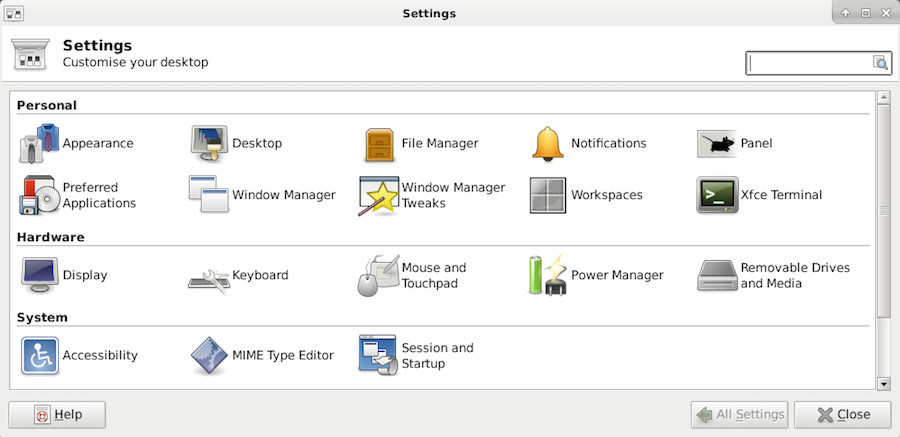
Main applications:
Minimum user level: complete novice / beginner
Xfce project home page: http://www.xfce.org/
More detailed information on the Xfce Debian wiki: https://wiki.debian.org/Xfce.
Xfce has been chosen by Emmabuntüs (https://emmabuntus.org) as default desktop environment. More details in the chapter 12.3.2.
LXDE is a free desktop environment for Unix like systems, and other systems which are compliant to the POSIX standard, like Linux or BSD (Berkeley Software Distribution). The LXDE name is the acronym for “Lightweight X11 Desktop Environment”.
And as its name implies, the goal of this project is to propose a fast and lightweight desktop environment.
As opposed to other desktop environments, the various components are not tightly linked together. Instead they are rather independents and each of them can be used without the others, with very few dependencies (packages used during the installation).
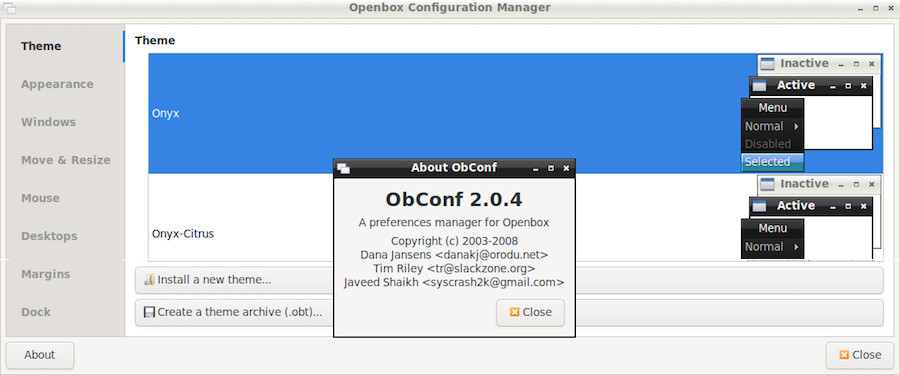
LXDE uses by default Openbox (https://wiki.debian.org/Openbox) as window manager:
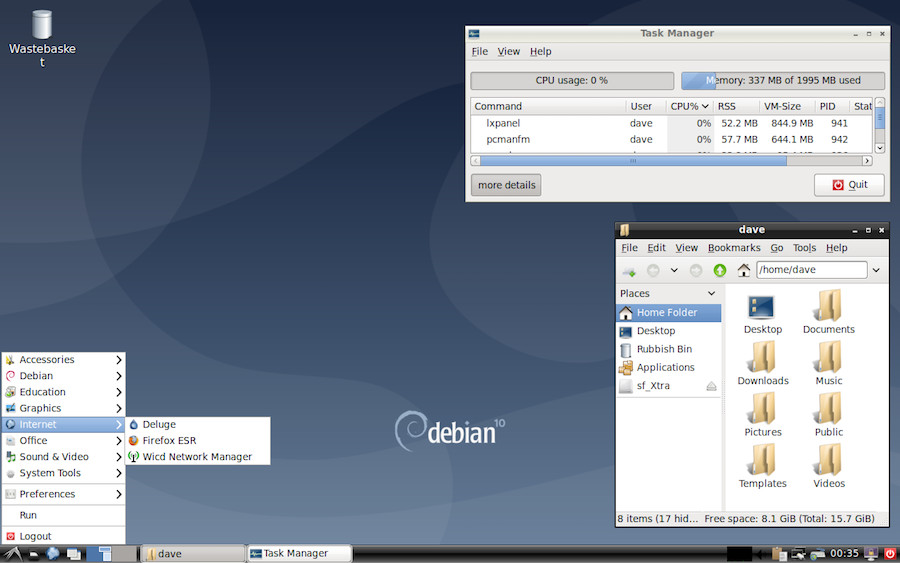
The LXDE design model implies that the configuration of each element needs to go through an interface designed for this specific application. You will not find a “Control Center” akin to the Gnome one, but rather a suite of lightweight tools to customize your environment.
LXDE is notably light, making it an ideal solution for small hardware configurations and computers refurbishing, but it requires a little more time to learn and use its different elements.

Note that each element being configured, displays its setting modifications on the fly, which makes the customization very easy.
Main applications:
Minimum user level: beginner / experienced
LXDE project home page: http://lxde.org
More detailed information on the LXDE official wiki: https://wiki.lxde.org
LXQt is a light desktop environment. It offers a classical but modern and lightweight interface that will let you work without thinking about it. It comes with a series of specific tools to take advantage of your favorite data and applications. It is an ideal environment for old and low performance machines.
LXQt was originally intended to succeed LXDE but the two projects did end up coexisting, giving users even more choices (thanks GNU/Linux). This environment is still in full development but is completely stable for at home usage.
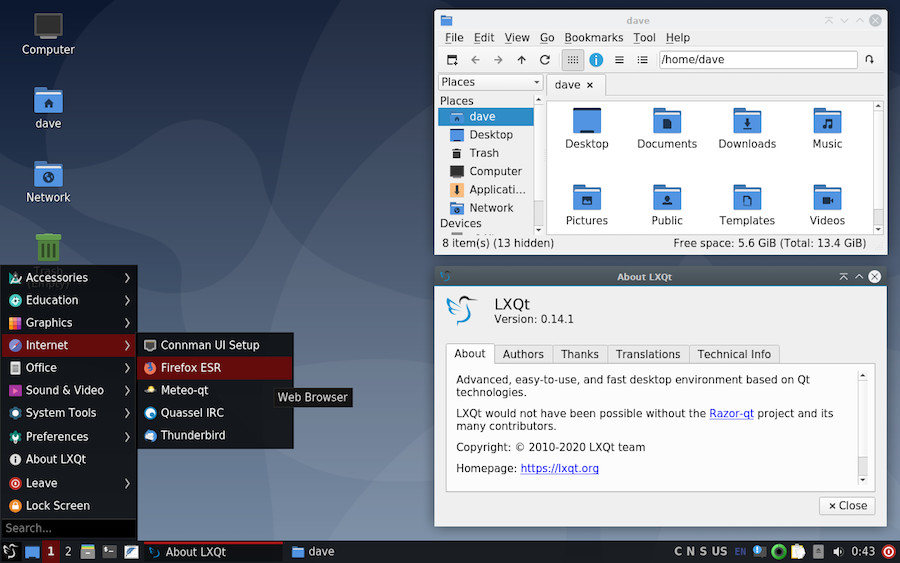
LXQt is the Qt variant (the graphic rendering engine of KDE) of LXDE (which works with Gtk, another graphics rendering engine). You will therefore find certain similarities between these two environments.
Its lightness does not prevent it from having a centralized configuration tool allowing you to access the settings of the main system functions: direction the main menu > Preferences > LXQt Settings> LXQt configuration center.
LXQt is available in the classic Debian installation interface since its version 10 “Buster”.
Main applications:
Minimum user level: beginner / experienced
LXQt homepage: http://lxqt.org/

 Installing Debian
About time to take the plunge …
The following sections describe the classical Single-boot installation: Debian will be the only distribution residing on your hard disk and the install process will be automatic (assisted partitioning, with the whole Debian system in a single partition).
This manual is intended for beginners, and does not cover all the install capabilities of the Debian system. If you are in a particular situation not covered here, look at the on-line Debian installation manual (https://www.debian.org/releases/stable/installmanual).
For installations in a different context (separated /home partition, DualBoot, Logical Volume Management, Encryption, Multi-boot, etc.) you will find the links to the specific documentations in chapter 5.5.
Most of the users never had to install a system previously (computers are usualy delivered with an operating system already installed). And that could be a little freaking … Make the time to be well prepared, take a breath of fresh air, and everything is going to be all right .
One of the first questions when you want to install Debian concerns the hardware compatibility: is Debian going to run smoothly on my computer??
A fast and simple way to check this out, is to type “Debian” followed by your machine type, within your favorite search engine: look for “Debian IBM T60”, for example. In case of doubts, don’t hesitate to ask on a support-and-help forum (chap.1.2).
In order to be really sure, you can use a distribution offering a test capability through a “live” session (chap.5.3.1).
If you anticipate to overwrite your hard disk with Debian, verify first that none of your personal data is in there: everything will be lost.
Remember to back-up your data before you start messing with your existing partitions (chap.9).
A Debian distribution occupies 10 GB in average, but you should still plan for a minimum of 15 GB, to be able to download the updates. For greater safety and if you plan to add few applications, reserve 20 GB and you will be comfortable.
To install Debian from a “net-install” ISO requires some time because the software is downloaded from the Debian servers during the process: the time duration needed for the installation then depends on the speed and quality of your Internet connection and may vary from 40 up to 90 minutes.
To install a derivative from a Debian Live support, takes far less time (around 20 minutes, depending on your computer power), because the packages are already included within the downloaded ISO image. However, a system update will then be necessary after the installation, because the embedded packages are dating back to the time when the ISO image was burned.
If you anticipate to install Debian as the unique operating system on your machine, you don’t have to do anything special: the embedded installer includes the tools needed to prepare (I.E. to format) the disk(s).
If you anticipate to install Debian next to another operating system, take good care in preparing your hard disk (like running a defragmentation of the Windows partition for example). More details in the section dedicated to specific installations (chap.5.5).
Debian ISO images offered for each desktop flavors, in several architecture variations, and supported by various media like netinst, CD, DVD, … are directly available from its website https://www.debian.org/distrib/.
Here after the different ways to obtain a Debian ISO image. If you have other questions, read the Debian FAQ: https://www.debian.org/CD/faq/index.en.html.
If your Internet connection is stable, we encourage you to download an ISO image of type “Netinst” multi-arch which includes everything you need to install Debian on any modern 32 or 64 bits (i386 or amd64) computer, with all the desired options: you will be able to choose your main interface during the installation process.
This is the ISO image used in the installation section of this manual.
To get hold of the “Netinst” ISO image, you can visit this page: https://www.debian.org/CD/netinst/index.en.html. You will find there the torrent links (to share and relieve the load on the main servers) and the direct “HTTP” to the ISO images, depending on your architecture. Below the torrent link to a 64-bit ISO image:

Note that if you absolutely need an ISO image already integrating the specific non-free drivers or firmware for your specific hardware (for a Wi-Fi installation for example), Debian provides you with multi-arch ISOs (installable on 32 or 64 bits architectures): http://cdimage.debian.org/cdimage/unofficial/non-free/cd-including-firmware/current/multi-arch/iso-cd/
To obtain a classic bootable ISO image, pre-configured with a specific desktop, you can look at this page: https://www.debian.org/CD/http-ftp/index.en.html.
This ISO file does not let you test your system, through a “live” session (chap.5.3.1) to check the hardware compatibility with your PC. It only allows you to install Debian on your computer, which is already cool, and let you install directly your preferred desktop, without needing a stable Internet connection at your disposal.
Other images, called “autonomous”, are also available: they let you check your particular environment through a “live” session. They include also an installation launcher on the desktop, which, once your tests are completed, let you install Debian directly from the session you are in. To get hold of a live image, you can visit this page: https://www.debian.org/CD/live/index.en.html.
More details on the dedicated “live” section (chap.5.3.1).
Note that if you absolutely need an ISO image already integrating the non-free drivers or firmware for your specific hardware (for Wi-Fi test for example), Debian makes available to you ISOs of the type Live-non-free: http://cdimage.debian.org/cdimage/unofficial/non-free/cd-including-firmware/current-live/
To relieve the main Debian servers and, at the same time, share your ISO image with other community members, you can use the BitTorent protocol.
To obtain the list of the available “torrents”, you can visit this page: https://www.debian.org/CD/torrent-cd/index.en.html.
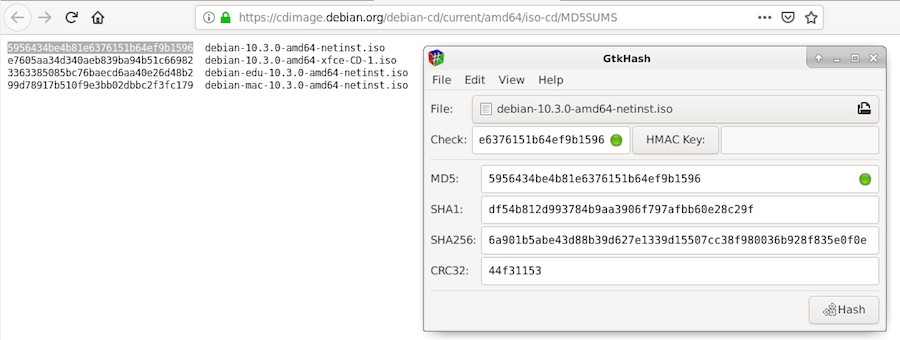
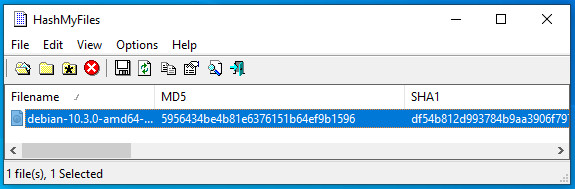
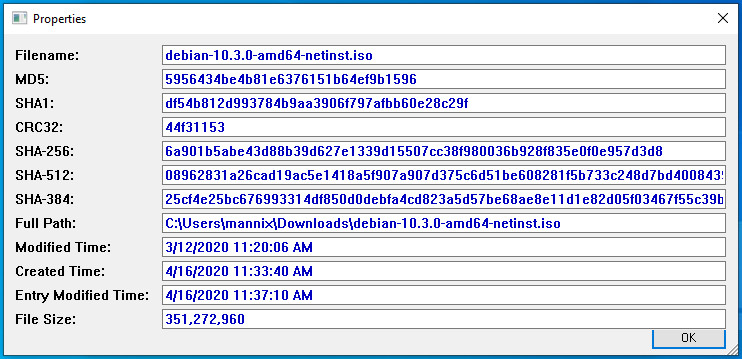
In order to verify the integrity of the transferred image, Debian computes the “md5sum” (short form of “md5 check sum”). This check can be used on all kind of data, but is particularly useful when downloading ISO images.
Note that the md5sums indicated in this manual are only for example purose: remember to check the real md5sum of your file on the download site.
The md5 checking tool is integrated in almost all the GNU/Linux distributions. To verify the md5 checksum of a file, just type the following command in a terminal emulator, including the path of the file to be checked:
user@debian-pc: cd ~/Downloads && md5sum debian-xx-amd64-i386-netinst.isowhich will return a result of the type (to be checked against the md5sum given by the download site.):
6753c353cef5f5336079d94562ad15c3 debian-xx-amd64-i386-netinst.isoVerification in graphic mode (“with the mouse”).
The Gtkhash program let you also check the md5 signature, but with a graphical interface.
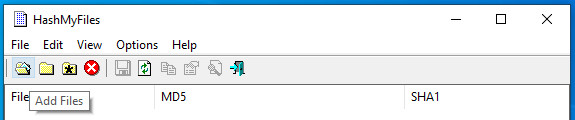
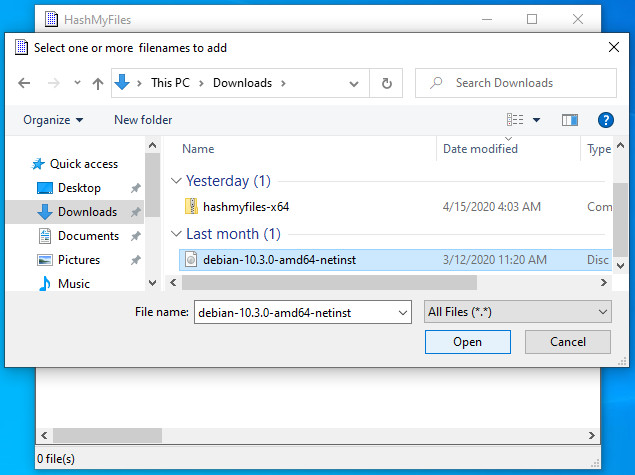
In order to graphically check the md5sum on a Windows® system, you can use the HashMyFiles tool that you can download here: https://www.nirsoft.net/utils/hash_my_files.html. You’ll have to scroll down to find the download links.


To burn your Debian ISO file on a CD/DVD using a computer under GNU/Linux, simply open your favorite burning application, indicate the path of the ‘debian-xx-iso’ downloaded file, and start the media burning.
For the Microsoft® users, read this tutorial made for the Windows®7/8 systems: http://www.digitalcitizen.life/burning-iso-or-img-disk-images-windows-7

The USB key is the most convenient way to install GNU/Linux distributions, because you can change them as often as you want and even test several of them in parallel. The key also secures your tests because once the session is over, no trace is left on the key nor on the computer which booted from it.
Transfer will be done with the terminal, this is the recommended method. However, there is this a graphical tool, Etcher from Balena https://www.balena.io/etcher/
Plug your USB key in and launch a terminal in “root” administrator mode (chap.3.8.3). We are going to identify the USB key to be used, with the command:
blkidwhich returns information of this type:
/dev/sda1: LABEL="system" UUID="3d378712-1b6e-4f66-b9e8-2a6673c62199" TYPE="ext4"
/dev/sda5: UUID="65bdec62-8d0e-49ca-b70b-c99340e4ee5e" TYPE="swap"
/dev/sdb1: UUID="F9B8-E691" TYPE="vfat"
Here, our key is identified as UUID=“F9B8-E691”, is formated in “vfat” and includes the sdb1 partition. Note carefully this sdb1 value, to avoid erasing by mistake a partition on your internal hard disk (here sda1 is another partition on this disk).
The Debian ISO file should be located in the Downloads folder. Let’s move in there to act on this ISO file (the “$Home” variable replaces the address “/home/your_loginID”):
cd $HOME/DownloadsNow, we are going to transfer the ISO content to the USB key, thanks to the “dd” command. Take good care of naming the USB key device “sdb” and not “sdb1” (in our example), because it is the disk device name which is requested, not the partition, and don’t forget to change the xx in the ‘debian-xx.iso’ file by the corresponding real version number.
Within a terminal in “root” administrator mode (chap.3.8.3):
dd if=debian-xx.iso of=/dev/sdb bs=4M status=progress; syncThe transfer duration on the USB key is obviously depending on the size of the ISO and on the transfer rate of your USB port. This operation usually lasts from 10 to 15 minutes without any sign of activity within the terminal window. Once the transfer is completed, the control will be given back to you, that is a new command line prompt will be displayed in the terminal.
Win32DiskImager is a bootable media creation utility for Windows®: it will allow you to create a USB key from which you will then boot your computer in order to install Debian.
To install it on your Windows® system, go to the main project page and download the latest version: https://sourceforge.net/projects/win32diskimager/
Win32DiskImager installs like other Windows®-compatible software. Once in place, first plug your USB stick in and note the ID of the new disk displayed (disk “F:” for example). Then run Win32DiskImager.
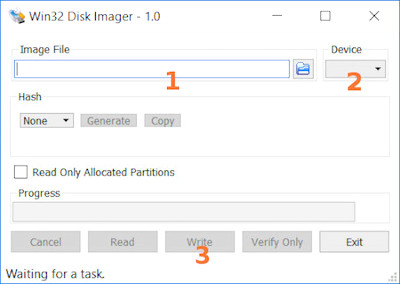
Wait a moment and you will be in possession of a bootable Debian USB key! You still have to restart your computer from this bootable key and begin the Debian installation.
To proceed now with the Debian installation, using your CD/DVD or USB medium, you need to ask the computer to boot from this device. If your computer does not boot automatically from the desired installation medium, you need to access the “Boot menu” or modify the “Boot order” in the BIOS.
Some computers have a function key that let you boot directly from a peripheral device, without having to modify the BIOS parameters. Usually, pressing the F12 key at start-up gives you access directly to the boot options. On the other end, to access the BIOS configuration you need to tap one key like DEL, ESC or F2 during the start-up phase. More information at: http://www.boot-disk.com/boot_priority.htm
As mentioned above, the key to access the Boot Menu at start-up may vary from one computer to another. This specific key and the key to access the BIOS configuration are usually indicated during the boot sequence for one or two second:
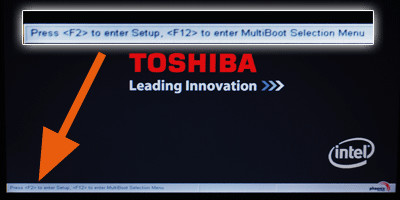
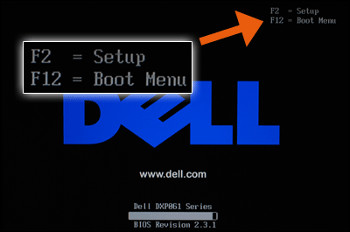
The boot menu let you select the boot peripheral without going into the BIOS configuration
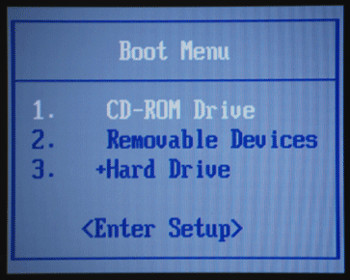
Use the keyboard direction arrows to select the right peripheral (in this example the USB key is the “Removable Devices”).
When you reach the BIOS settings, you should check if, within the Hard Disk Drive entry, there is a tree you can expand and where the USB key is showing up. In that case you can move your USB key up to the first position, by using the F5/F6 keys on your keyboard.
If the Boot-order menu is not available, you must modify the Boot priority inside the BIOS.
Once entered in the BIOS settings, the operations to execute are very simple, but you should be extremely careful to not modify other parameters. Hopefully, in case of mistake, the program let you quit without recording the changes, by pressing the ESC (or Escape) key. Other keys like F9 or F10 will let you reload the default parameters, or to record the changes before quitting:
The navigation is done by using the directional arrows on the keyboard. One validate or enter inside an option using the ENTER key. In most of the BIOS models, you move until the Boot menu is highlighted, then find the peripheral selection for the boot (boot device, boot sequence, boot priority) and finally put the various devices in the first, second, third etc … positions, reflecting the boot order you wish to apply.
Hereafter some peripheral names, like they might appear in your BIOS settings:
The correct handling of the UEFI SecureBoot is finally on the agenda of Debian 10 Buster, for the AMD64, i386 and ARM64 architectures. This implies that one can now test and install Debian 10 without the need to disable the SecureBoot option: https://www.debian.org/releases/buster/amd64/release-notes/ch-whats-new.en.html#secure-boot
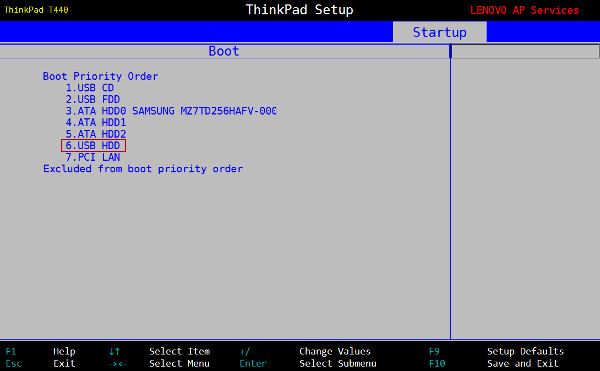
Changing the boot order
You still have to change the boot order so that the computer starts first from the USB (or the DVD). Click on the “Boot” tab and modify the order, if necessary, so that your medium becomes the first of the list as explained on the previous chapter (BIOS).

Now, you save your changes and you start the Debian installation.
The best way to make your choice: try the system directly on your computer!
There are two possibilities: you can test a GNU/Linux distribution from a stand-alone “Live” session or directly from your windows® system thanks to a virtualization software: VirtualBox or VMWare.
Debian provides standalone “Live” images for safe testing a given environment. Their peculiarity is to change nothing on the computer, everything happens in RAM and is forgotten once the computer is turned off.
These images have a setup launcher on the desktop that allows you, once tested, to install Debian directly from your session.
To get a live image, visit this page : https://www.debian.org/CD/live/index.html.
The principle of the Live CD is the capability to use/test a distribution on a computer without any risks for your personal data. The Live also let you check the distribution compatibility with your hardware.
The Debian software is “compressed” within a special file (the ‘squashfs.filesystem’ file) and embedded in the downloaded ISO image. This same special file is “uncompressed” during the Live utilization, and will later be copied on your hard disk during the installation process.
Whichever version you choose (Gnome, KDE, Xfce…), you will find on the desktop, and/or within the “System” menu, an entry to directly install Debian. After having checked your machine compatibility, you will be able to directly install the selected environment from the “Live” session.
Warning: This installation method is not the one encouraged by default. The Live install involves a risk: if for one reason or another, the graphical interface freezes, the whole installation process will be compromised.
if you choose this option, this is the Calamares graphical installer which will be launched in order to set your system up. Here, within a LXQt Live session, you start with your language selection:
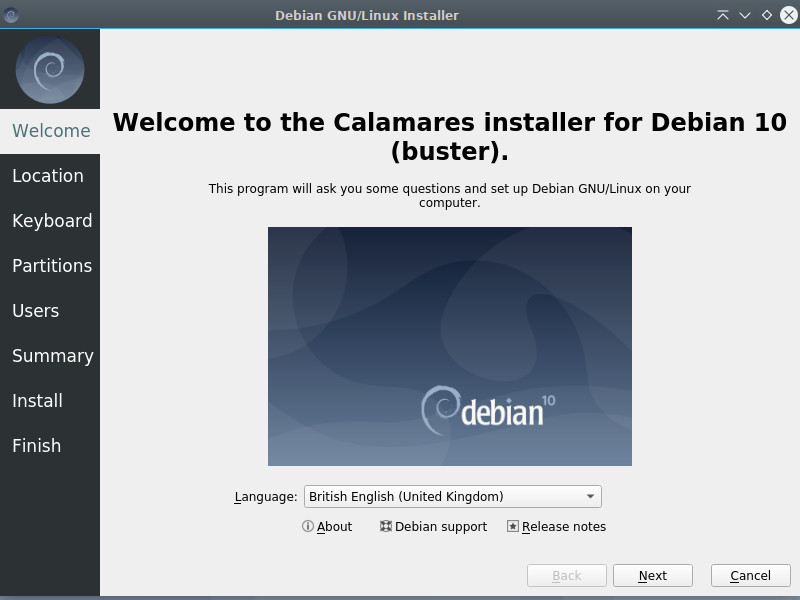
You just need to follow the on screen instructions …
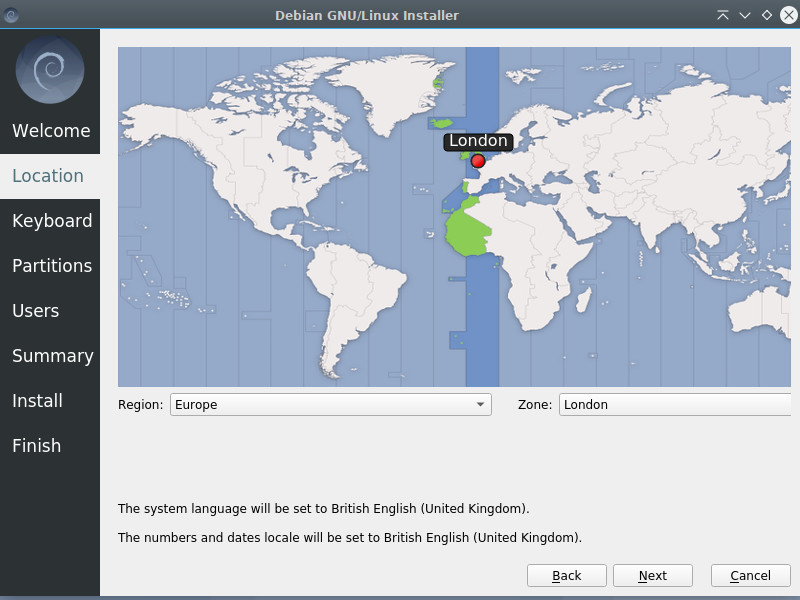
The Localisation tab allows you to set the clock via your time-zone.
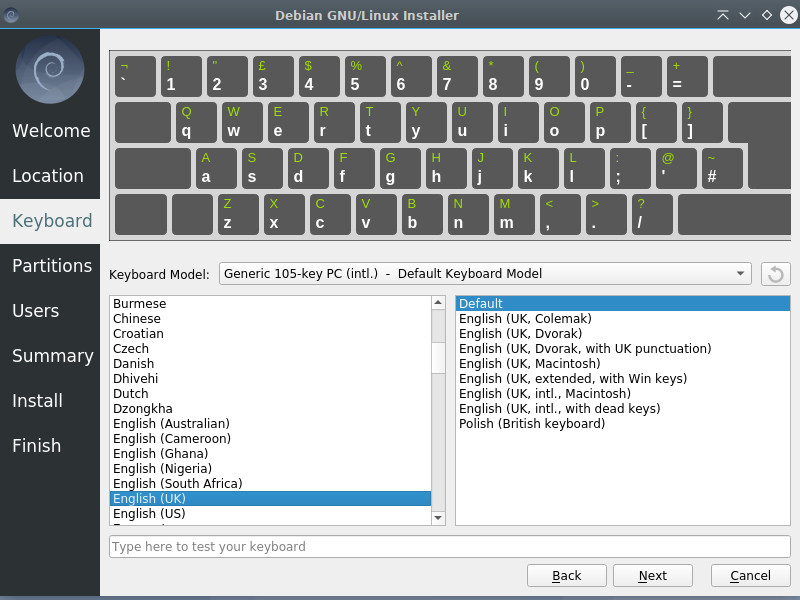
The Keyboard tab exhibits an impressive list of options (you may think it’s too much)… In case of doubts, pick the default keyboard, you will always be able to change it, once the installation is done.
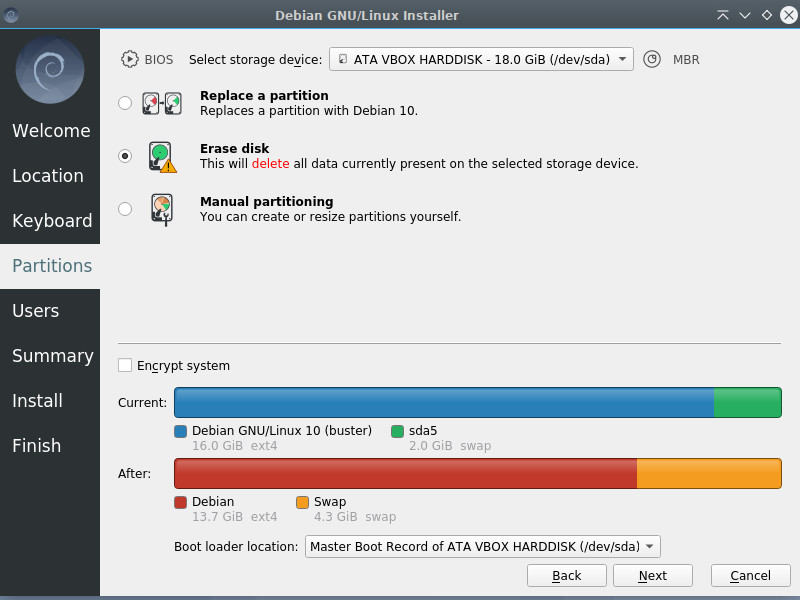
The Partitions tab is the most important one, because it let you modify your computer disk(s) layout : to be used with extreme care. For a single boot install (Debian will be the only system hosted by the machine), you can select “Erase disk”. For a dual boot (next to another system), select “Install along side”. In case of doubt send a question to the forum (chap 1.2).
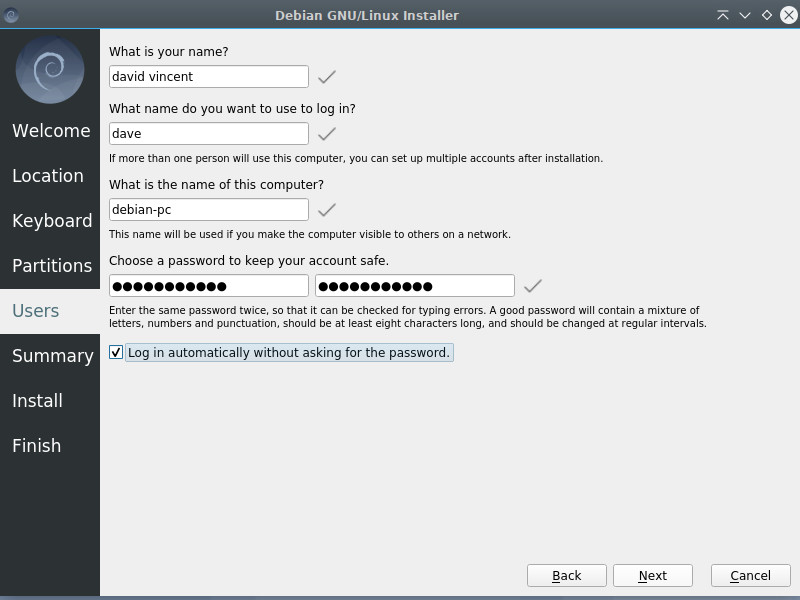
The Users tab allows you to define your identity on this machine, that is your full name, your login identity and your password. You can also enable the automatic login (no password request) for this account.
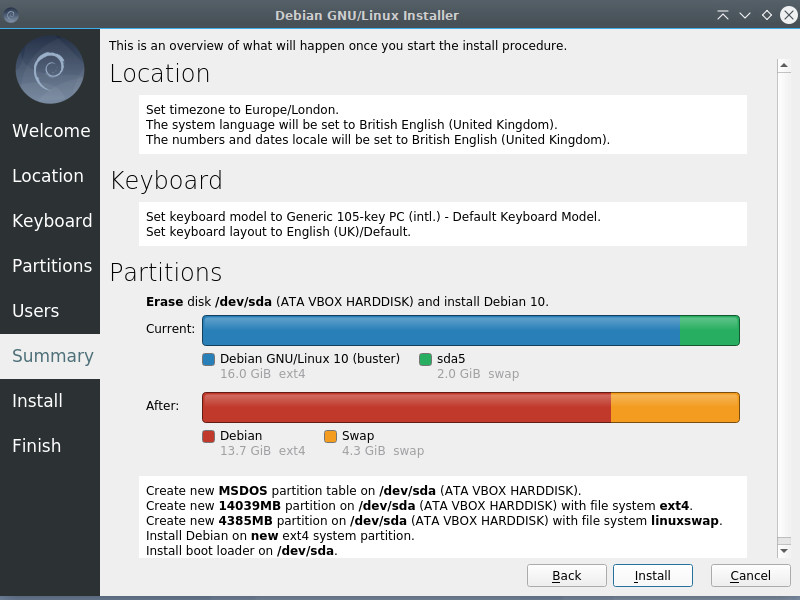
The aptly named Summary tab, is an overview of what will happen during the installation. Please take some time to review it carefully, because once you click on the “Install” button the partitions formatting process will start, without any going back possibility. At that point, if you notice an error you can still return to the settings with the “Back” button.
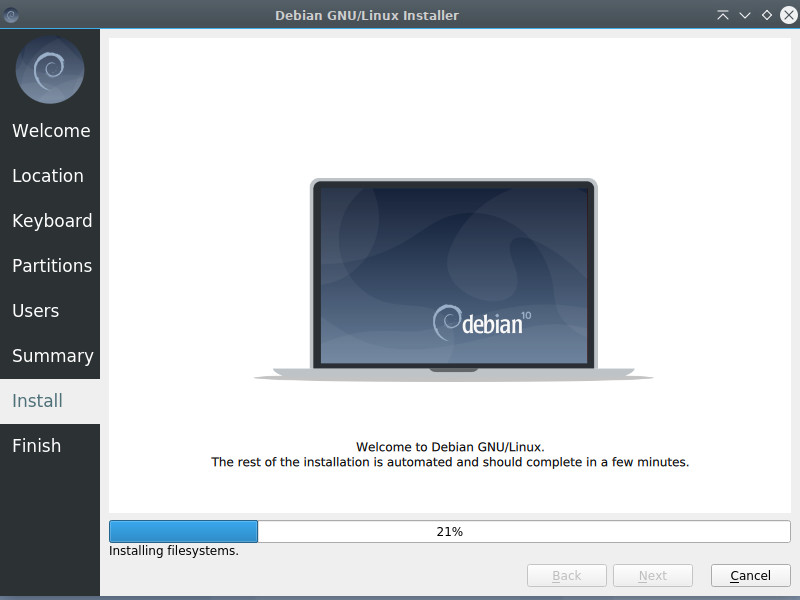
It’s now time to drink a cup of tea, open the window (a real glass window), while the Calamares installer is doing its job.

Your computer reboots with your new Debian system… Enjoy it

![]()
Virtualbox (http://www.virtualbox.org/) is a virtualization software available for major operating systems. This software will allow you to test your Debian or any other GNU/Linux OS directly on your Windows® desktop. Virtualbox is not the only virtualization software: more information about virtualization on Wikipedia (https://en.wikipedia.org/wiki/Virtualization#Nested_virtualization).
Internet is full of tutorials about installing VirtualBox. I leave it up to you to consult these few links which will let you quickly master this software:
… We enter the virtual world here??
A kind of. The virtualization software makes it possible to test or install a system inside a system, and to ensure the independence of the two installations. VirtualBox will “make believe” the system you want to test (referred to as “guest system”) that it is all alone on its computer, while ensuring exchanges (shared folder, network connection sharing, etc.) with the host system.
Your guest system will be installed on a “virtual disk”, which will simply be like a big archive in a folder of your documents.
Note that this test method does not verify hardware compatibility and is only for you to discover a distribution before installing it on your hard drive.
Here comes the long-awaited moment, the actual installation of the Debian GNU/Linux system on your machine … Are you ready to begin this exciting journey?
Hereafter a visual step by step explanation on how to easily install Debian, using the graphical installer. This method erases the whole disk and installs Debian as the unique operating system on your machine. The ISO image is of the type “netinst”.
The Debian installer displays an explanation at every step of the process: with GNU/Linux ![]() , there is no advertising, so please take few seconds of your time to read the little messages which talk about your future system
, there is no advertising, so please take few seconds of your time to read the little messages which talk about your future system
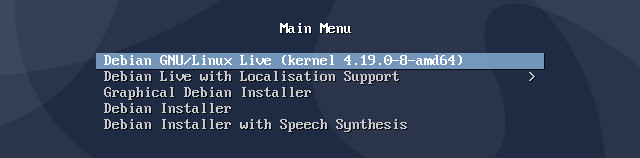
When the installer begins, we select the installation mode:
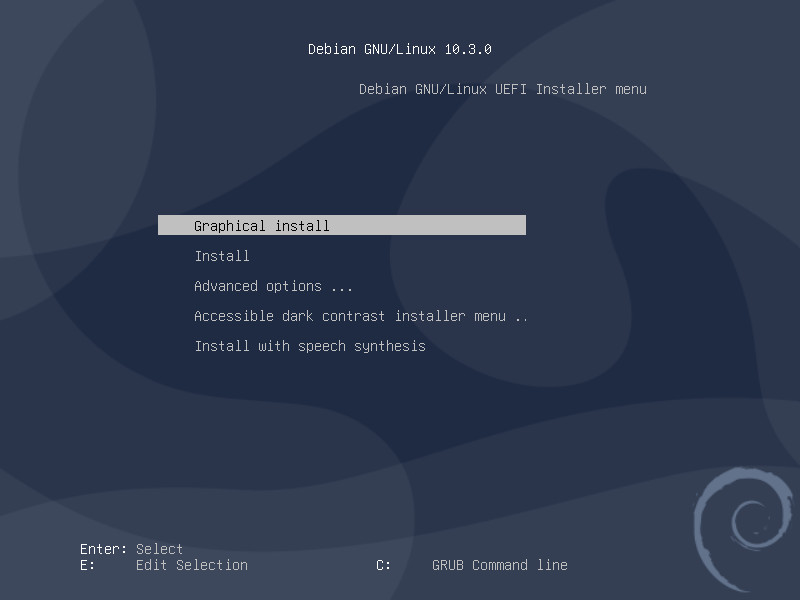
Depending on your motherboard model, or if it boots in BIOS mode, the display can slightly change. In all cases, select “Graphical Install”.

Each installer pane displays a clear explanation message. When you don’t know the answer, take the default setting. However, pay great attention during the partitioning phase, since this operation could erase the existing data on your hard disk(s).
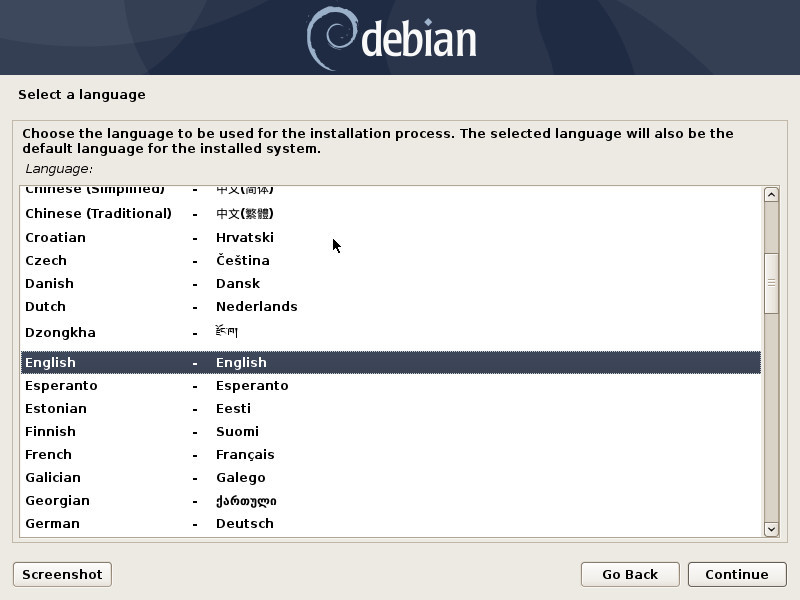
Selection of the system language by default: this choice will also modify the installer language itself, which then will display its own messages in English (if you chose “English”).
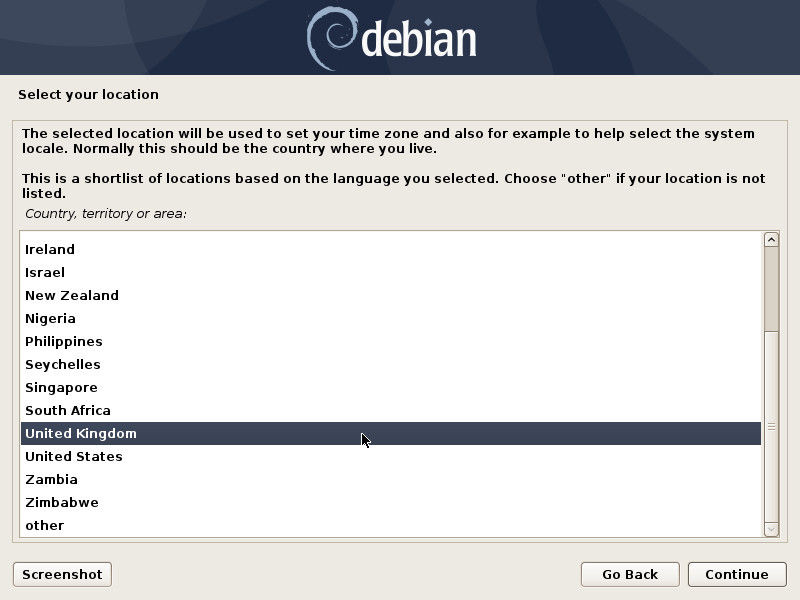
This information allows the system to automatically set the date and time of your system, using a remote time server.
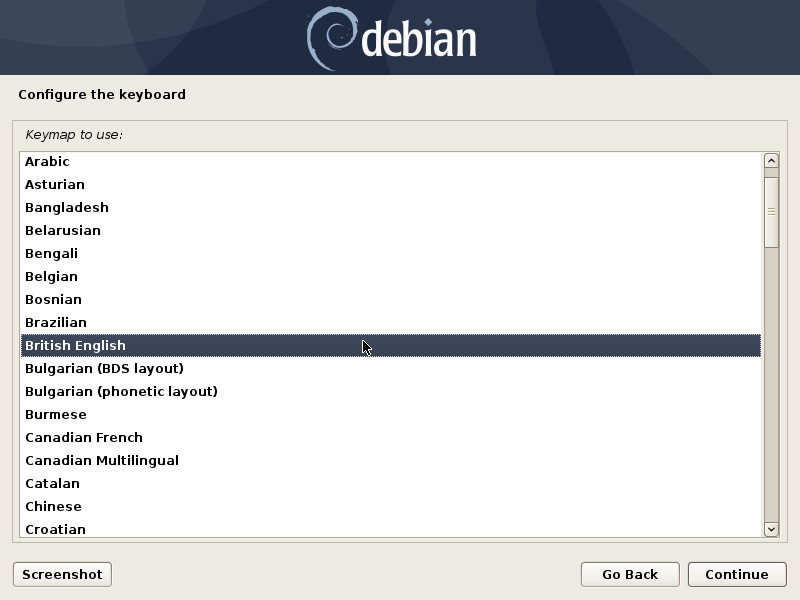
Here you can define the general layout of your keyboard. Please note that you would be able to fine tune its definition, once the system is installed.
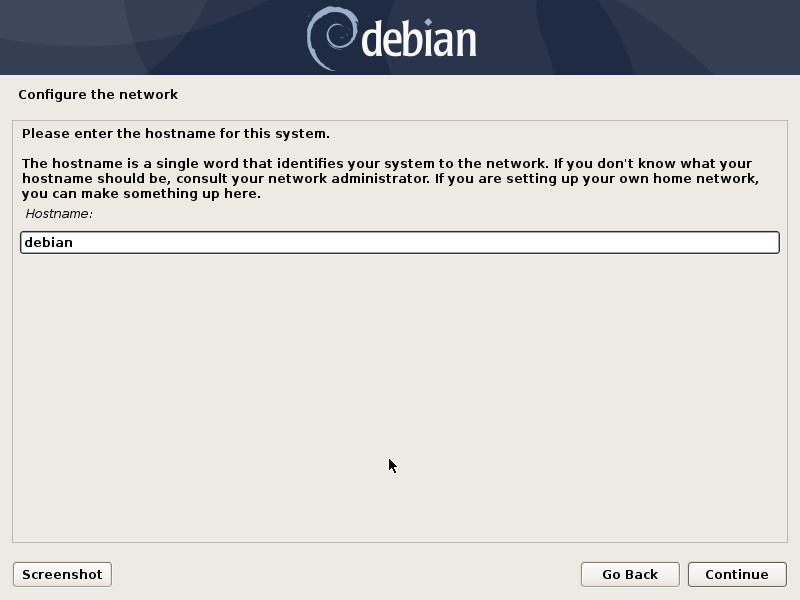
The host name is the “nickname” of your computer. For a domestic usage, you can pick whatever name you want to call it. If this machine is part of a network, remember to ask your network administrator for advice.

Leave this field empty if you don’t know the answer.
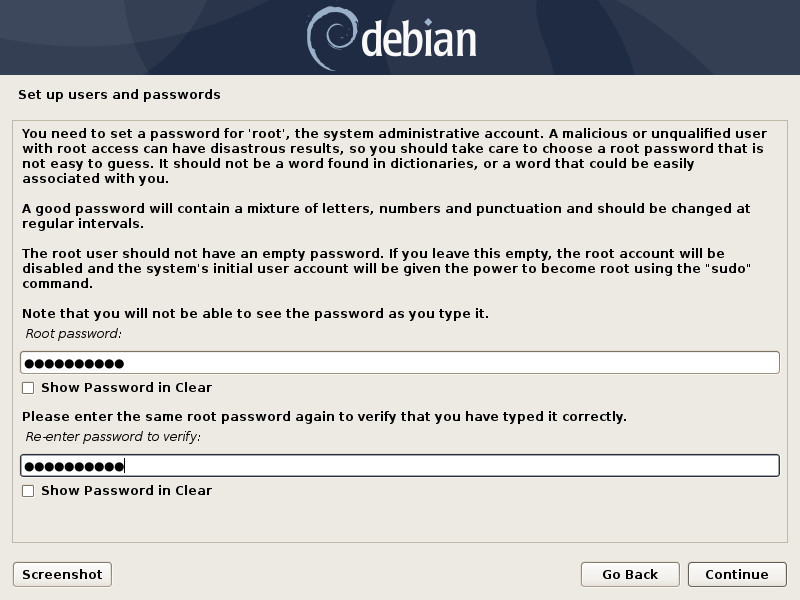
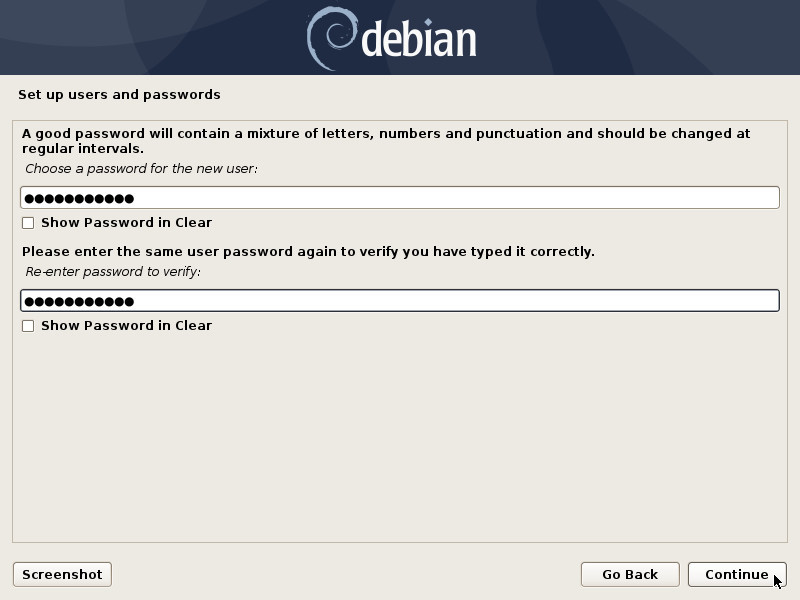
Enter the administrator password (twice to confirm). Like indicated in the information message, creating a “root” administrator account is not mandatory. If you leave these fields empty, the first user will receive all the rights to perform administrative tasks by using the “sudo” command and entering its own password.
The password is not shown in clear by default, but you can tick the check-boxes to verify that the passwords are matching. Do not enter “adminpassword”… please ! More information concerning passswords in chapter 10.1.3.
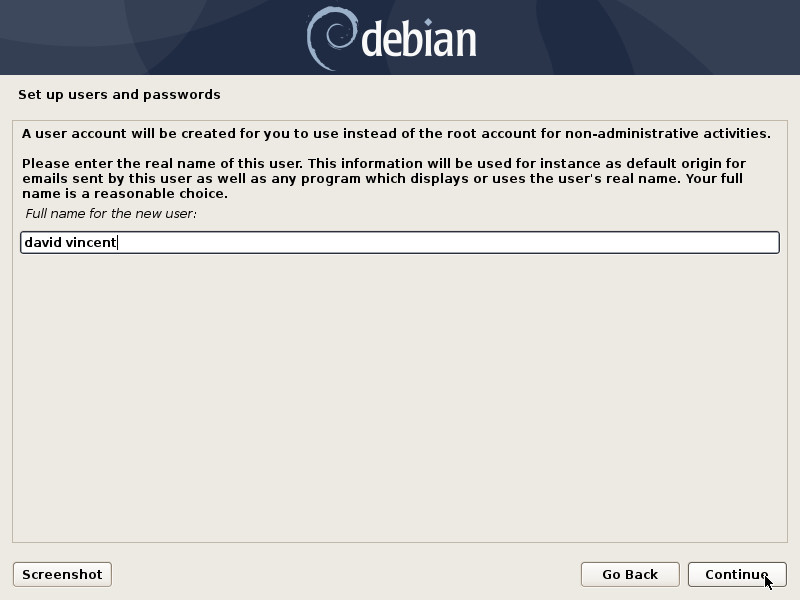
Start by entering the full name of the main user.
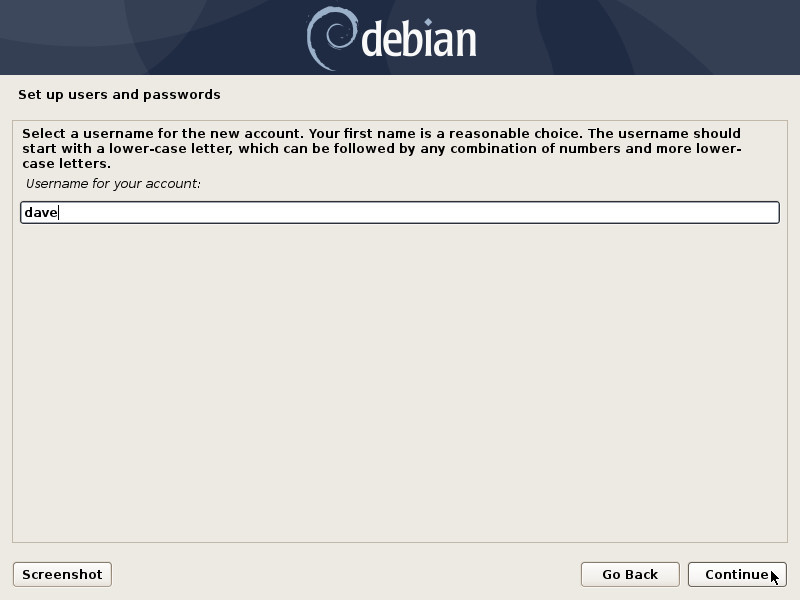
Then enter its identifier, that is the pseudo which will be used during the connection (login) to a session.
You will be able to create more user accounts once the system is installed, and give them, or not, the system admin rights.
Like for the administrator account, you need to enter the password twice for confirmation.
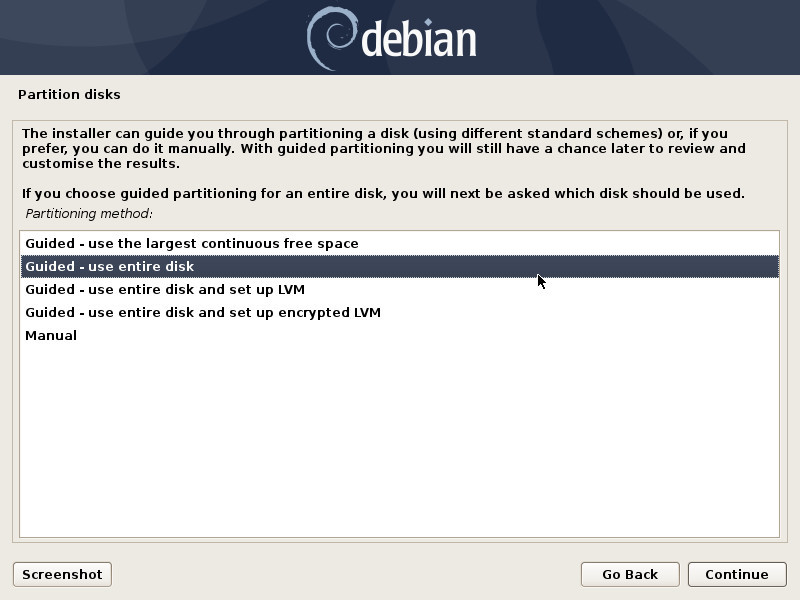
To perform a “single-boot” installation (the computer hosts only one system), you select “use entire disk”.
… “Partitioning” … What’s that?
The partitioning process consists in organizing different partitions on your system. Partitions are non-overlapping area defined on your hard disk(s), each one of them having its specific properties (file system type, unique identifier, size, etc.). In order to function correctly, Debian GNU/Linux needs at least one partition to install the operating system. An additional exchange partition (called SWAP) is highly recommended, to deal not only with insufficient memory space, but also with the suspend or hibernation functionality.
The guided partitioning scheme proposes 2 partitions (system + swap), but you can opt for a scheme proposing a separated “/home” partition, and use another hard disk to store your personal data (as an example).
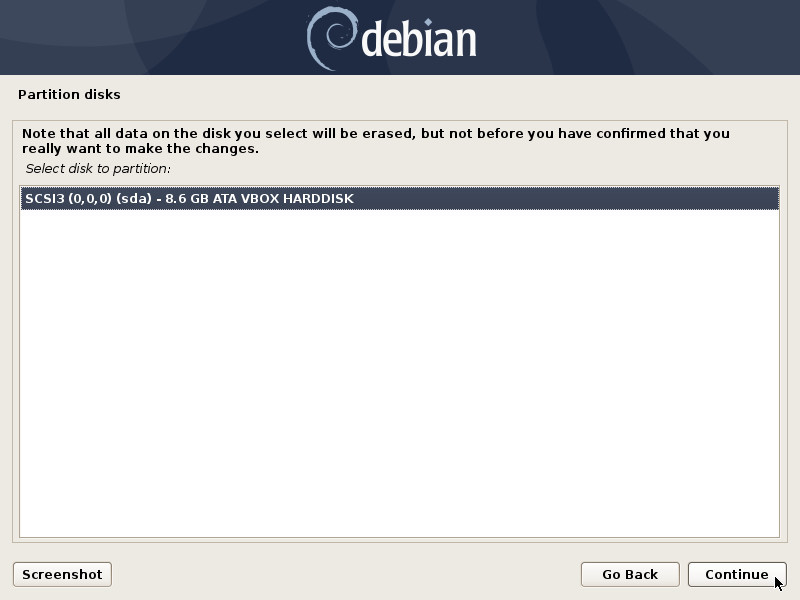
In our example, there is only one disk. If your configuration is different, make sure you select the “boot disk”, in general called sda.
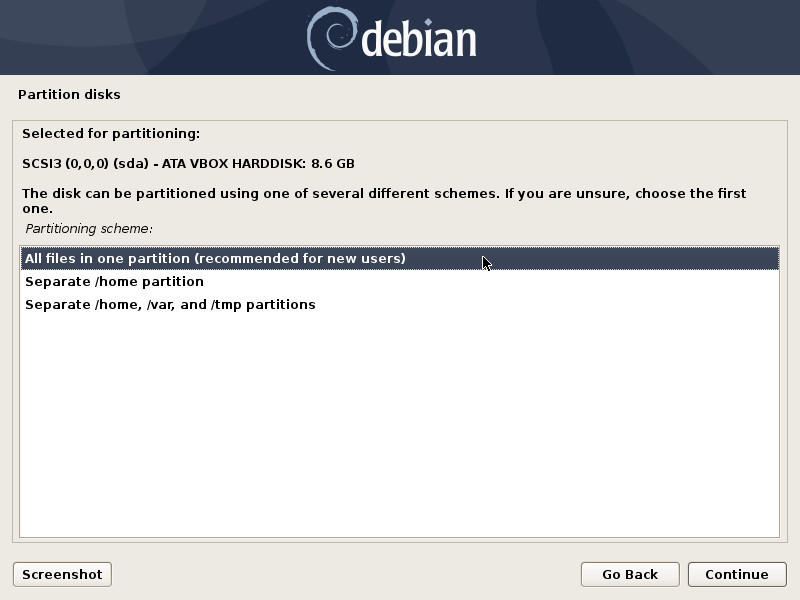
Your data will be kept on partitions. With a classic domestic system, you can “store” your data on the same disk as your system. So you can select “All files in one partition”.
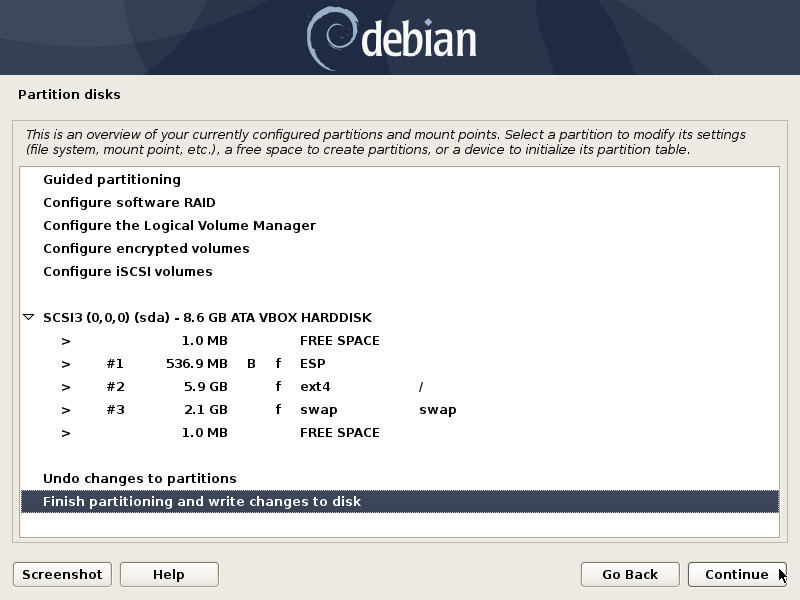
The partitions scheme is displayed for you to check : you can modify its layout if you think it is necessary, but the default scheme is generally the right one.
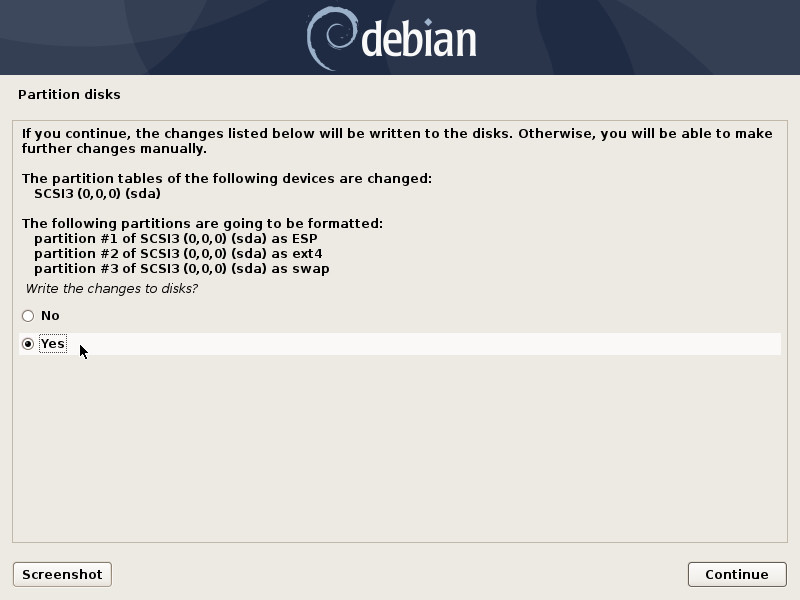
Warning: this is the step during which the installer will format the partitions.
The data on the selected disk will be erased!

The base system is installed. You will choose your main interface later.
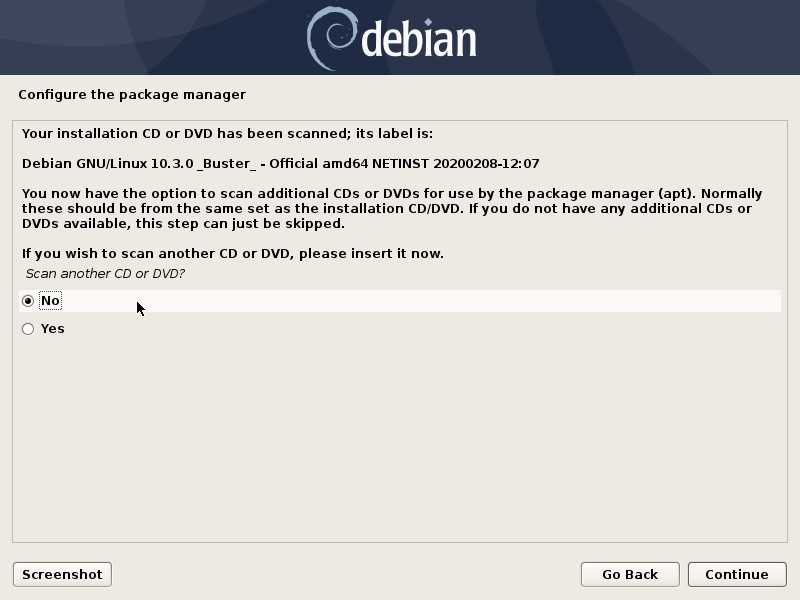
Optional: Had you opted for a Debian CD set including all the packages needed for the installation, you would now insert the second CD (and tick the “Yes” option).
If you use an “netinst” ISO, as in our example, you can skip this step.
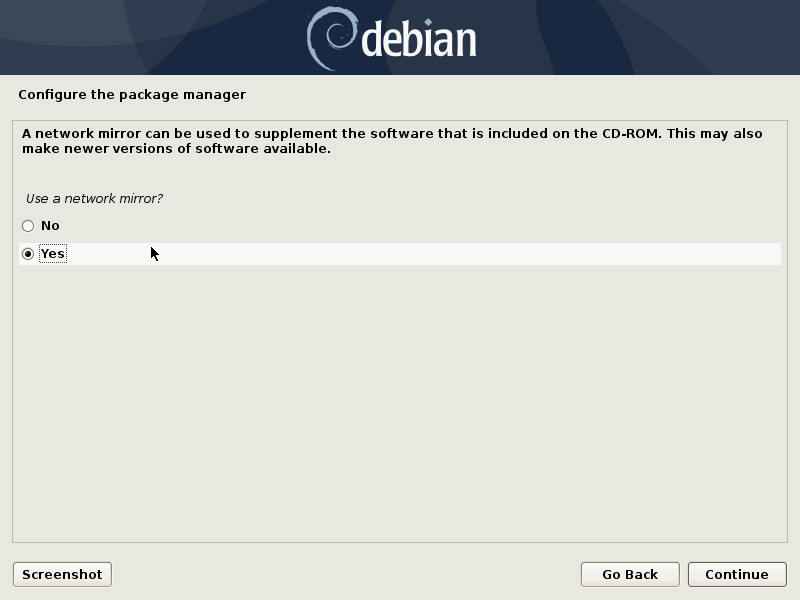
… where should I put this mirror?
“A repository mirror” is a computer server, available on-line, hosting the full set of the Debian packages. If you don’t have all the CDs on hand, Debian will grab the software or the packages you need on the network mirror servers.
There are repository servers all around the world, each one being the exact copy (mirror) of the others. In this example we select “Yes” and in the following section we will pick an Internet mirror located in the United Kingdom.
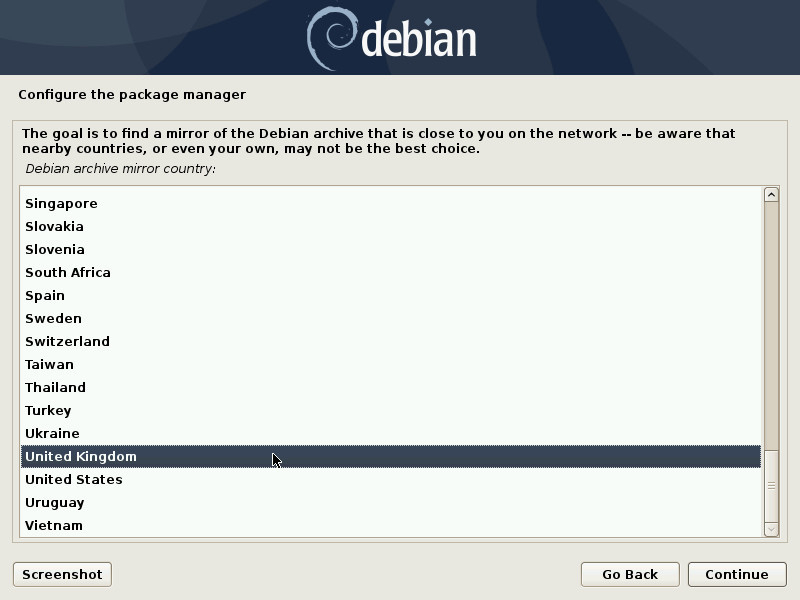
The beginner’s handbook being English-speaking, the default choice “United Kingdom” seems obvious. However, you should be careful and select a nearby mirror, if you live in another English speaking country.
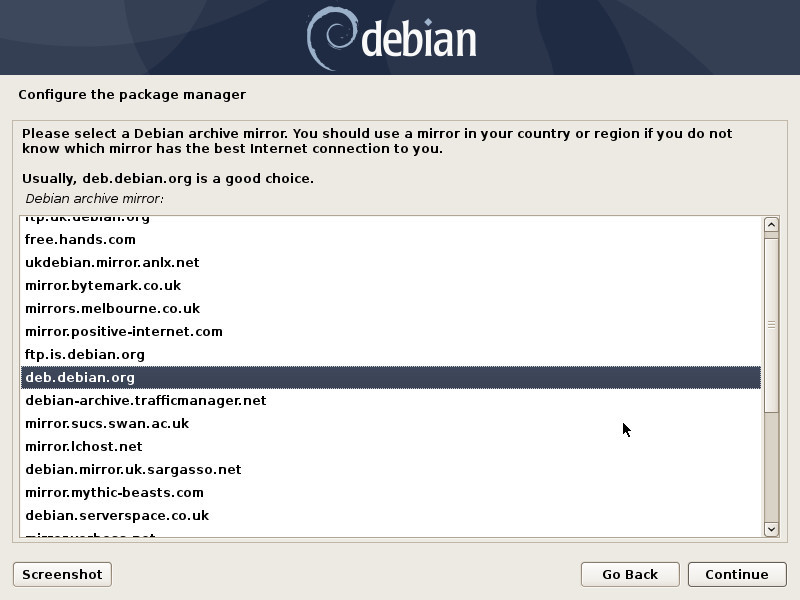
The server proposed by default is usually a good choice.
The entry “deb.debian.org” will redirect you to the closest available repository.
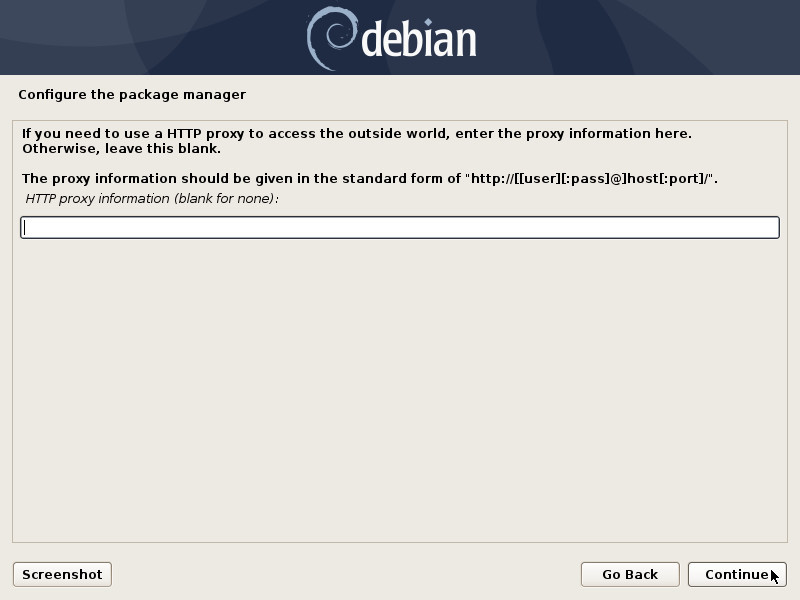
Leave this field empty, if you don’t know.
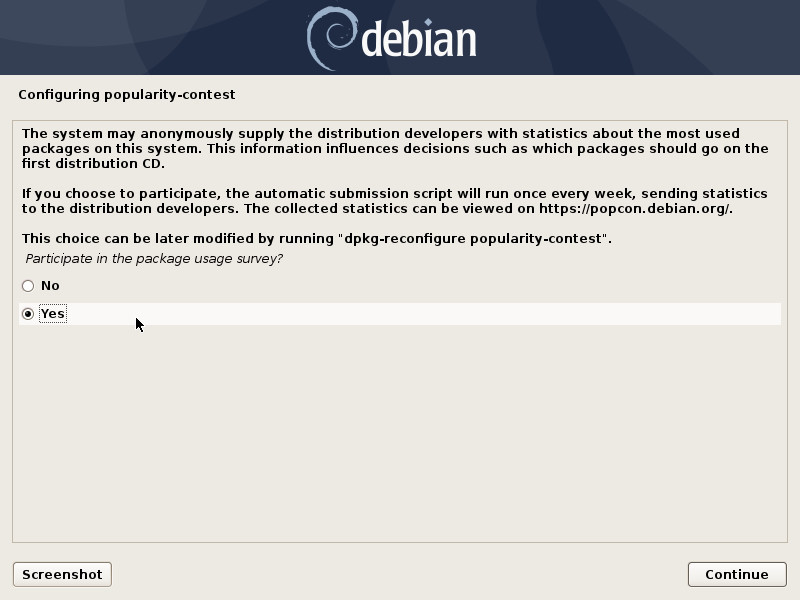
This can be useful to the community, but it is not mandatory.
Note that participation in Debian statistics does not imply the capture of your personal data or the sending of advertising emails … you can participate without any fear.
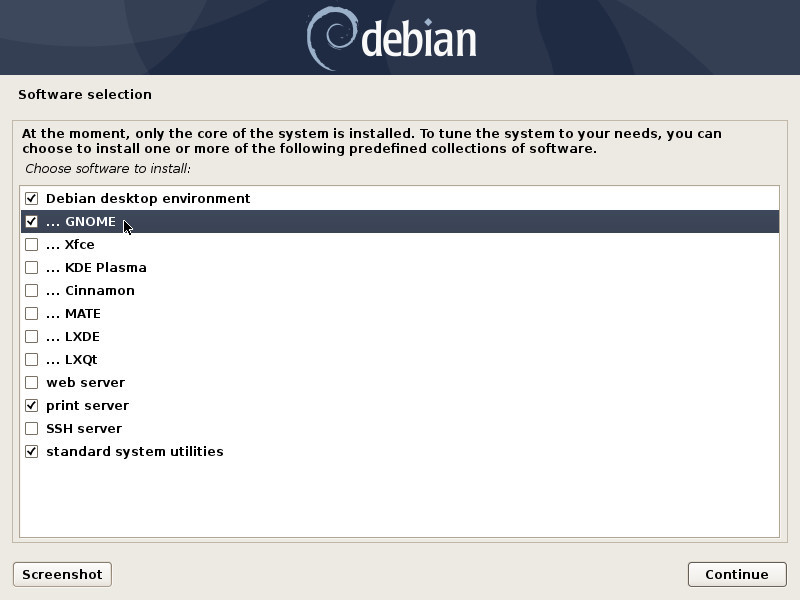
Now, it is time to select your main desktop interface, as well as the main services to be installed by default. Note that you can select several desktops in view of directly installing several environments. Hereafter a summary description of the proposed choices:
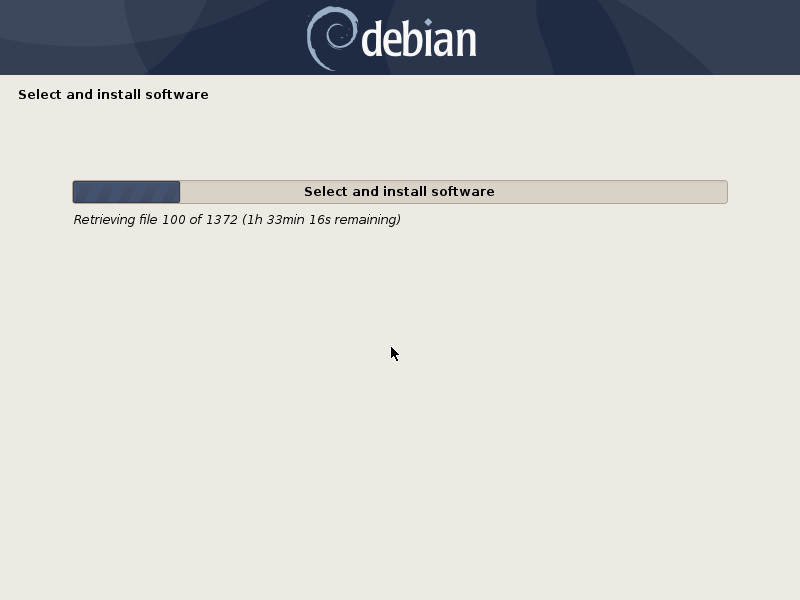
Time to take a little pause. Downloading and installing the packages may take quite some time, depending on the power of your computer and the Internet connection bandwidth.
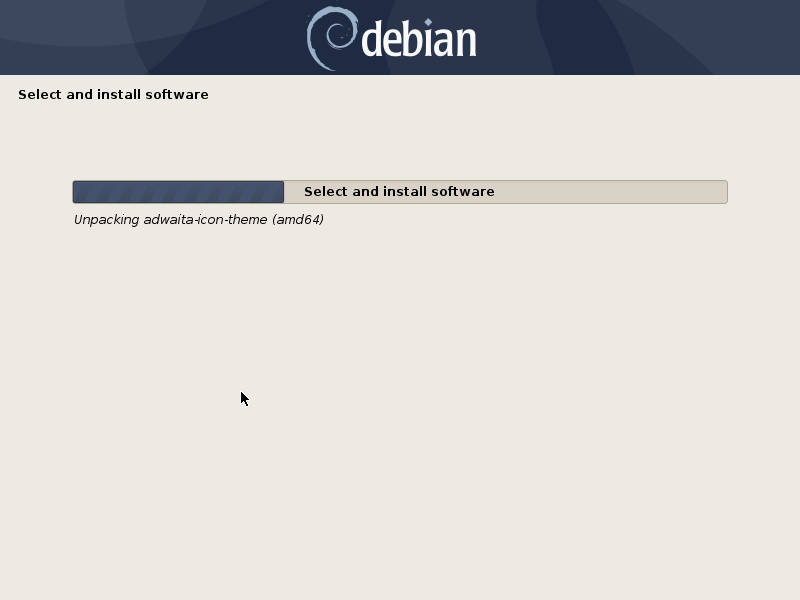
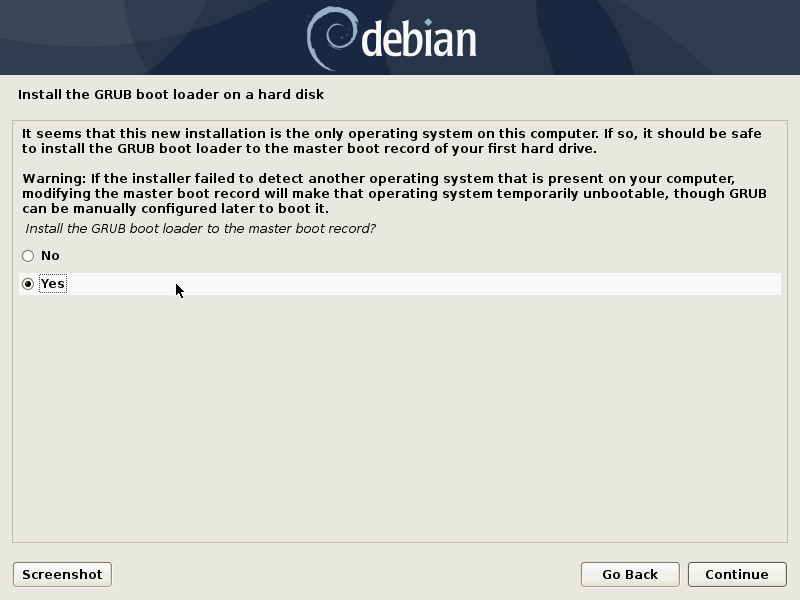
GRUB is the “launcher” of your GNU/Linux system. It must be installed to perform the start-up of your Debian. So, the default answer “Yes” must be kept, except if you know exactly what you are doing.
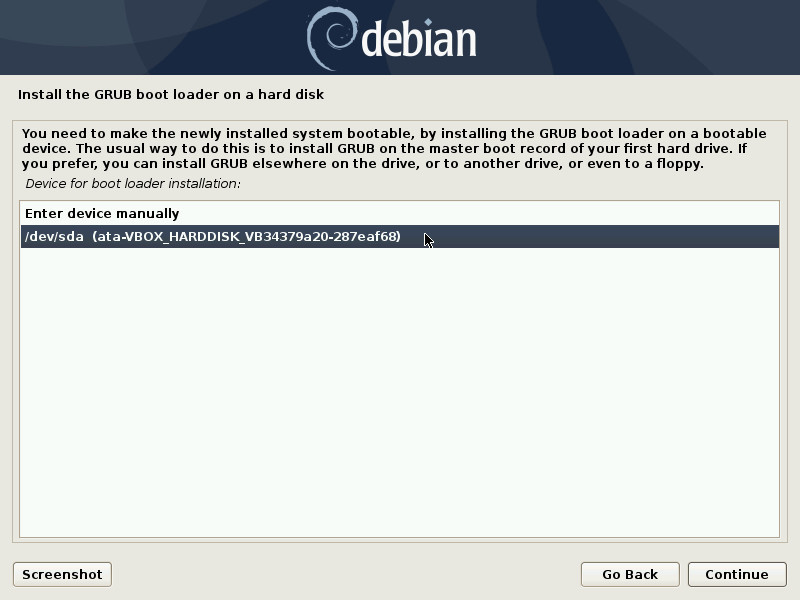
When the system installation is of type “simplified single-boot”, you should install Grub on your machine main disk, usually identified under the nice “/dev/sda” name.
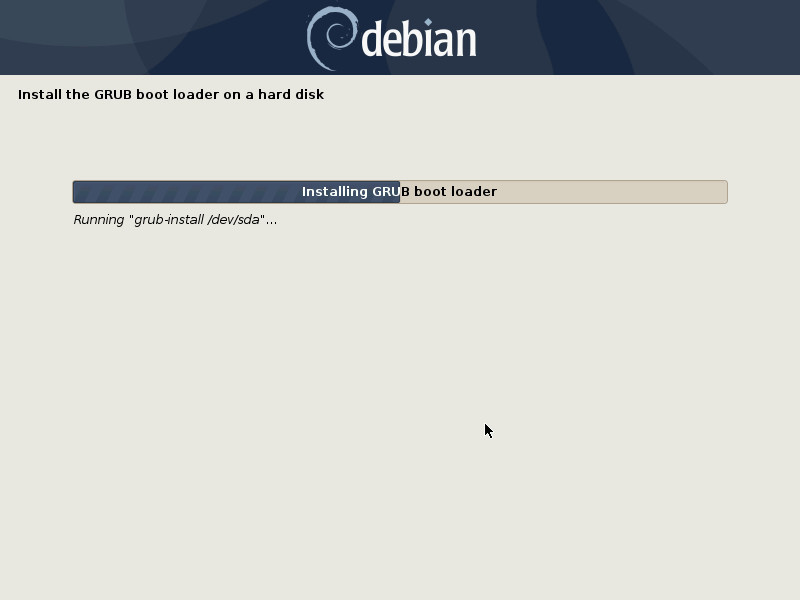
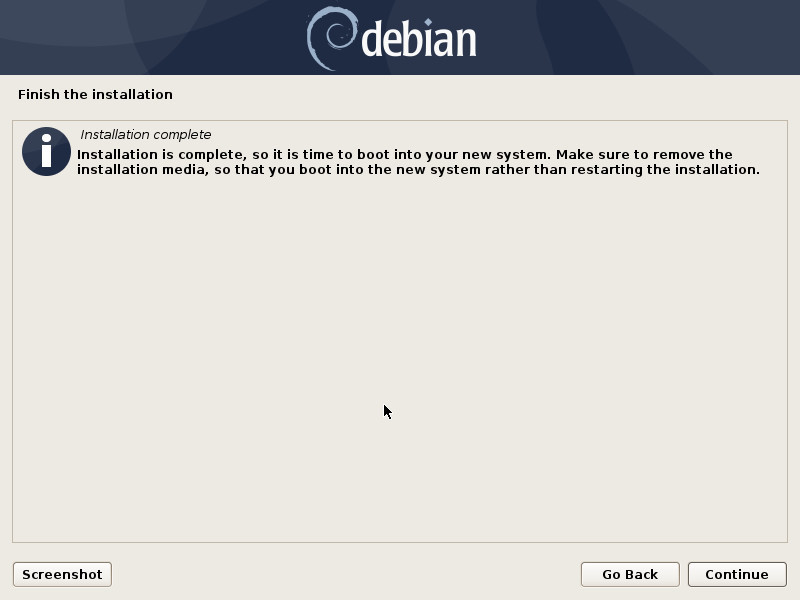
Don’t forget to remove the CD or USB key to avoid re-launching the installer during the next boot.
Then complete the installation process by pressing the Continue button.
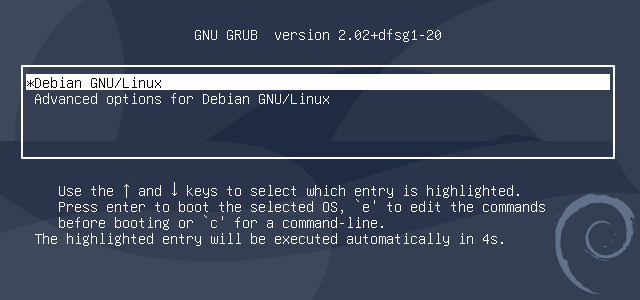
The entry by default will launch the system, when the advanced options include the “recovery mode” start-up, which allows you to perform some maintenance tasks, for example when the graphical session is broken.
Next comes the session opening of the Debian system, here under the Gnome environment, managed by GDM.
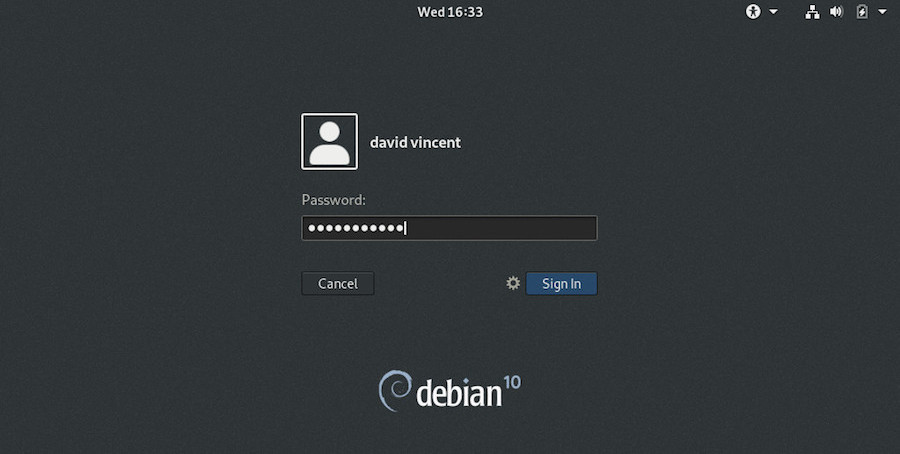
Debian offers more possibilities than just the two methods explained in the previous chapters.
But this manual being intended for the beginners, we kept it simple and the more complex installation modes are detailed in the official Debian documentation: https://www.debian.org/releases/stable/installmanual
Just to give you a flavor of the other installation modes:
The Dual-boot mechanism let you install side-by-side two independent operating systems, and doing so, allows you to select, at boot time, which one you want to launch.
This is not the recommended method: there are inherent risks for your data during the partition resizing. If you choose this solution to get started on Debian, please remember that you can very well test it first by using a Live session (chap.5.3.1) with no risks for your data.
More information of the Debian Dual-Boot Wiki: https://wiki.debian.org/DualBoot
LVM is an acronym for Logical Volume Manager.
Its usage consists in:
So, the “Logical Volumes” utilization, replaces straight out the usual disk “partitioning”, and provide a more flexible way to manage disk space by allowing modifications on them at any point of time.
It is possible, as well, to keep one part of the LVM partition without installed “Logical Volume”, pending further decisions.
More details on the dedicated Debian LVM Wiki: https://wiki.debian.org/LVM
The confidentiality of personal data is is a pretty hot topic these days. In order to better protect your data, you can opt for an encrypted installation. With this kind of installation, even in case of theft of your computer, or removal of its hard disk, no data access is possible without the encrypting password !
The Debain Administrator’s Handbook provides us with more details (https://debian-handbook.info/browse/en-US/stable/sect.installation-steps.html#sect.install-partman):
This feature can be added underneath any filesystem, since, as for LVM, Linux (and more particularly the “dm-crypt” driver) uses the Device Mapper to create a virtual partition (whose content is protected) based on an underlying partition that will store the data in an encrypted form (thanks to LUKS, Linux Unified Key Setup, a standard format that enables the storage of encrypted data as well as meta-information that indicates the encryption algorithms used).
To put it simply, LUKS creates a container to host an encrypted volume protected by a password.
For more information and a complete guide, visit the digital self-defense guide: https://ssd.eff.org/en
Wikipedia is my friend …
RAID is the acronym of redundant array of independent disks.
RAID is a data storage virtualization technology that combines multiple physical disk drive components into a single logical unit for the purpose of data redundancy, or performance improvement, or both.
Please note that the Debian installation in RAID mode, uses the RAID software (thanks to the mdadm tool) and not the RAID hardware (handled by a physical RAID controller).
For more details and installation tutorial see the official Debian wiki https://wiki.debian.org/SoftwareRAID or the dedicated section of the Debian Administrator’s HandBook https://debian-handbook.info/browse/stable/advanced-administration.html#sect.raid-soft
 Fast boot after installation
First things to do after installation: Wi-Fi network connection, screen resolution, printer configuration … everything you’ll need to do before your workstation is ready for operation.

Using either an Ethernet wired connection or a Wi-Fi wireless connection, your Debian system is expected to access the network. The Ethernet connection is recognized natively. As far as the Wi-Fi is concerned, it is sometimes necessary to use a non-free driver.
This is the network manager delivered with Gnome, Mate, Cinnamon, and Xfce. It is accessible from its icon within the notification area (here on Gnome and LXDE):
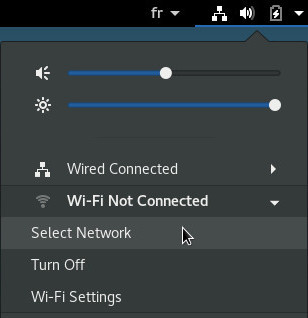
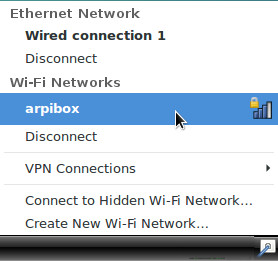
All the active or inactive connections are listed here, and the Wi-Fi networks are detected as well. Left-click on the network you want to connect to, and a dialog box will pop up. Select your network then “Connect”. A password is then required (the one given by your Internet Service Provider). Here on the Gnome desktop:
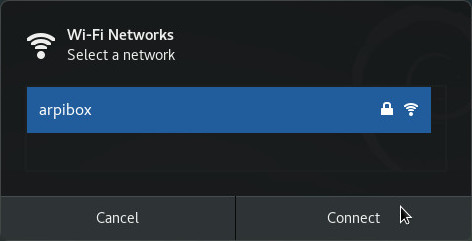

Then enjoy your Wi-Fi connection:
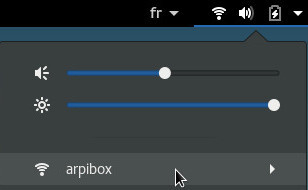
To tweak the Wi-Fi settings, select the dedicated entry in the main menu:
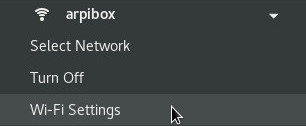
You will be able to modify the connection settings, and even “Forget” it:
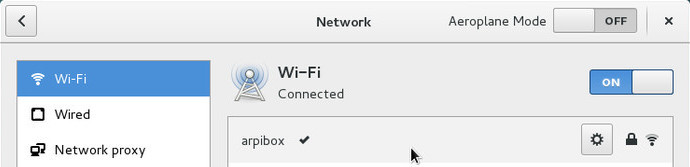

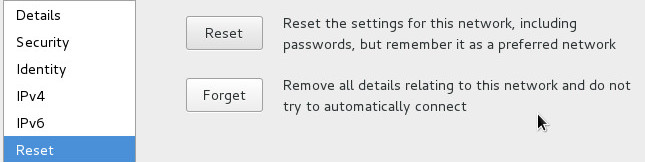
Wicd (https://wiki.debian.org/WiFi/HowToUse#Wicd) (Wireless Interface Connection Daemon) is an independent network manager delivered with LXDE. However, it can be used on any other desktop.
Its interface is slightly different compared to the Gnome manager one, but the functionality is the same.
Wicd is available from its icon in the task bar (usually at the bottom right, in the notification area). A left-click opens the main interface which lets you select your network access:
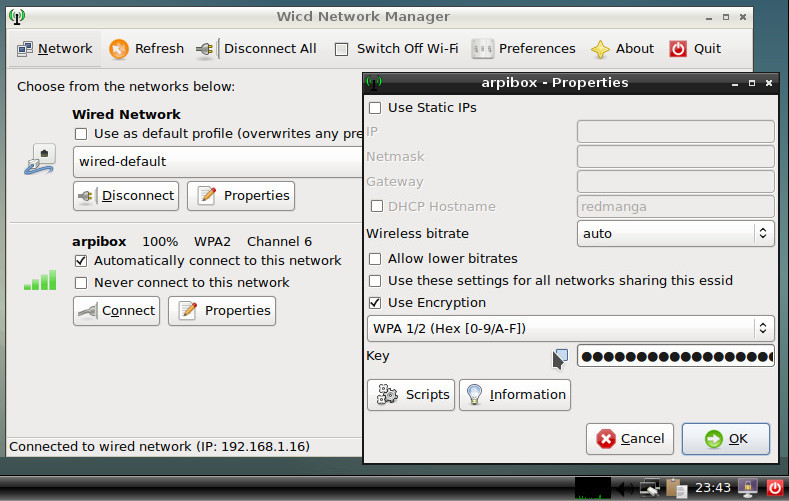
If the network does not show up, verify first that in the Wicd “Preferences”, the right interface (the very one found in the “material recognition” section, like mentionned in the previpus chapter: “wlp2s0” for example) is selected for the Wi-Fi network.
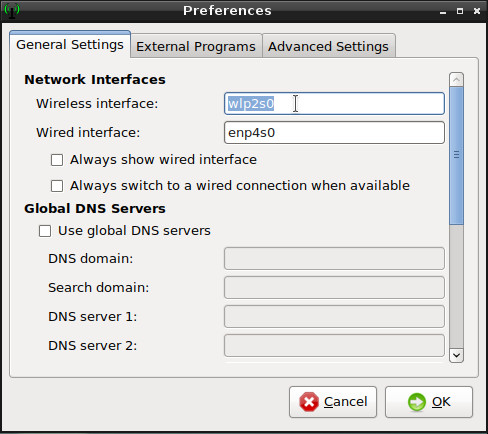
On KDE, the network connections are managed like on the other desktops: through a graphical interface. A left-click on the network icon in the notification area gives you access to the list of available networks. A click on “Connect” and KDE ask you to enter the network Wi-Fi key:
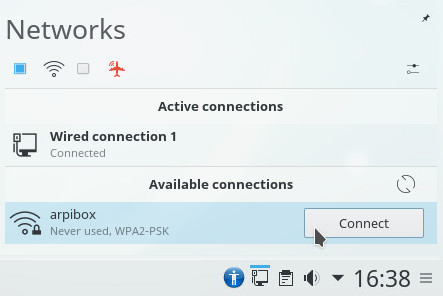
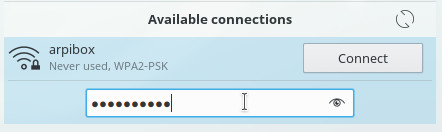
When this is done, you can connect your computer using this Wi-Fi network and/or modify its settings.
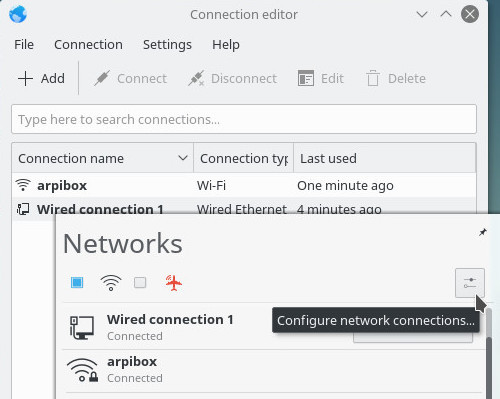
LXQt uses a different tool: “Connman” available from the general menu > Internet > Connman UI Setup

The main ConnMan interface opens. Available networks (connected or not) are displayed in the “Services” section. To connect to a network, use the “Wireless” tab:
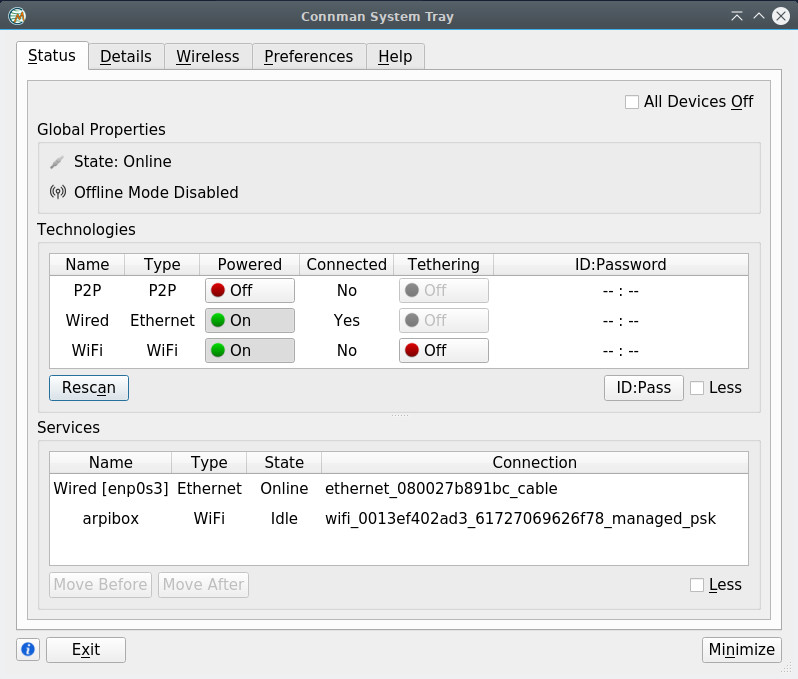

Select your network then click on “Connect”. Then enter the password of the selected network:
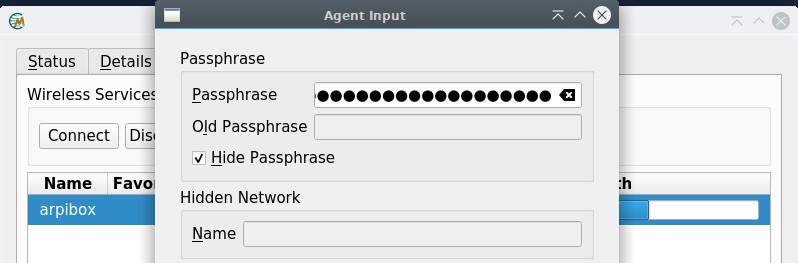

An icon did take place in your notification area: when hovering the mouse over it, it displays network information, and when clicked, it opens the main ConnMan interface.
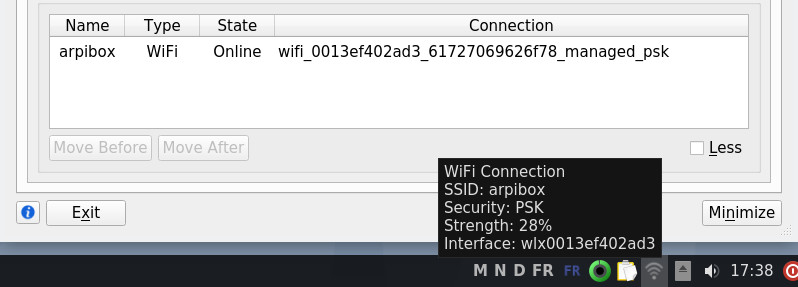
Drivers are often provided by the manufacturer, and sometime also some Firmware (micro-program) which needs to be loaded by the kernel inside the WI-FI device itself, using this very same driver. So it is very important to check that the driver is correctly installed in the system. To do so, we are going to use the command ip link:
ip linkwhich should return a result like:
1: lo: <LOOPBACK,UP,LOWER_UP> mtu 65536 qdisc noqueue state UNKNOWN mode...
    link/loopback 00:00:00:00:00:00 brd 00:00:00:00:00:00
2: enp0s25: <NO-CARRIER,BROADCAST,MULTICAST,UP> mtu 1500 qdisc pfifo_fast...
    link/ether 00:24:e8:a1:13:65 brd ff:ff:ff:ff:ff:ff
3: wlp0s29f7u3: <BROADCAST,MULTICAST,UP,LOWER_UP> mtu 1500 qdisc mq state...
    link/ether e8:94:f6:16:7f:f3 brd ff:ff:ff:ff:ff:ff
If an interface named something like “wlp…” does not appear in the list, this means that the Wi-Fi driver is missing.
If your network connection is not functioning, it is usually a driver issue. In order to select the right one, we need first to identify the network device.
Within a terminal in user mode, launch the lspci command which lists all the available interfaces. If you use this command alone, your terminal window will be filled up with all kinds of information. In order to help you sorting out all these data, we are going to complement the lspci command with a grep and a cut , like this:
lspci | grep -i "net" | cut -d: -f3which will return a result like:
Intel Corporation 82567LM Gigabit Network Connection (rev 03)
Broadcom Corporation BCM4322 802.11a/b/g/n Wireless LAN Controller ...
Here, the detected Wi-Fi device is the Broadcom BCM4322
If I run a simple Internet search, like “Debian Broadcom BCM4322”, I will find quickly the right page (https://wiki.debian.org/bcm43xx) which tells me to install the firmware-b43-installer.
The Wi-Fi connection setting is a very touchy subject for the GNU/Linux distributions, due to the non-free nature of the drivers to be installed. More details in the chapter 8.1.4.
More information in the Debian Wi-Fi Wiki: https://wiki.debian.org/éWiFi.

C.U.P.S (https://wikipedia.org/wiki/Common_Unix_Printing_System), is an acronym for Common Unix Printing System, and as its name suggests, is a printer management system created by Apple Inc. for OSX and other Unix-like systems. It is used by default on Debian to manage printers. To achieve this, CUPS uses the Internet Printing Protocol (ipp) to drive both the local and the network printers.
What is enough for you to remember is that CUPS is the tool managing the printers.
If you chose an exotic installation, you might need to install yourself some Debian packages. Within a terminal in administrator mode (thanks to “su” chap.3.8.3):
apt update && apt install --install-recommends task-print-serverCompatibility
Likewise Wi-Fi devices, printers need external drivers. However their detection by default is much better, which enables Debian to embed a simplified printer setting interface (detailed in the first section of this chapter). Methods may vary from one manufacturer to another.
To check your printer compatibility, you can visit the dedicated page of the openprinting.org site: https://www.openprinting.org/printers.
Regardless of the chosen method, don’t forget to plug the power cord at both ends, to verify that the paper tray is not empty, to connect the printer either directly to your computer, or to the local network, and to turn its power on.
The Debian GNU/Linux desktops include the system-config-printer tool, a simplified graphical manager to add and configure your printer.
If you followed the Debian classic installation procedure, this tool is already present on your system and can be found usually at “System > Print Settings”, or in the Control Centers for Gnome or KDE. If you don’t find it, simply open a terminal and launch:
system-config-printerIf a message indicates that the printing service is not available, it is enough to press the “Start the service” button in the very same message window. You will be asked to enter your password. If this does not improve the situation, chances are that the CUPS package is not installed.
Within a terminal in admin mode, install the CUPS package :
apt update && apt install cupsThen re-boot your system to take into account these modifications.
If everything went well, the printer configuration program then displays this message window when the system-config-printer is launched:
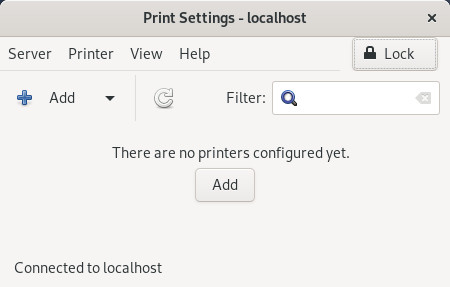
Click on the “Add” button to get the list of detected printers. If the button is disabled, click on “Unlock”.

Then you access the “New Printer” window which presents the local or network “Detected Devices” list. Select your printer and click the “Forward” button:
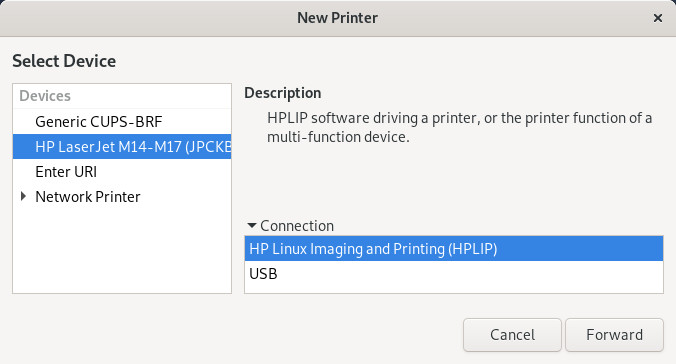
If your printer was correctly detected, its driver has been selected for you. You can describe your printer in the next window. Once you are done with the modifications click on the “Apply” button:
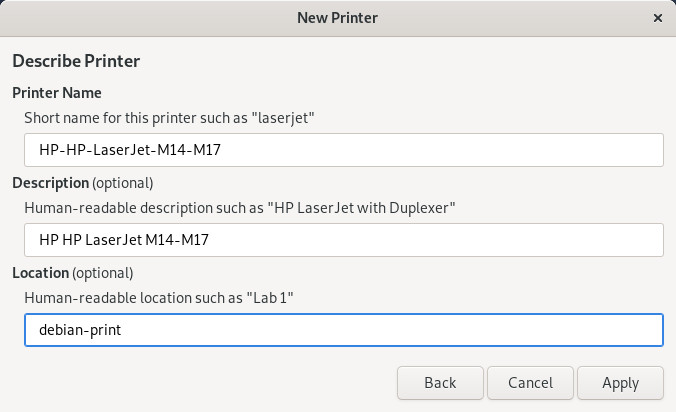
The installer then ask you if you want to test the printer:
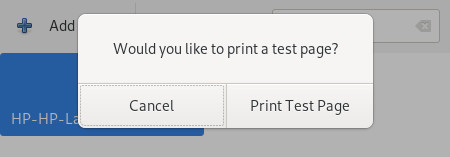
The printer is now correctly added to your machine. It is available for the printing tasks executed by any of the installed applications on your system (LibreOffice, Evince (for pdf files), etc.).
To change your printer settings, double-click on its icon:
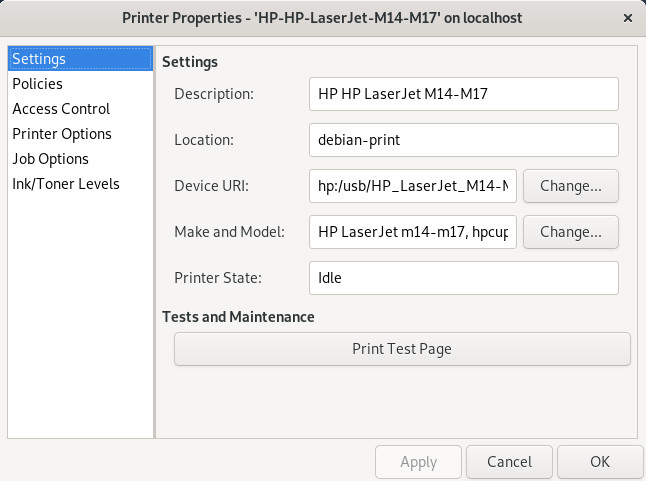
Small hint: to change the printer behavior in case of error, go to your printer settings, click on the “Policies” category, and select the “Abort job” option (instead of “Stop printer”) in the “Error policy” field.
The simplified interface is handy, but the classic CUPS interface is no longer as austere as it used to be. You can access it from your Internet navigator since CUPS is a print server offering a web interface.
So let’s meet on the page http://localhost:631/printers/ which displays all the detected printers (don’t forget to connect your printer either directly to your computer, or to the local network, and to turn its power on).
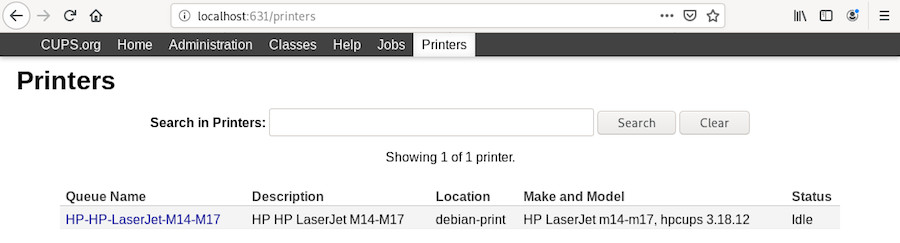
A left-click on your printer opens the dedicated page:
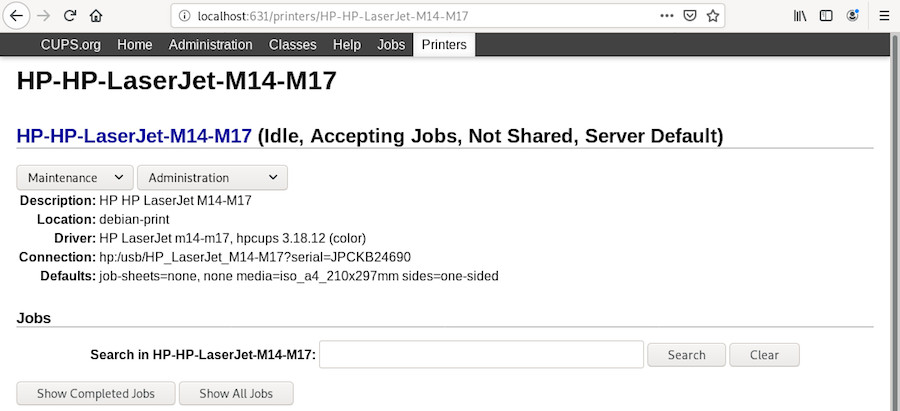
which includes the “Maintenance” and “Administration” menus. Depending on the selected operations, the administrator password will be requested. (chap.3.8.3).
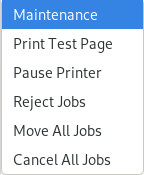
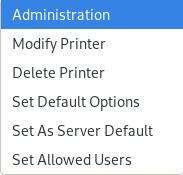
More information of the Debian SystemPrinting Wiki: https://wiki.debian.org/SystemPrinting.

Debian updates have nothing to do with Windows’ updates…
The GNU/Linux system updates are the direct evidence of one of the free software strengths: the public sources.
As opposed to the proprietary systems, hiding their software flaws (since they sell it) as long as possible, the free distributions publish their software flaws as soon as they are discovered and fix them immediately.
So, when a small window suddenly pops up and invite you to update your system, say yes, of course, and your computer will thank you a all lot.
The terminal, this little box which frightens you so much, whereas it is actually your friend … yes, yes … your friend.
You want a proof ? Easy: we are going to update the entire system using just one line.
You start by opening a terminal window (usually under the menu “System” of your environment).
If during the Debian install, both the “root” account and a “normal” user account (for the common use of the system) were created, you have to use the command “su -” in order to execute a command in administrator mode, when the session was open by the “normal” user. The super-user password is then requested.
user@debian-pc:~$ su -
Password :
root@debian-pc:~# apt update && apt full-upgrade
On the other end, if during the Debian install, the super-user account was disabled (no password was entered) , the “normal” user has the opportunity to gain the super-user privileges by using the “sudo” command. When using sudo, your own password is requested.
user@debian-pc:~$ sudo apt update && sudo apt full-upgrade
Password :
… wait a minute, what does that mean exactly?
The GNU/Linux desktops use Software or the Synaptic package manager on the Gnome, Xfce and LXDE interfaces, or Discover on the KDE interface, and both tools include a notification function.
Thus, your system checks the repositories on a regular basis (when the network is available, of course), without even bothering you, and displays a notification at the beginning of a new session when some updates are available. It is enough to accept the updates, or to click on the notification bubble opening up, to display the update manager tool integrated in your system.
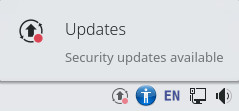
If you want to manually check for available updates, you can use the terminal and the magic command apt update in administrator mode:
user@debian:~$ su -
Password :
root@debian:~# apt update
If you have an online messaging service like gmail.com or free.fr, you can access it from your Firefox web browser (launches from the application menus in the “Internet” section). Enter the address of your online account provider (openmailbox.org, yahoo.fr, orange.fr, google.com …) in the address bar and launch it by pressing [Enter].
If you do not have an e-mail account, or if you want to create a new e-mail account, we recommend that you use one of the services that respect your privacy. For example:
If you want to use a local e-mail client, a dedicated software, Debian offers several tools, but all working on the same model: Gnome uses “Evolution”, KDE includes “KMail” and Xfce integrates Thunderbird.
Thunderbird (https://www.mozilla.org/fr/thunderbird/) is primarily an emailer, but it is also a communication hub that allows you to read and write within newsgroups, chat with others (discussion group), and read RSS feeds provided by some websites.
If you have two or more email accounts, it might not be very practical to access each of them using the browser! Thunderbird is an application that brings together all the mail boxes of all your email accounts, in one single convenient interface.
To open Thunderbird, from an application list or a menu, select the “Mail client” from the “Internet” category.
At first startup, Thunderbird provides temporary configuration interface and a foreground window that allows you to create an account with two suppliers and partners.
If you want to take advantage of this option, fill the fields in and let you be guided, this configuration is automatic.
If you are not interested, you can click on “Skip this step and use my existing address”.
Another window opens. Then provide the requested information about your account. You can choose whether Thunderbird must remember the password. If you leave this option unchecked, you would need to re-enter your password each time you connect.
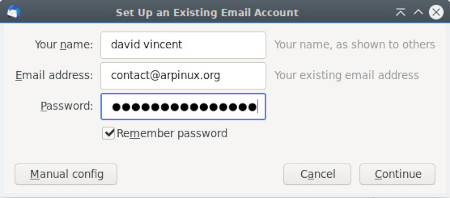
Click on “continue”. Thunderbird then searches in its database the specific parameters for your email account. When finished click on “Done”.
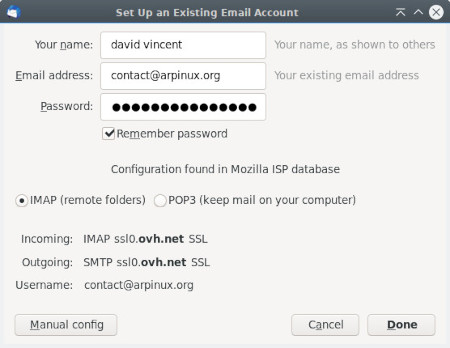
Thunderbird now displays your account details in the right column, starts downloading all your emails and, depending on your provider, all your contacts (this may take sometime).

The Thunderbird interface is relatively intuitive. In the top tool bar you can check your mail, compose a new message, open a chat session, access your address book, put a label on a message, or filter your messages.
At the right of the menu bar you can find the Thunderbird menu, represented by three small horizontal bars, from which you can set your preferences, and launch various actions.
For example if you click on the Message menu (or right-click on a given message), a list of actions is proposed, like Reply, Forward, Archive, Mark as Junk, etc.
The right panel is reserved for the “Lightning” calendar, very intuitive: a click on a date will open the assistant to make new appointments.
If you are looking for a specific message you have several options:
If you have more email accounts you want to access via Thunderbird, click on the main menu (the three small horizontal bars at the right of the tool bar) and select “New Message” > “Existing Mail Account …” and continue the Mail Account Setup procedure like explained above.
In the modern presentation of Thunderbird (as well as other communication tools like Firefox and Chromium, for example) the application menu is defined by three small horizontal bars (sometime called “burger menu”) at the top right of the window. From this menu you have access to the various parameters of the application.
If you prefer the classic presentation, with the menu bar at the top of the window, click on this Thunderbird menu, then on “Preferences” and tick the “Menu Bar” on.
It is advisable to visit the Preferences setting window, where you can define the handling of junk mails, define a master password for all your account, customize your tag list, among all the settings available in there.
… Encrypt your e-mails … what does that mean?
Let us take the example of the regular mail, sent via post-mail. You send a postcard to your mother-in-law for example, you know that what is written on it can be read by the postman or anyone else. Well, with your e-mails, it’s exactly like the postcard, if you do not encrypt them.
“Does not matter” you say, “I don’t care if someone knows that I wrote to my mother-in-law that the weather is fine during our vacations”. Perhaps. But you can write more than just mundane wordings in your messages, and you never know what can happen to them. You are not convinced? I ask you to reconsider if you really have nothing to hide by visiting this page on the FSF website: https://emailselfdefense.fsf.org.

To effectively protect your electronic exchanges, use EnigMail!: https://emailselfdefense.fsf.org.
GNU/Linux systems follow the principle of rights and permissions by default. When you install Debian, a password is requested for the primary user. This password is requested at the beginning of the session.
If you are using Debian in single-user mode, you can disable this password request in order to begin your working session directly when the computer is started.
Debian uses three different default connection managers: GDM (on Gnome & Cinnamon), LightDM (on MATE, LXDE & Xfce) and SDDM (on KDE).
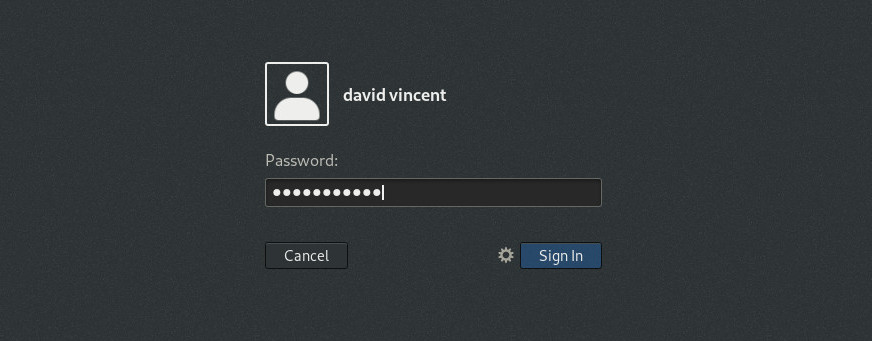
GDM3 (https://wiki.debian.org/GDM) is the Gnome Display Manager for the main desktop environment on Debian 10 “Buster”. To enable automatic login:
From the system widget, click on your nickname then “Account settings”:
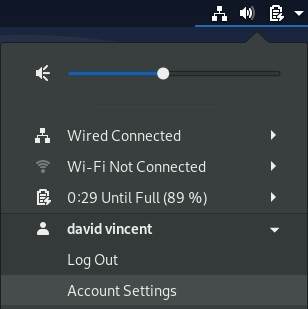
Unlock the application, the administrative password will be asked.
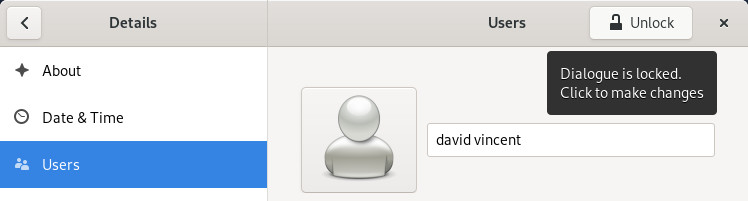
Activate the automatic login:

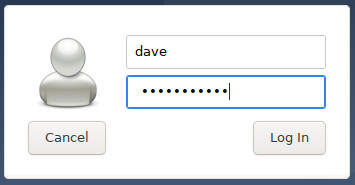
You can setup LightDM (https://wiki.debian.org/LightDM) by editing its main configuration file. To enable autologin, you’ll have to edit it with a terminal. Open a terminal and become root with the “su” command (chap.3.8.3). The administrator password will be asked. Once connected to a root terminal, copy (to backup) and edit the dedicated file with this 2 commands:
cp /etc/lightdm/lightdm.conf /etc/lightdm/lightdm.conf.bak
nano /etc/lightdm/lightdm.conf
The second command opens the configuration file in the CLI Nano editor. Use arrows to scroll and locate those lines:
#autologin-user=
#autologin-user-timeout=0
Remove the “#” (uncomment) in front of each line then add your login like this:
autologin-user=my_login
autologin-user-timeout=0
Where “my_login” should be replaced by your login.
Save the file with the [Ctrl]+x shortcut, then answer “Y” for “yes”:
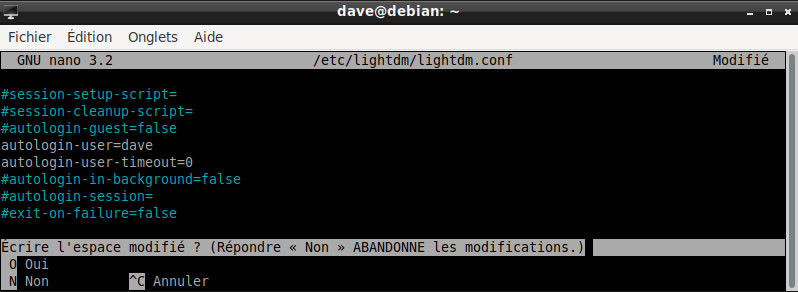
You can close your terminal: your password won’t be asked anymore at login time.
In case of troubles, just enter this command in administrator mode to restore your previous LightDM configuration:
mv -f /etc/lightdm/lightdm.conf.bak /etc/lightdm/lightdm.conf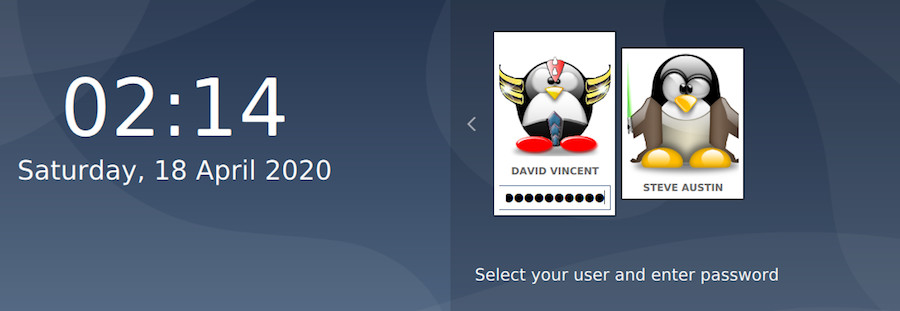
KDE is a truly complete environment and SDDM (Simple Desktop Display Manager) provides you with a graphical interface to configure your login screen. The configuration tool will allow you to manage the wallpaper, the language used, some options and of course, the automatic login.
To access the SDDM configuration, direction the main menu > Applications > Settings > System Settings > Startup and Shutdown:
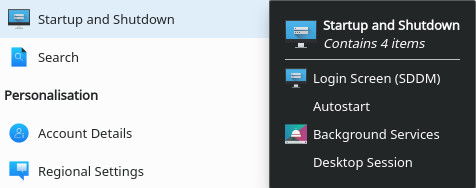
Enable automatic login from the “Advanced” tab of the SDDM configuration interface:
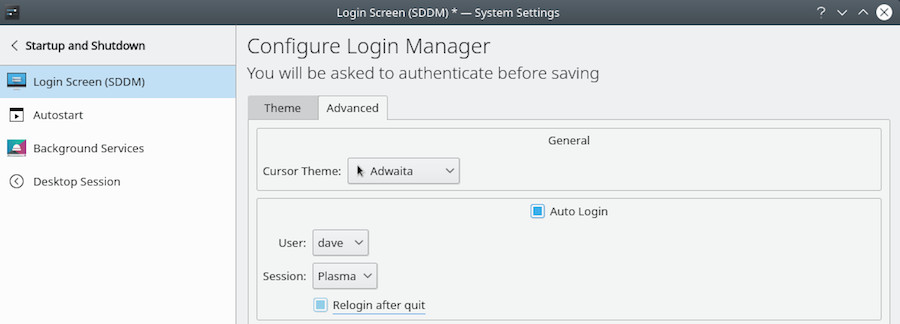
Select the “Automatic login” checkbox together with the user ID from the “User” drop-down menu. As this action changes the system settings, you will be prompted for the administrator password. On the next login, your password won’t be asked.
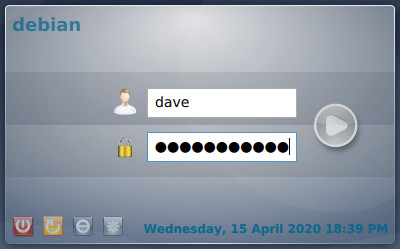
LXQt uses sddm as KDE but does not offer a graphical configuration interface. To open your LXQt session without a password, you must go through the terminal and edit the configuration file sddm.conf.
Start by creating the configuration files then edit it with nano within a terminal console in administrator mode (chap.3.8.3):
sddm --example-config > /etc/sddm.conf && nano /etc/sddm.confFill in the file by indicating the name of the session (“lxqt.desktop”) and the identifier of the user who will benefit from the automatic connection:
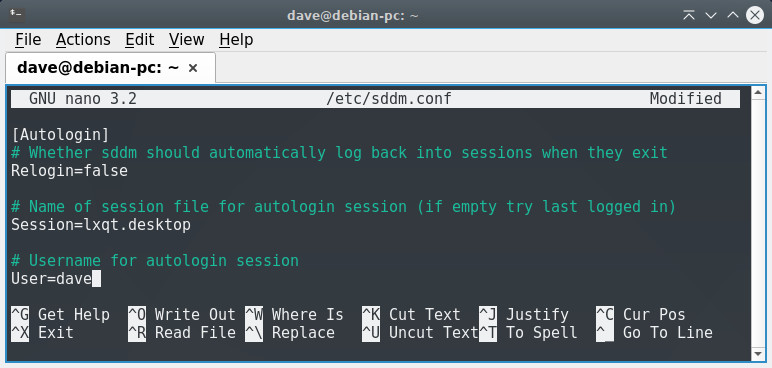
Save the file using the keys [Ctrl]+x then choose “Y” to confirm the name of the file. Upon restart, you will take advantage of the automatic connection.

The primary function of a web browser is to let you consult information available on the Web (World Wide Web).
The user gives the browser the web address of the resource to consult. There are three ways to provide a web address:
The browser connects to the web server hosting the target resource. The communication protocol commonly used is HTTP or HTTPS (its secure version).
Firefox (https://www.mozilla.org/en-US/firefox/desktop/) is an open and free web browser, developed and distributed by the Mozilla Foundation (https://www.mozilla.org) with the help of thousands of volunteers using the free software/open source development methodology (according to wikipedia).
Debian integrates Firefox-ESR, the “Extended Support Release” version, aimed at large organizations (and small ones) for mass deployments. This version is maintained for 10 months from its release date and only benefits from security updates, ensuring a stable and secure browser.
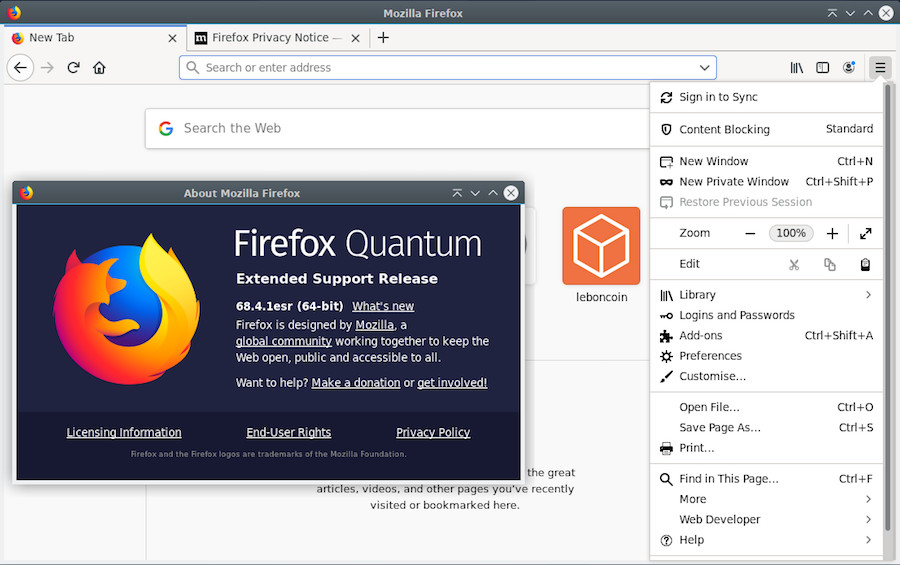
The main window consists of the following elements (from top to bottom):
Customize and configure Firefox through its main menu that appears when clicking on the “burger” icon (at the right end of the tool bar):
To add new features to your Firefox browser, navigate to Preferences > Add-ons. In the tab that opens, select “Get Add-ons” and choose from the available modules (https://addons.mozilla.org/fr/firefox/extensions/).
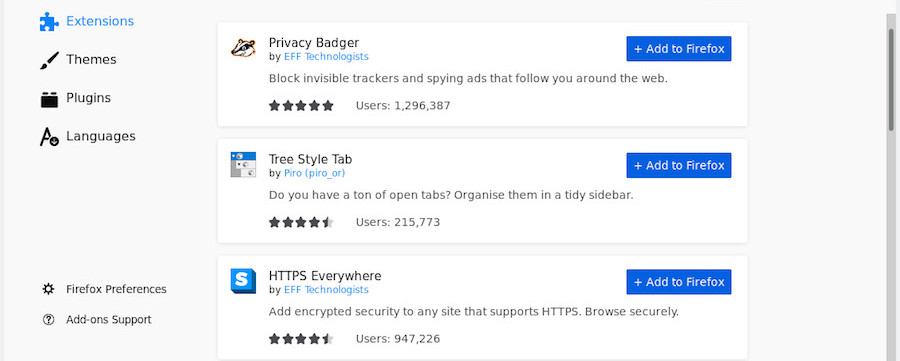
Adobe Flash Player is a non-free platform used to add animation, video, and interactivity to Web pages. Flash is frequently used for advertisements and games.
Be aware that the current trend for site developers is to move away from Flash in favor of HTML5 (https://en.wikipedia.org/wiki/HTML5), thus it is more and more easy to survive on the Internet without the proprietary FlashPlayer.
This manual being intended for beginners, we are not going to ask you to remove all the bookmarks pointing to sites still using the flash reader (although that could help making a faster transition), so we will detail below how to install the flash player from the Adobe website. Start by visiting the official download page (https://get.adobe.com) which should automatically detect your architecture and your browser. Select the “linux tar gz” archive in the menu:
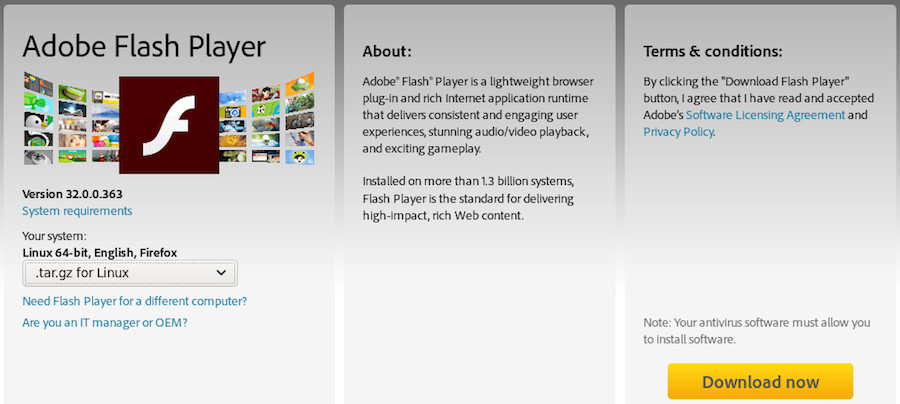
To update your flash player, retrieve the latest version in the same way, and overwrite the old file with the new one, simply.

Once your system is installed (or in Live session), a double-click on a video file will open it with the default player of your DE. For Gnome or Cinnamon, it is the “Videos” player (Totem) which is automatically launched when double-clicking on a video:
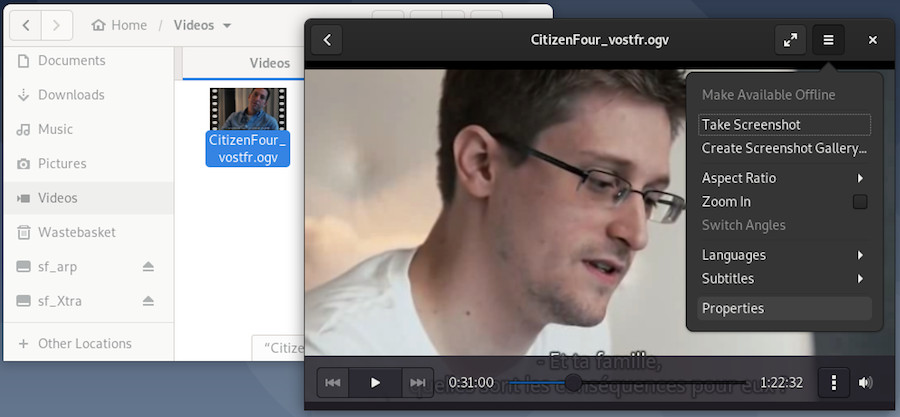
Its use is very simple and intuitive. At the slightest movement of the pointer, the playback menu is displayed and allows you to browse the video file, set loop playback (the vertical bar formed by 3 points) or adjust the volume. The main menu gives you access to other functions.
Each DE integrates its own player, all featuring the same basic functions, largely enough for a first use of a Debian system.
As usual on Debian, you can add the multimedia software of your choice. I’ll let you visit the list of applications available on the Debian wiki (https://wiki.debian.org/Multimedia).
The Xfce desktop comes with a multi-platform media player widely used by Windows®: VLC (https://www.videolan.org/vlc/), a way to get started on Debian without changing your habits.
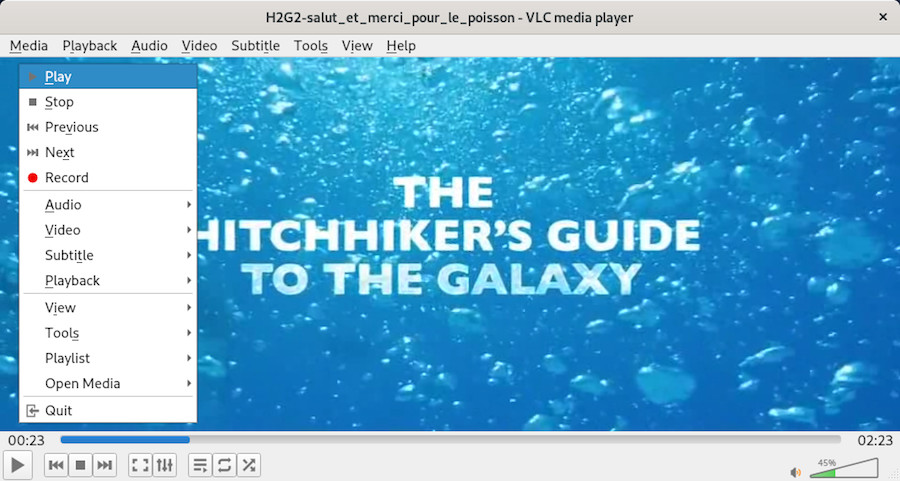
VLC is a free media player and a system capable of playing most multimedia files as well as DVDs, Audio CDs, VCDs, and various broadcasted protocols.

Debian GNU/Linux comes with a media player for each DE. Some allow the management of a large music collection, including sort management, play lists, cover artwork, etc (such as Amarok or Rhythmbox described in the following section), others are simple, lightweight and easy to master (Such as Audacious http://audacious-media-player.org/ or XMMS https://xmms2.org/wiki/Main_Page).
Wikipedia is my friend …
An audio file format is a file format for storing digital audio data on a computer system. The bit layout of the audio data (excluding metadata) is called the audio coding format and can be uncompressed, or compressed to reduce the file size, often using lossy compression. The industry has produced many formats for either production or distribution.
The program element which transforms the signal into a file and the file back into a signal is called a codec (https://wikipedia.org/wiki/Codec), an abbreviation for coder-decoder.
Debian recognizes (among other things) the 4 main default formats (mp3, ogg, flac, wav). If you need to install codecs or non-free audio software, you will need to modify your repositories (chap.8.1.4) to add the “contrib” and “non-free” sections.
Rhythmbox (https://wiki.gnome.org/Apps/Rhythmbox) is the default music player in the Gnome environment, which allows you to play and organize your music collection.
Here are its main features:
At first launch, Rhythmbox scans your “Music” folder, but you can add more folders to your music library.
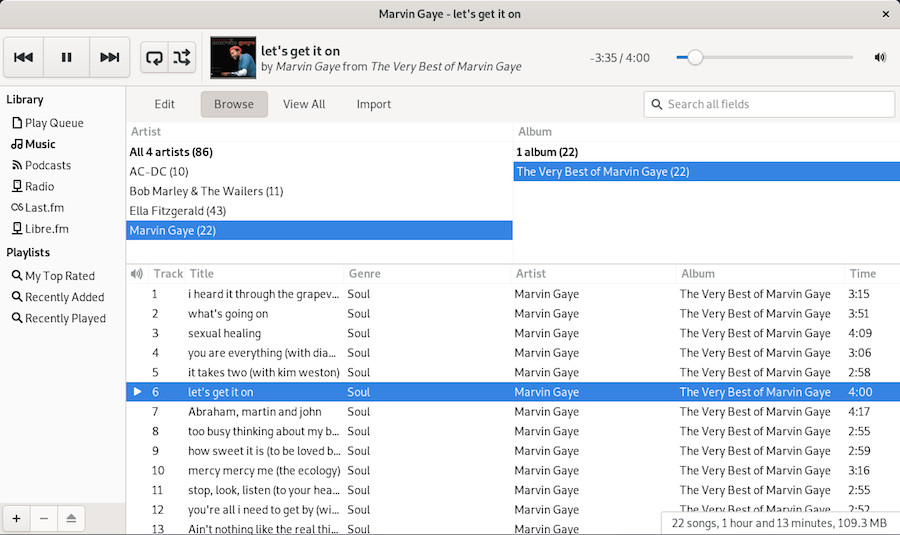
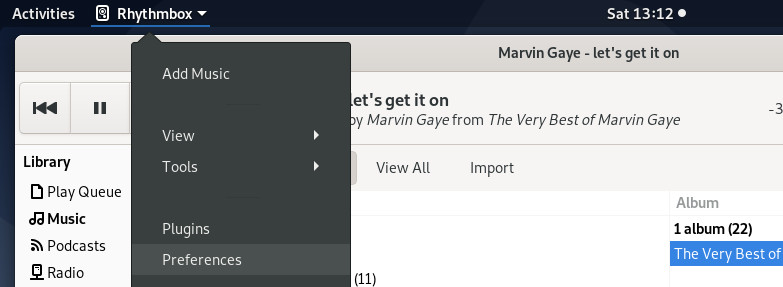
Rhythmbox integrates a complete preferences and a plugins system that adds functionality to the player.

Being the default audio player of the Gnome desktop, it benefits from a complete integrated help:

The main desktops also have their own dedicated player, which works with the same principle: a music library scanned by the application which then offers you to play a single record or a full “playlists”, options, preferences and plugins.
Let your mouse wander, you do not risk anything: a confirmation will be asked for each action involving the modification or the deletion of your musical files.

Debian integrates by default the full office suite LibreOffice which allows you to work on documents using any kind of format coming from different office suites.
If you don’t need such a comprehensive tool suite, you can use the Abiword (https://packages.debian.org/stretch/abiword) or Gnumeric (https://packages.debian.org/stretch/gnumeric) tools, which are lighter, while maintaining a high level of compatibility.
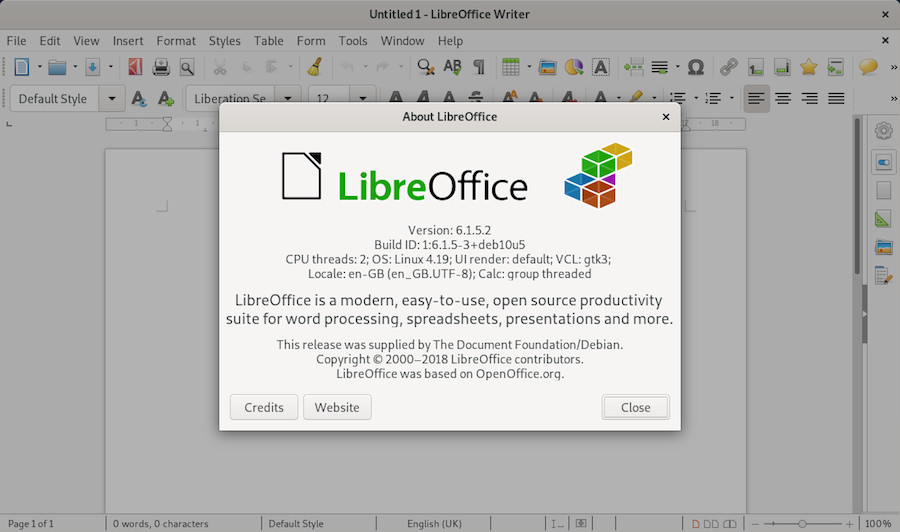
LibreOffice (http://libreoffice.org/) is a free (as in freedom) office suite that offers tools for word processing (Writer), spreadsheet (Calc), presentation (Impress), drawing (Draw), database (Base) and editing mathematical formulas (Math).
LibreOffice is the default office suite for Debian 10 and is integrated within the main desktops during the installation process. There are many possibilities for LibreOffice. The official wiki of the community is very well done and will provide you with an efficient and complete help (no need to reinvent the wheel …): https://wiki.documentfoundation.org/FAQ
Good reading .
Debian includes the graphic edition software the Gimp.
GIMP, standing for GNU Image Manipulation Program, is an image processing software. Often considered as a competitor of Adobe™ photoshop™, it is, at any rate, a safe alternative with basically the same feature set, and on top of it, it is free!
Available for a whole range of OS, it runs obviously on Linux, MacOsX, BSD and Windows®.
There are already very good documentation concerning The GIMP, and this page was written only to gather, in few lines, the most basic hints, without having to browse through dozens of sites hoping to find its happiness.
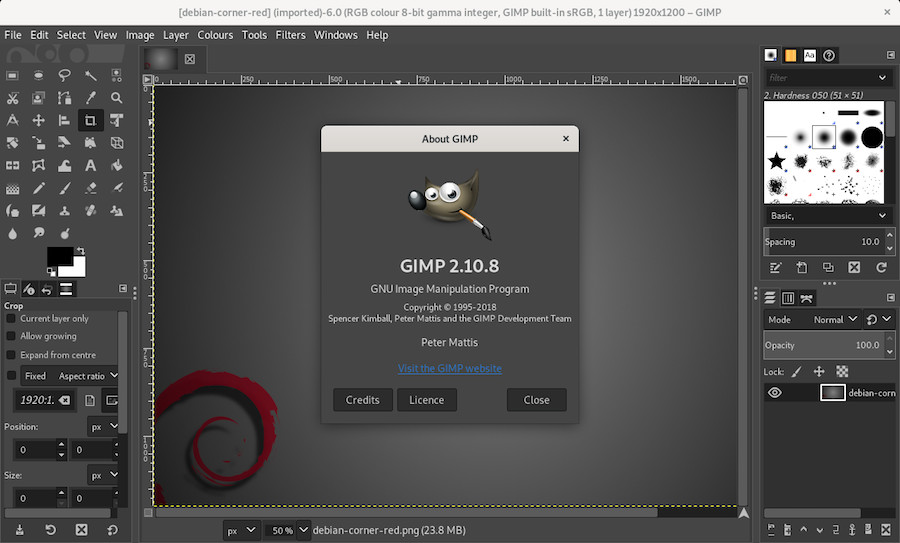
The main window pops up and unveils … lots of tools to have fun with …
The tools box (top left) - The tools options (bottom left) - The Gimp menu bar (top center) - The active picture (centered) - The tabs displaying the tools data(top right) and the layers (bottom right).
By default, the first tab displays the active layers in the image.
… What do those “layers” exactly mean??
Gimp uses the principle of layers, ie the superimposition of images for a final rendering. It is the same principle as when recording a piece of music: the instruments are all recorded on separate “audio tracks”, and the voices also; then they are “mixed” all together to obtain the final piece of music.
For the layers of Gimp, it is the same principle: you separate the different elements on layers and the final image is assembled and exported in the format of your choice (JPEG, PNG …).
The default format of Gimp is “xcf”, a format that preserves the independence of the different layers and thus enable modifying one element without touching the other layers.
Prepare a folder with a copy of the images to be modified:
It is often said, the backup is your friend and it is also true for image editing. Before working on your project, create a folder where you will place a copy of your original image as well as all the elements you want to add (other images to process, modify, your graphics resources in short).
Record your work regularly in “.xcf” format:
Gimp uses the default “xcf” format to save your project. This format allows to save the layers and therefore, permits a fine modification of your work. To save in xcf format, direction the menu “File”> “Save”. Once your project is finalized, you can export your project in a compressed format (jpeg, png, gif) from the menu bar: “File” > “Export as”.
Have Fun! ![]()
One way to discover the Gimp is to test it, try it, and have fun editing your family pictures … Create a folder to play with Gimp and place your favorite photos or images and start to gimp-it
Tutorials ![]()
The Gimp website provides a large choice of tutorials where you could learn how to start playinf with it: https://www.gimp.org/tutorials/
Print an image
If Gimp prints only white pages, and the preview is desperately showing a blank page too; but you can fix this problem by installing the gimp-gutenprint package in administrator mode (chap.3.8.3):
apt install gimp-gutenprintThen, to print a image, all you have to do is: “File > Print with Gutenprint”. A page is open where you can set up your printer and your desired print layout.
 Tweaking your environment
Do you feel that you took control of your system ? Now we are going to tweak the configuration of your workstation.
Basically, you can modify everything you want on the Debian GNU/Linux desktops and tailor your environment to make it fit your personal needs and tastes.
To achieve this, the right-click is the quasi-ultimate weapon !

The GNU/Linux environments are known for their great flexibility in terms of configuration. However, some desktop are more flexible than others, because of their main interface.
Grossly speaking, they all work the same way: a “Control Center” to handle almost
all parameters in the same place, and the right-click for the settings of individual elements.
Most of the functionalities have been addressed during the presentation of the desktops (chap.4.2). But let’s go back to the two main Debian desktops: Gnome and KDE.
Gnome is the default desktop for the Debian installations. This desktop features an “all-in-one” interface which makes it a fluid and intuitive environment.
Gnome-Shell (https://wiki.debian.org/GnomeShell) provides a “uniform” interface: this is what brings this great fluidity. This means also that you will not be able to modify everything you want, like on the other desktops built with a modular design. But instead of talking about the few things you cannot make, let’s talk about all the settings directly available to you.
Let’s take the direction Gnome Activity menu > “Tweak Tool”.
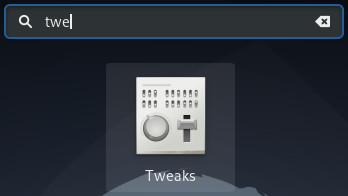
The opening window includes all the elements of your Gnome-Shell desktop. The changes are applied and visible immediately.
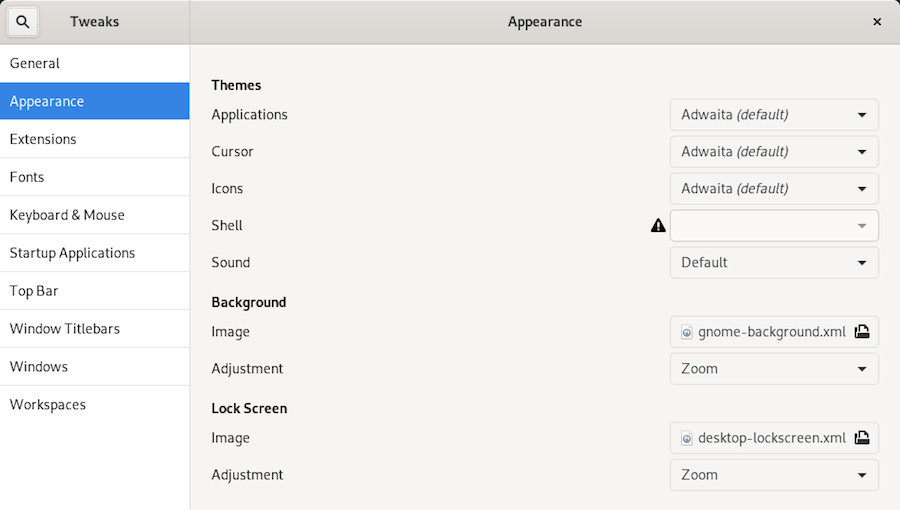
After few “clicks” on the various categories, you will easily understand how to install, in the screen top bar, the Application menu, the Places menu or the weather forecast.
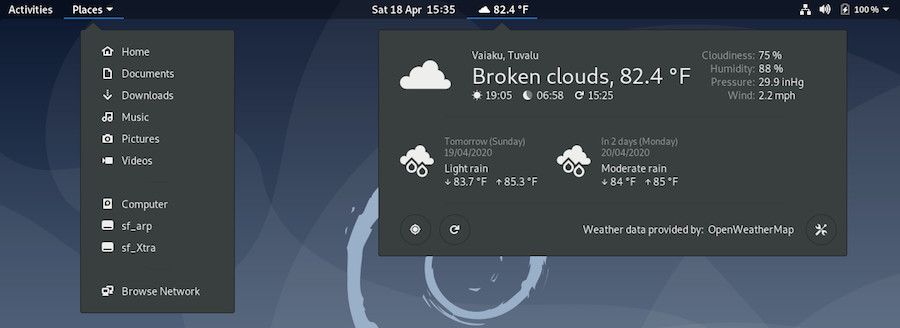
Gnome-Shell can be enhanced with various extensions available in Debian repositories. To install them, run the software manager, category “Add-ons”… simple isn’t it?

Selecting the Add-ons category.
You still have to make your choice in the list: a left click on an extensions and “Software” offers you to install it. You will be asked for confirmation.
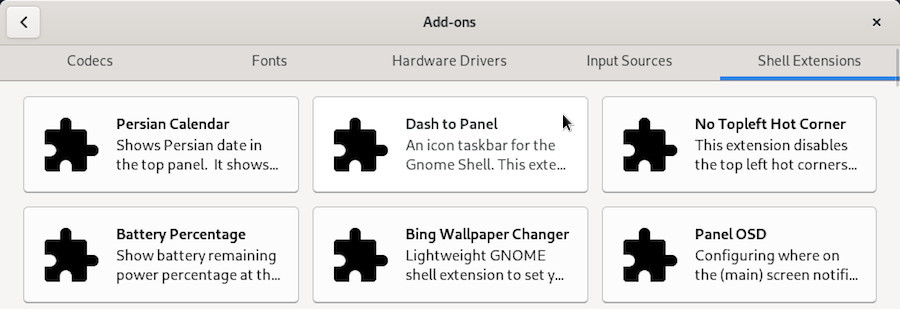
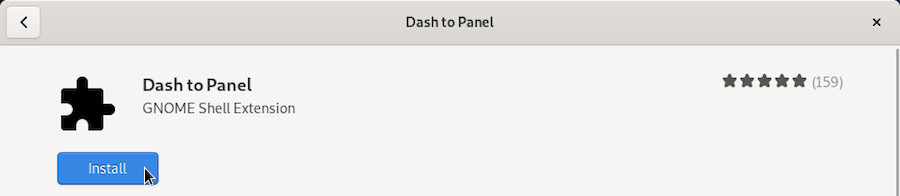
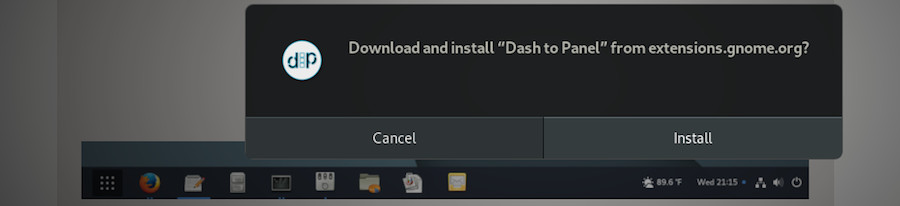
Your extension is immediately accessible, here with the extension “Dash to Panel”, which allows the replacement of the activity overview dock and the top bar, by a panel equivalent to the task bar under the Xfce environment:

In order to be more efficient, and even if Debian is “mouse-click-oriented”, we suggest you use the keyboard shortcuts: pressing the “Windows” key, for example, switch between the Activities overview and desktop. The overview displays the open activities, the dock and the virtual workspaces.
| Shortcuts | Actions |
|---|---|
| Alt + F1 or Win | Open/Close the Activities overview |
| Ctrl + Alt + Tab | Give the keyboard focus to the top bar |
| Alt + F2 | Pop up command window |
| Alt + Tab | Quickly switch between windows |
| Alt + Maj + Tab | The same, but in reverse order |
| Alt + ² | Switch between windows from the same group |
| Ctrl + Alt + ↑/↓ | Switch between workspaces |
| Ctrl + Alt + Maj + ↑/↓ | Move the current window to a different workspace |
The main “Gnome Settings” tool is available from the Parameter launcher and gives you access to all your environment settings.

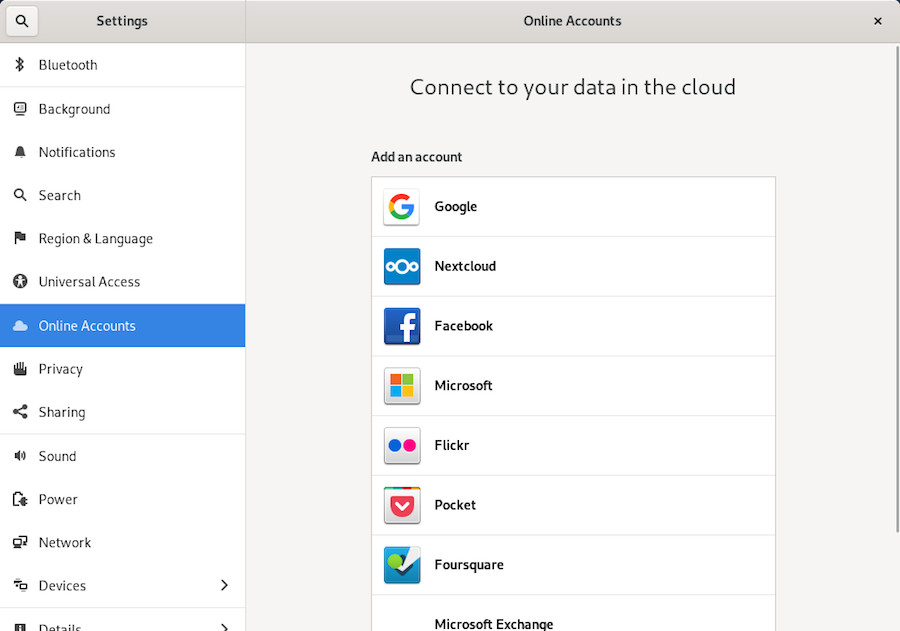
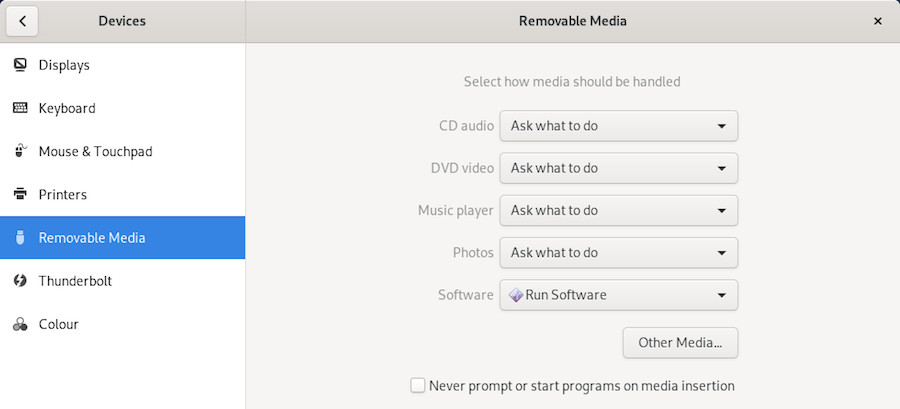
Each entry opens a sub-menu which allows you to make your changes, then returns to the main menu to continue the customization of your environment.
If you want to use a more “classical” interface, you can take this option during your session sign in: click on the little gearwheel to select the “Gnome Classic” option before clicking on the “Sign In” button:
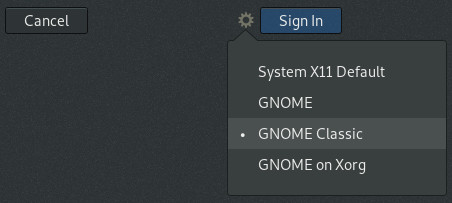
Your session then opens with a more conventional version of Gnome, but you keep your main settings and your tools.
The “Classical” interface is lighter, but offers less visual effects (usefull or useless, depending on the view point).
In order to come back to the default Gnome-Shell interface, select the “Gnome” option of the gearwheel menu, next time you Sign In.
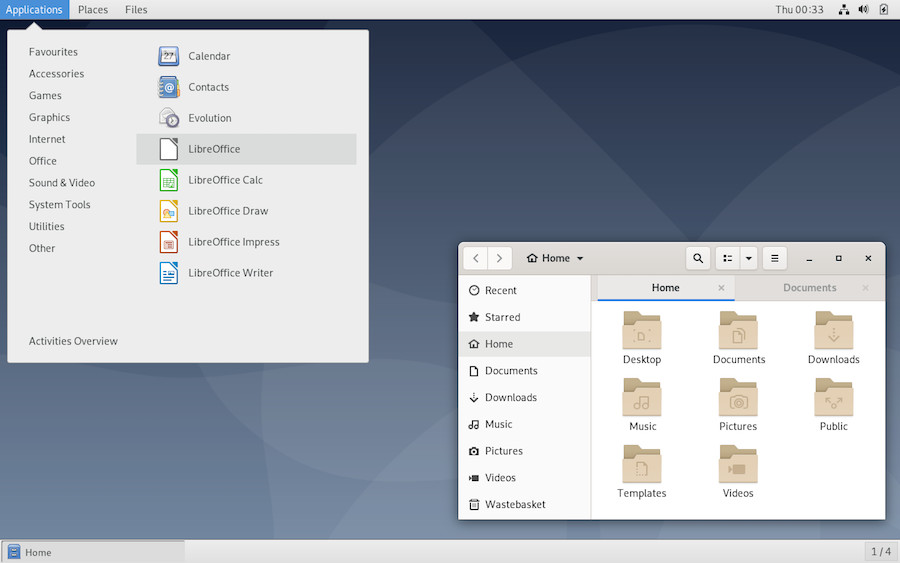
KDE is a historic desktop among various the GNU/Linux environments, which has always put the emphasis on its extreme customization. The transition to the Plasma (https://www.kde.org/plasma-desktop) rendering engine did not change a bit on that point: everything in KDE is modular, movable, configurable, and accessible from a very detailed System Setting Center.
KDE allows you to build your environment from A to Z, down to the last detail. Some would argue that it is (too) complete, and we cannot hide that there is a small rivalry between KDE users and those using The Gnome environment.
In any case, these different environments have a distinct advantage: they offer you the opportunity of a choice!
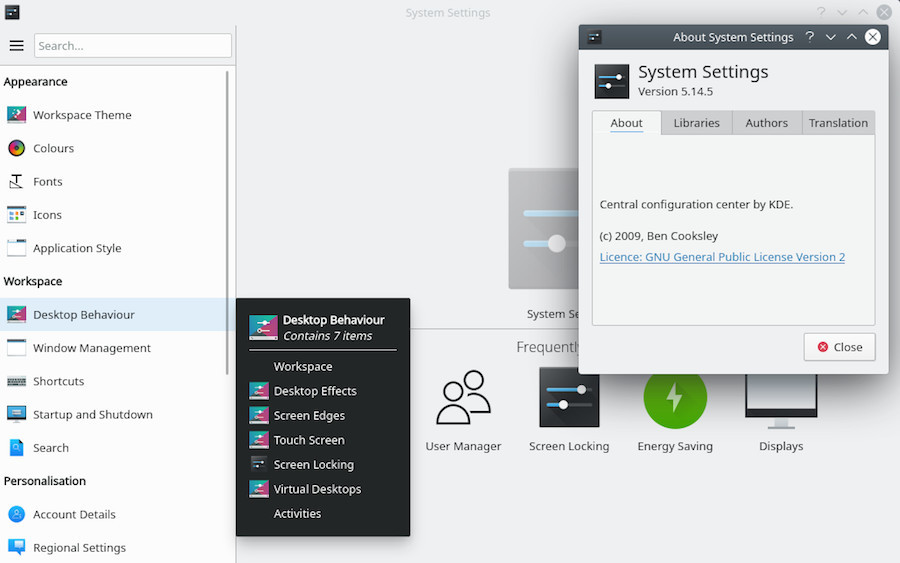
This is where you are going to tweak all your computer and Debian system settings.
Network, audio, video, window appearances, default language, as well as the way you sign in, and a lot more … Virtually everything is configurable from this panel. Even some desktop special effects integrated in KDE, in Compiz style, can be managed from here.
Each entry is detailed and you will discover as you go along, the configuration possibilities of the KDE-Plasma environment.
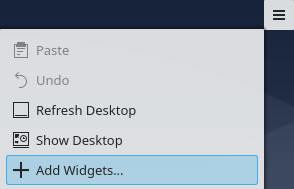
Plasma allows you to add graphic components to your desktop, sort of small ‘widgets’ that display virtually anything on your desktop. From the launcher at the top right corner or by right-clicking on the desktop, select “Add Widgets” and then drag and drop the desired components to your desktop.
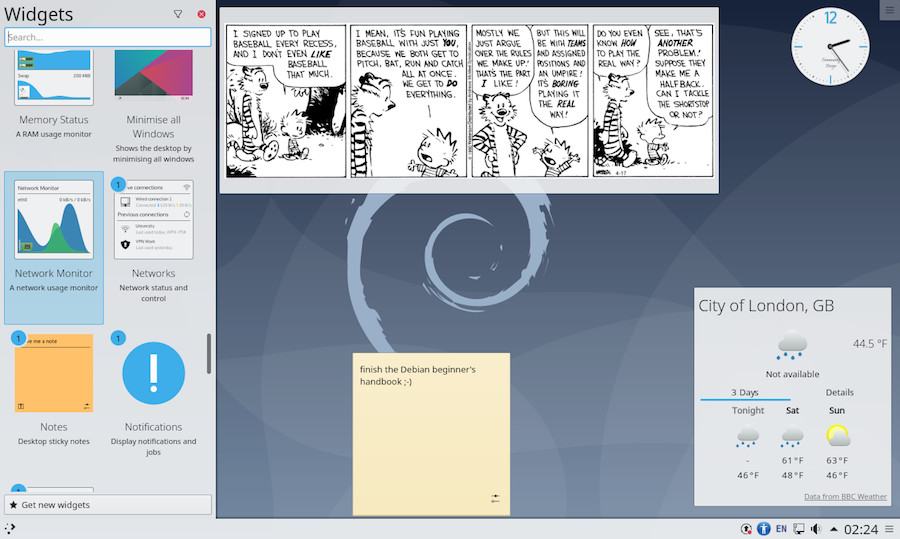
To configure the widgets, left-click on the relevant component to bring up its configuration menu. You can then adjust the component, move it or resize it to your liking.

The Activity manager let you organize your tasks and keep an eye on them. To access it, left-click on the top-right corner menu or right-click on the desktop:
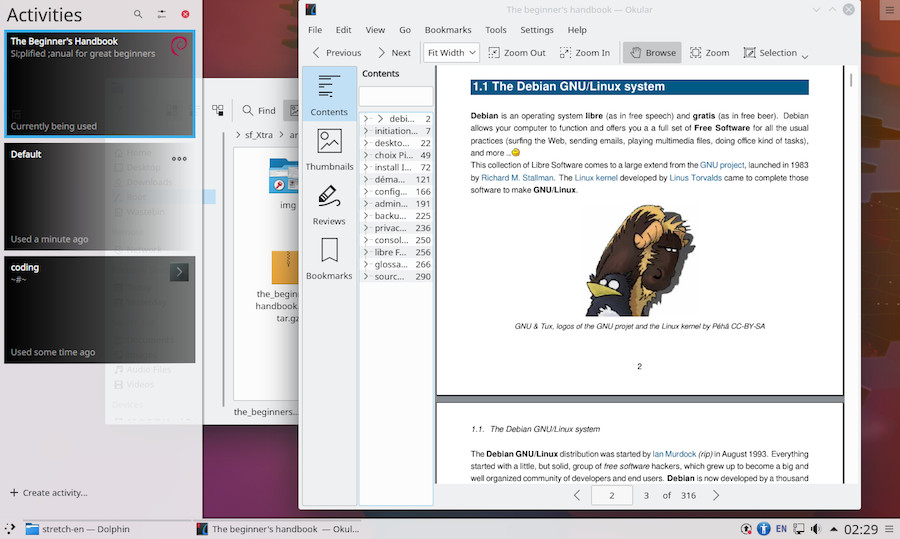
The activity banner will then appear at the left of the screen and display the current and pending activities. Each activity can be configured to separate your tasks and associate certain settings: you can associate each activity with its own wallpaper, widgets, but also some fine tuned settings like deleting the browsing history, for example.
This organization is similar to the “virtual desktops” presented at the beginning of the manual (chap.3.4).
KDE is an environment with multiple possibilities. I invite you to look at their website, and more particularly the tutorials page, which is teeming with information: https://userbase.kde.org/Tutorials.

The configuration of your system directly impact you user experience. Instead of writing a complete chapter about the different ethical and technical concepts which led to the Debian software organization, we are going to examine their consequences on your daily usage.
In the rest of this chapter, you might be asked to activate the “contrib” and/or “non-free” sections of the Debian repositories, in order to access some “less-free” software. In that case, follow the method documented in the chapter 8.1.4.
During the installation, Debian ask you to enter the password for the “root” administrator account. This account is common to all the GNU/Linux systems and allows to execute administrative tasks on the system.
However, this account is not mandatory. During the installation process, you can pass over the “root” account configuration (by leaving empty the root password fields), and doing so, avoid its creation.
In this case, this is the first user registered during the installation who will assume the “root” role.
OK… and then?
Then, this changes the way you launch commands to administrate the system: in this manual, every time we ask you to execute a command in “root” mode, we use the “su” command. But if the “root” account was not created, you must use instead the “sudo” command, which promotes you as “root”, and type your own password.
In a nutshell to launch an administrative command:
If the “root” account was created, use “su” + administrator password + command launch:
su
> asking administrative password
apt update && apt upgrade
> command execution
If the “root” account was NOT created, use “sudo + command” + your user password:
sudo apt update && sudo apt upgrade
> asking first user password
> command executionThe DVDs sold commercially are “copy protected” and usually are not readable by default on free systems.
The Entertaining Companies consider that we do not have the right, on a free system, to make a private copy of the DVDs we bought … no comment.
To remedy that, if you really need this functionality, you must install the libdvdcss2 package. This package is not present by default in the Debian repositories, but can be easily installed via the libdvd-pkg. To install libdvd-pkg, remember to activate the “contrib” repository. Within a terminal in admin mode:
sudo apt install libdvd-pkg && dpkg-reconfigure libdvd-pkgYour Debian GNU/Linux system is now able to read the “protected” commercial DVDs, and to make private copies of them.
The Debian GNU/Linux system includes free drivers and some firmware in order to operate the integrated graphical functions (chipsets) of the motherboard or the external graphical card.
… I need a driver to manage the card of my mother ??
Your computer is designed around its “motherboard”, a plastic board on which the various elements of the processor (the central compute unit) are fixed, as well as the chipset, the graphical component being part of them (the graphical display computer, to make a long story short).
In order to send the right instructions to these elements the GNU/Linux kernel (the program managing the interactions between the hardware and the the system) uses pieces of code, called drivers (and sometimes also “firmware” to be loaded on smart devices during the initialization phase). The Linux kernel includes by default a set of free drivers. These drivers are usually sufficient to manage the screen display. But it may happen that proprietary drivers are still needed, for example to optimize the screen resolution.
You can try to install these proprietary drivers if, during a live session or once your system is installed, you find out that:
Please note that installing proprietary drivers is a non-free alternative, and as such, not followed by the Debian developers. If your computer is very recent, don’t hesitate to ask the support of the community before tinkering with your system (chap.1.2).
The first thing to do is to identify your graphic device (or graphic card). Open a terminal as simple user, and enter the following command:
lspci | egrep "3D|Display|VGA"which will display this kind of result for a nVidia controller:
01:00.0 VGA compatible controller: NVIDIA Corporation G96GLM [Quadro FX 770M] (rev a1)or this kind of result for an ATI controller:
01:00.0 VGA compatible controller [0300]: Advanced Micro Devices, Inc. [AMD/ATI] Barts PRO [Radeon HD 6850] [1002:6739]As you can see the identification is rather easy … we got the manufacturer and the model on the same line: “NVIDIA Quadro FX 770M” or “AMD ATI Radeon HD 6850”.
Should you have the slightest doubt concerning the installation of additional drivers, don’t hesitate to ask the Free Community for help (chap.1.2).
In all cases, and before the installation of any proprietary driver, you should add the non-free firmware delivered by Debian. To add the Debian non-free firmware to your system, start with modifying your repositories (chap.8.1.4) by adding the contrib and non-free sections to your sources.
Open a terminal in administrative mode (see chap.3.8.3) with the “su” command (the administrator password is requested), then launch the command:
apt edit-sourcesModify the sources.list file by adding the contrib and non-free section, like this:
deb https://deb.debian.org/debian/ buster main contrib non-free
deb http://deb.debian.org/debian/ buster-updates main contrib non-free
deb http://security.debian.org/debian-security/ buster/updates main contrib non-free
Save your modifications with [Ctrl]+x in the Nano text editor, then “Y” for “Yes”.
Reload the repository information, and install the non-free firmware:
apt update && apt install firmware-linux firmware-linux-nonfreeRestart your machine to test again your screen display before installing the proprietary drivers.
If no real improvement is noticed, continue with the following sections … The sources.list file is already set for the next steps.
ATI driver
This is the “generic” driver to install if your card is not listed in the specific sections (Radeon, Catalyst). To install it from an administrator terminal (chap.3.8.3):
apt install libgl1-mesa-dri xserver-xorg-video-atiRestart your computer to load the microcode (firmware) of the graphic peripheral.
Radeon driver
the Radeon driver of Debian 10 “Buster”, supports the graphic processors from R100 to Hawaii (Radeon 7000 - Radeon R9 290). See the Radeon package page https://packages.debian.org/stretch/xserver-xorg-video-radeon to verify your card.
To install it within an administrator terminal (chap.3.8.3):
apt install libgl1-mesa-dri xserver-xorg-video-radeonRestart your computer to load the microcode (firmware) of the graphic peripheral.
For non-supported cards here and for more information, visit the official Debian documentation: https://wiki.debian.org/AtiHowTo.
Debian uses a software tool to detect and indicate the driver to be installed: nvidia-detect.
To install and use it, open a terminal in administrator mode (chap.3.8.3), then launch:
apt update && apt install nvidia-detectTo launch the detection, simply launch the command:
nvidia-detectwhich will return this kind of result:
Detected NVIDIA GPUs:
01:00.0 VGA compatible controller [0300]: NVIDIA Corporation G96GLM [Quadro FX 770M] [10de:065c] (rev a1)
Your card is supported by the default drivers and legacy driver series 304.
It is recommended to install the
    nvidia-driver
package.
In this example, the card is natively supported by the default driver and by the “legacy series 304” driver. Depending on your machine, you can install two types of drivers: the 340.xx series (for the GeForce 8x and more) and the 304.xx series (for the GeForce 6x and 7x). Older models are supported natively by the free driver.
For a complete list of the supported cards, visit the dedicated documentation: 340.xx series page (http://us.download.nvidia.com/XFree86/Linux-x86_64/340.65/README/supportedchips.html) - 304.xx series page (http://us.download.nvidia.com/XFree86/Linux-x86/304.125/README/supportedchips.html)
For details on the installation procedure and supported cards, refer to the official Debian documentation page: https://wiki.debian.org/NvidiaGraphicsDrivers
If, following a driver installation, you are facing a black screen, you need to restore the previous configuration … Undo the modifs.
At the login prompt, you need to type your username and password (likewise a graphic session) and then restart cleanly your computer with the “systemctl reboot” command.
Boot in “recovery mode”: from the Grub loader menu, select the “Advanced options” entry and then the “recovery mode” entry.


The system launches a console and invites you to continue the startup sequence (by using the [Ctrl]+d short-cut to quit the console) or to enter the administrator password for maintenance, and this is what you do:

Recovery mode failed:
If you did not configure a “root” account during installation (chap.3.8.3) recovery mode cannot be activated because it needs the “root” account and its password. You will see this screen:

To solve this problem, just add a “root” account with its password. That’s good, you have the rights to do it, thanks to “sudo”. In your console, log in as a simple user with your password then start creating the “root” password:
user@debian-pc:~$ sudo passwd root
[sudo] Password for user:
You are asked for your password. Then you fill in the new password for “root”:
New password:
Retype the new password:
Abd that’s it, the “root” account is now activated, you can start again the operation and enter “recovery mode”.
Removal of the xorg.conf configuration file: during the installation of the proprietary driver, you created an X configuration file located in /etc/X11/xorg.conf and/or in /etc/X11/xorg.conf.d/xxx.conf. It must be removed. Always within the console and depending on the file created, remove it with the command: “rm”:
rm /etc/X11/xorg.conf.d/20-nvidia.confHere it was the file corresponding to nVidia which was removed, !! to be tailored to your situation !!.
Uninstall the proprietary drivers: the same way you were able to install a driver, you can uninstall it, here after an example with the nVidia driver, !! to be tailored to your situation !!:
apt remove nvidia-kernel-dkms nvidia-driverRestart your computer with a simple systemctl reboot

If you are not the only user of your computer, you can create new user account in order to preserve your own data and preferences. By adding a new user, a new folder will be created in the system. This folder, named by the new user pseudo (login-ID), will receive the default parameters defined during the system installation.
It will be readable by you (you can consult the data of the other user) but not writable (you cannot create or modify its data).
Debian includes a simple graphical tool to execute this task, but you can also use the terminal and the “adduser” command (described in the next section).
Each desktop offers its own tool to add a new user, and it is usually located in the environment “system” menu.
With Gnome-Shell, the default session under Debian, you can go through the system-menu located at the top right of the screen. Select your login-ID to open the drop-down menu, and click on “Account Settings”:
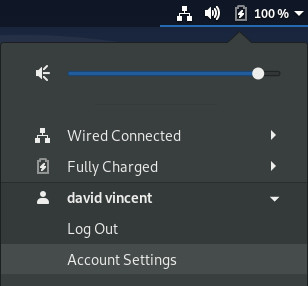
The window which opens, displays the detailed information of your user account. You can then modify the parameters of your account, or create a new account. But you need first to “unlock” the application by clicking on the lock button at the top-right, and enter the administrator password.
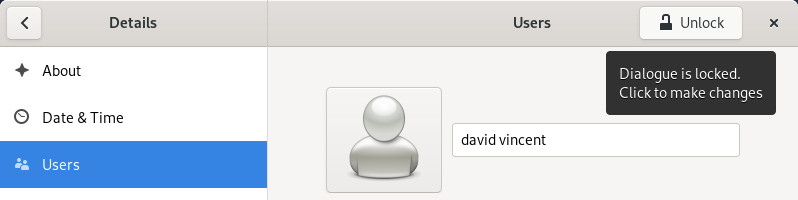
To add a new account, click on “Add user…” button:
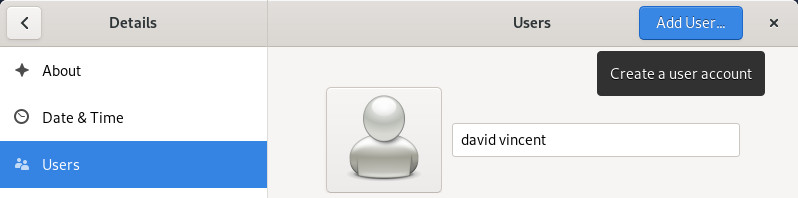
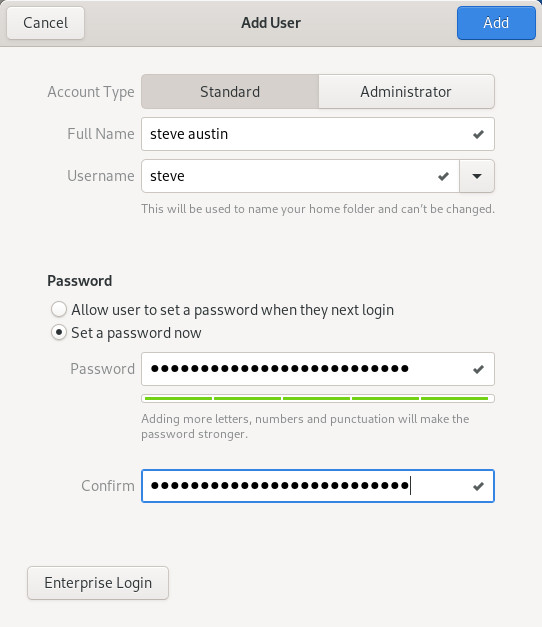
You must enter the full name of this new user, as well as its username (the pseudo or login-ID used when connecting to a new session). On the Gnome system, you can let the user to define its password during the first connection, or enter it immediately. The user account is created … and here you go:
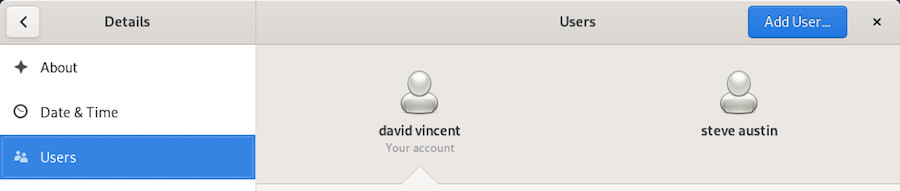
Note that if you have set up an automatic connection for the first user, you will need to “exit the session” or “switch users” in order to log in as the new user.
Open a terminal in administrator mode (see chap.3.8.3) enter the command which creates the new “username” account. Note that you should enter here the login-ID (or pseudo), not the full name which will be asked later on:
root@debian:~# adduser dave
Adding user 'dave' ...
Adding new group 'dave' (1003) ...
Adding new user 'dave' (1003) with group 'dave' ...
Creating home directory '/home/dave' ...
Copying files from '/etc/skel' ...
Enter new UNIX password:
The user account creation process is started and you must enter the password twice (without any echo, its normal).
Once the account is created, we can enter additional information: full name, room number, work phone, home phone, and any comments in the “Other” field.
Once done, a confirmation is requested. If these information are correct you can press [Enter] or Y to finish the account creation process:
Retype new UNIX password:
passwd: password updated successfully
Changing the user information for dave
Enter the new value, or press ENTER for the default
        Full Name []: Dave Melville
        Room Number []:
        Work Phone []:
        Home Phone []:
        Other []:
Is the information correct? [Y/n] Y
This new user will be able to login with its username and password at computer startup. It will be able to store and manage its data and configure its environment without any risks for your own data and preferences.
 System administration
Debian GNU/Linux uses the repository methodology to distribute applications. This methodology allows the software centralization and the usage of simple interfaces to administrate and upgrade your system: you have no need to visit the software sites themselves.
The Internet addresses of the Debian repositories are stored in the /etc/apt/sources.list file, as well as the files of the type /etc/apt/sources.list.d/xxx.list.
To edit and modify your sources.list file, you can use the apt edit-sources command.

Details concerning the various information found in the ‘sources.list’ file (the lines beginning with a “#” are just comments):
… why “buster” and not “stable” since the system is based on Debian Stable ??
“buster” is the precise version name of the installed system. It sets a given version of each packages included in the “buster” repository (the version of the generic kernel, for example).
“stable” is the generic name of the currently stable version.
For the time being, Debian 10 “buster” is the “stable” version, thus you could used either designation. But when the Debian “stable” version becomes Debian 11 “bullseye”, then Debian 10 “buster” attribute will change to “oldstable”.
Using the precise name of your version allows you to control if and when you want to upgrade your system to the next version, as opposed to some systems which want to impose their upgrades…
For more detailed information, I invite you to visit the dedicated Debian wiki https://www.debian.org/releases/index.html
Debian organizes its software packages inside repositories. These repositories are divided into branches and sections/components. To learn more about the “testing” and “unstable” branches read the chapter 8.9. One word, however, about the sections/components inside the repositories.
There are 3 sections in the official Debian repositories:
DFSG (Debian Free Software Guidelines) : philosophical principles of the “libre software” according to Debian ( https://www.debian.org/social_contract.html#guidelines)
Only the packages within the main section/component are officially supported by the Debian project and are 100% free software. Rather, those proposed in contrib and non-free are partially or totally non-free.
Having said that, and depending on your type of hardware, it is very possible that some services won’t function correctly without using some specific (proprietary) drivers. In that case, you need to modify the /etc/apt/sources.list file (details in the following chapter)
Debian offers also some special repositories called backports, which contain more recent versions of some applications. These repositories are not activated by default, but do not present any particular risks for your system: the “regular” repositories have the highest priority during the update process, only the applications installed from the backports will look into these specific repositories.
… what do you mean exactly by “backports” ?
Nothing to do, in fact, with the “backdoors” used to spy on computers running proprietary systems…
The backport is a mechanism allowing an application currently hold in the Debian development repositories, to be ported back to the “stable” version.
For example, the Debian developers take from the development repositories the most recent version of LibreOffice, and re-compile (re-build) the package holding the application, while taking care of all the dependencies existing in the “stable” version.
More details about Backports in the dedicated page of the Debian wiki (https://wiki.debian.org/Backports).
If you are looking for specific application, you have two solutions:
Before you start modifying the software sources of your system, you must be conscious of the risks your are taking by using the “contrib” or “non-free” components of the archived branch :
Now, that you are aware that the non-free people kill the pink rabbits, let’s move on:
To modify your software sources, it is enough to edit the ‘sources.list’ file. Open a terminal in administrator mode (chap.3.8.3), and enter:
apt edit-sourcesThis command opens the appropriate file with the default text editor (nano or vim). Once you are done with your modifications, save the file (“[Ctrl]+x” with nano, or “:wq” with vim http://www.vim.org/).
Example of line entry for the free packages:
deb http://deb.debian.org/debian/ stable mainExample of line entry for the free packages and the proprietary packages:
deb http://deb.debian.org/debian/ stable main contrib non-freeNow you can pick in the 3 package sections and install the non-free codecs and drivers.
Note that you can also modify your software sources by using the graphical Synaptic package manager (chap.8.3).
The following sections present the basic commands to manage de Debian packages with APT (Advanced Package Tool) within your terminal emulator.
Debian supports also “aptitude”, another package manager, with a different syntax and behavior. This manual being intended for beginners, no need to explicit these commands here: to learn more about them, visit the dedicated Debian Aptitude Wiki: https://wiki.debian.org/Aptitude.
These commands can be executed as simple user, because they do not impact your system.
| Command | Description |
|---|---|
| apt show foo | Display information about the package foo |
| apt search foo | Look for packages corresponding to the foo |
| apt-cache policy foo | Display the available version of foo |
These commands must be executed with the “root” administrator rights, because they impact the system. To move into the administrator mode from a terminal, type “su -”: the administrator password is requested.
| Command | Description |
|---|---|
| apt update | Update the repositories metadata |
| apt install foo | Install the foo package and its dependencies |
| apt upgrade | Secured update of the installed packages |
| apt full-upgrade | Update of the installed packet, by adding/removing other packages if necessary |
| apt remove foo | Remove the foo package, but not the configuratrion files |
| apt autoremove | Auto remove the unecessary packages |
| apt purge foo | Purge the foo package and its configuration files |
| apt clean | Clean the local cache of the installed package |
| apt autoclean | Clean the local cache of the obsolete packages |
| apt-mark showmanual | Mark a package as being “manually-installed” |
For more detailed information and the apt/aptitude equivalence, visit the dedicated page of the Debian manual: https://www.debian.org/doc/manuals/debian-reference/ch02.html
All-in-One command line (in administrator mode) to update the repositories information + update your system + clean the packages in cache:
apt update && apt full-upgrade && apt autocleanTo delete useless packages, unecessary dependencies, and old configuration files in administrator mode:
apt autoremove --purgeWhich goes to demonstrate that managing your system with a terminal is not that complex.

Software is a simplified manager for Debian applications. It allows you to search, install, delete or update packages containing your applications. You can find it in the “System” category of your menus or directly from the Gnome search box by typing “Software”.
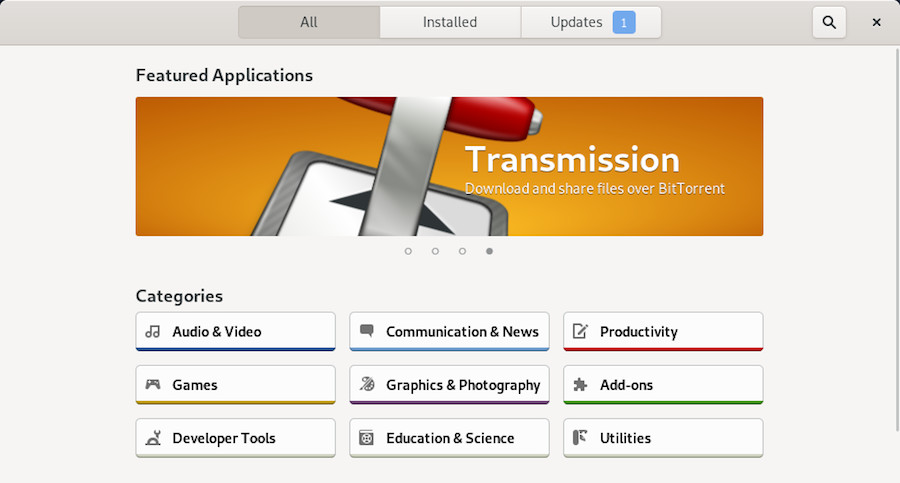
Directly by clicking on the search button (the magnifying glass symbol), or by selecting one of the displayed categories:
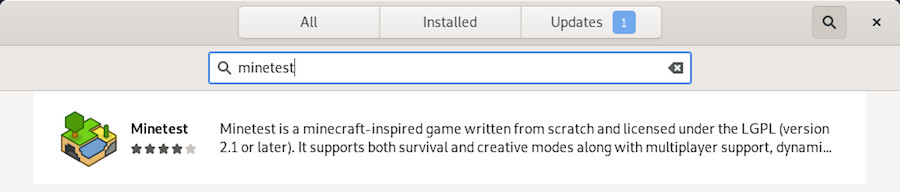
You can Install an application simply by clicking on its description area and then on the “Install” button. The administrator password will be requested. You can follow the installation progress in the main window and then launch directly the newly downloaded application.
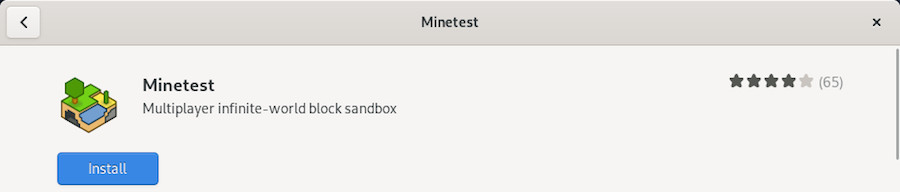
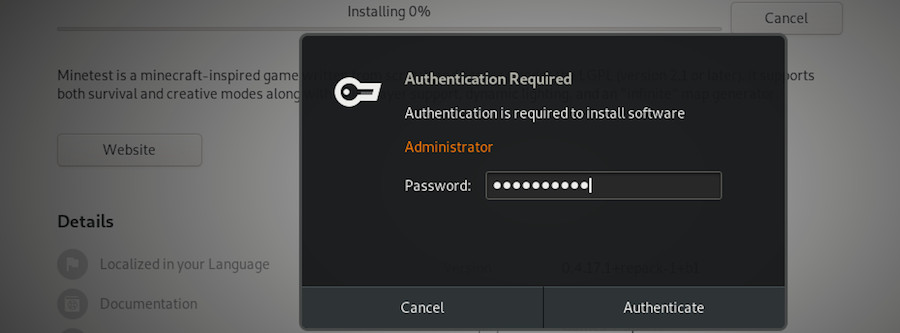

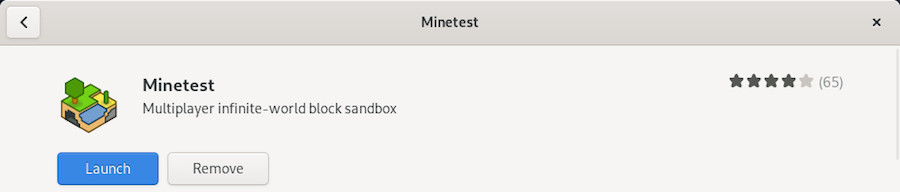
You can Uninstall an application simply by visiting the “Installed” category (at the top of the interface) and then by clicking on the “Remove” button. You will be asked for confirmation:
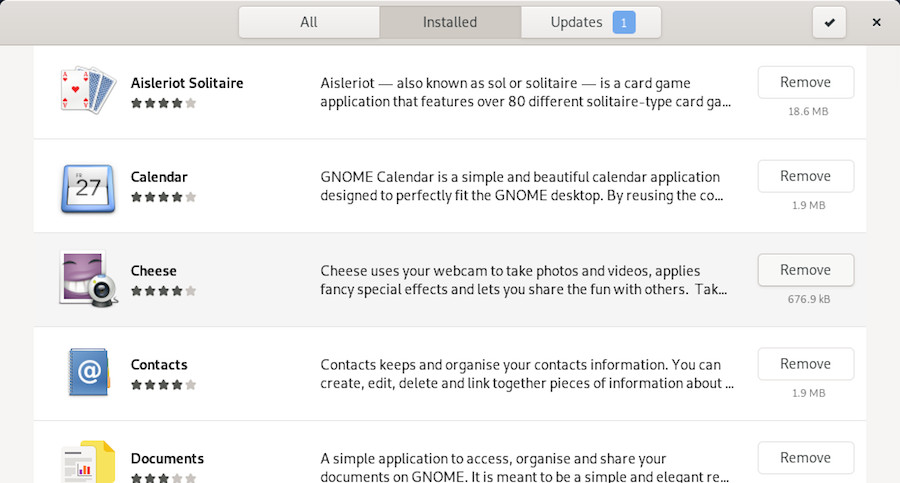

You can Update your system from the dedicated section “Updates” which will indicate the available and/or already downloaded updates. If no update is available, you can check the repositories by using the dedicated button at the top left.

In our example, a set of updates including an “operating system update” requires a reboot. We start by downloading the packet to update:

You then have to restart the system by clicking on the dedicated button.
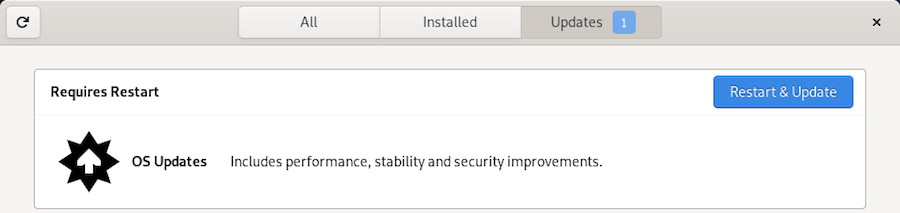
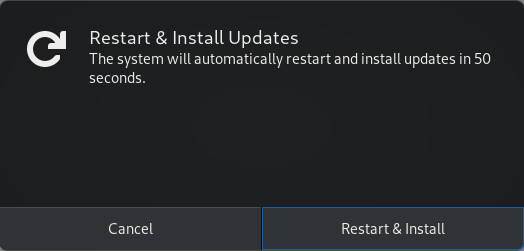
Note that for lighter updates, restart is not necessary.
After reboot, a message window on the desktop informs you that the install was successful.

The “Software” application is rather simple, but still allows you to configure your repositories graphically. From the menu, choose “Repositories”. You can add “non-free” sources and/or define the frequency of the repositories updates. The repository adresse information on display are coming from your sources.list file (chap.8.1.1).
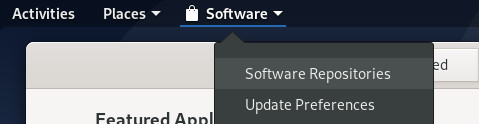
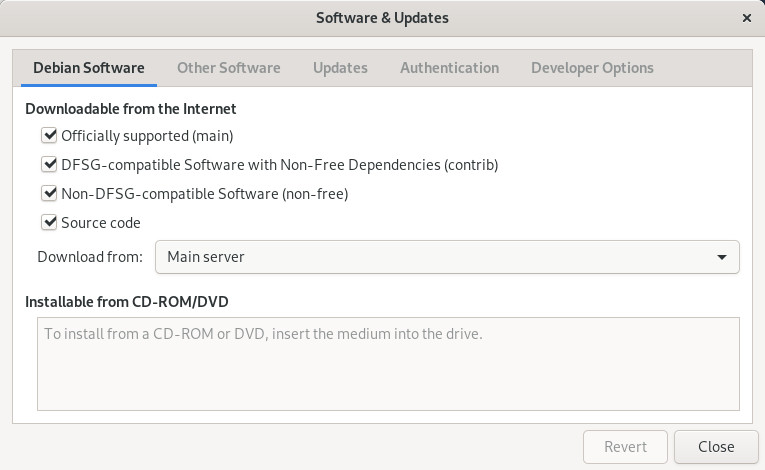
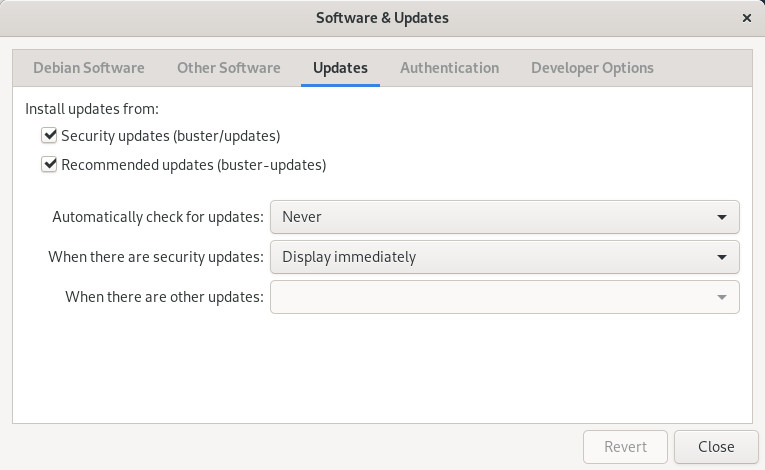
Once your repositories have been modified, you must reload the information packages. A message prompts you:
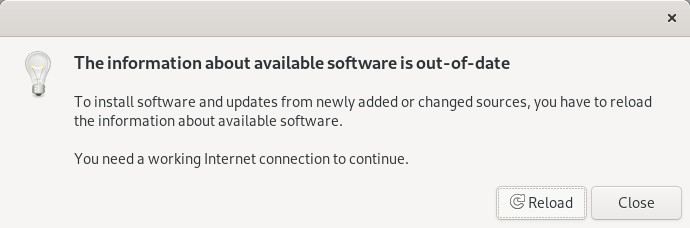
To take advantage of your system without worrying about updates, you can activate the automatic updates mechanism. From the “Software” menu, select “Update Preferences”. The entries are self-explanatory:
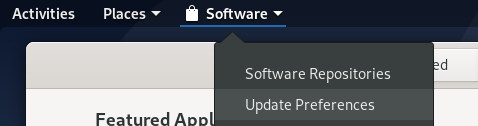
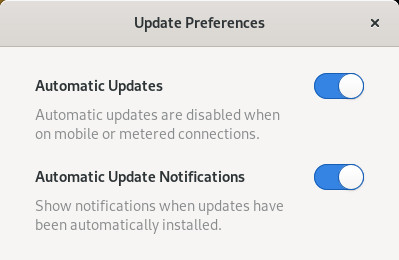

Gnome uses “Software” to manage applications in a simplified way, KDE integrates Discover, an intuitive and efficient program.
Discover allows you to search, install, remove or update your applications from a single interface. You can also modify your software sources in order to install - or not - some non-free applications.
Discover is launched simply from the KDE main menu > Applications> System > Software Center:

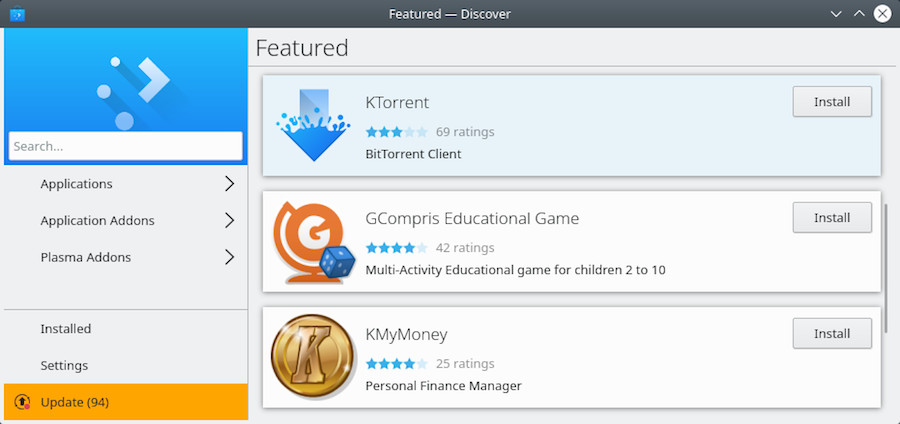
Don’t hesitate to browse though the application, you will be asked to confirm any modification done to your packages.
To find an application, type its name in the dedicated search field or visit the various categories of Discover. Then a click on the “Install” button is enough:
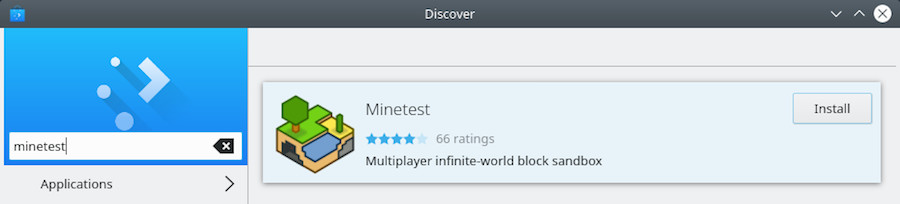
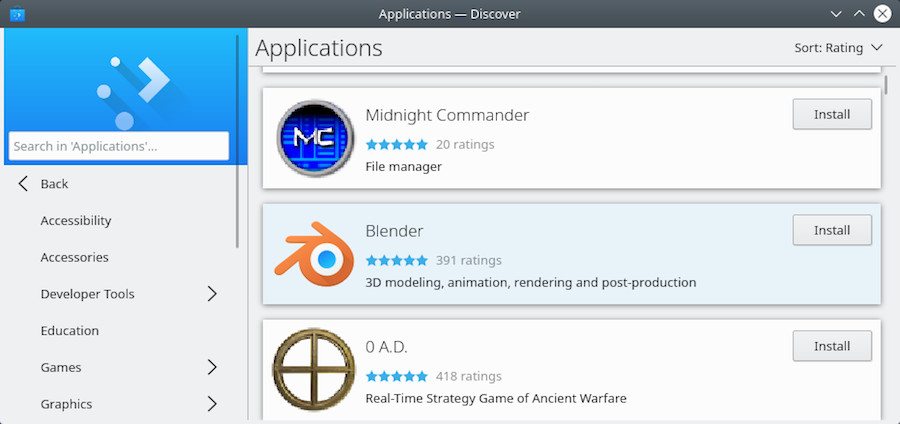
You will be asked for confirmation for any action on the software together with the administrator password. The process will then be launched in the background. You can follow the progress of the modifications within the KDE notification area.
Discover allows you to add additional components to your Plasma environment. To achieve this, visit the “Plasma add-ons” section.
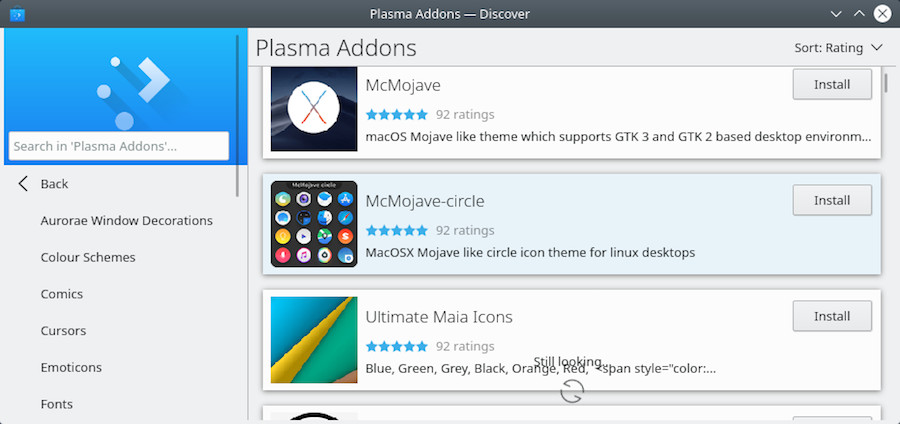
Some additional modules are also available for your applications:
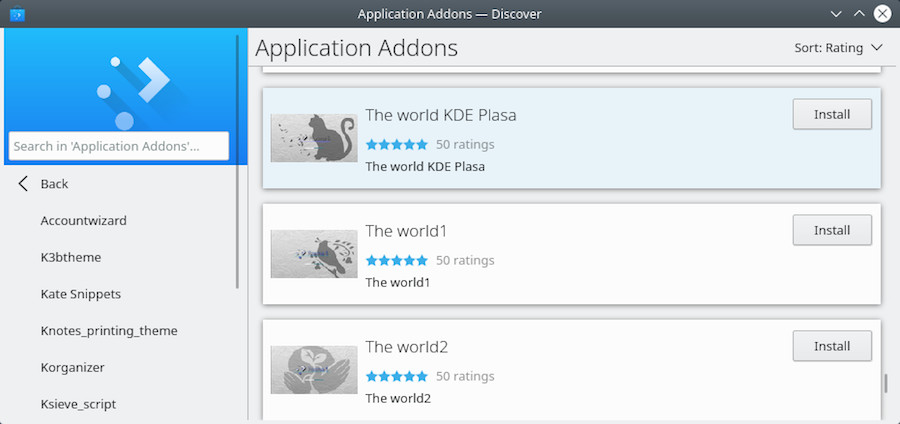
With Discover, simply visit the “Installed” category then click on “Remove”:


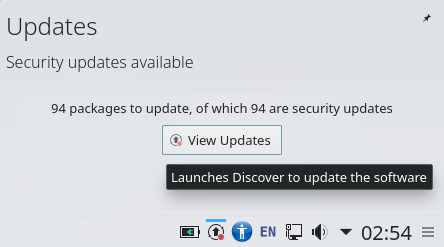
When KDE notifies you of one or more updates, it is “Discover” which performs them. To check updates “manually”, click on the dedicated button:

Simply click on “Update all” and confirm with the administrator password.
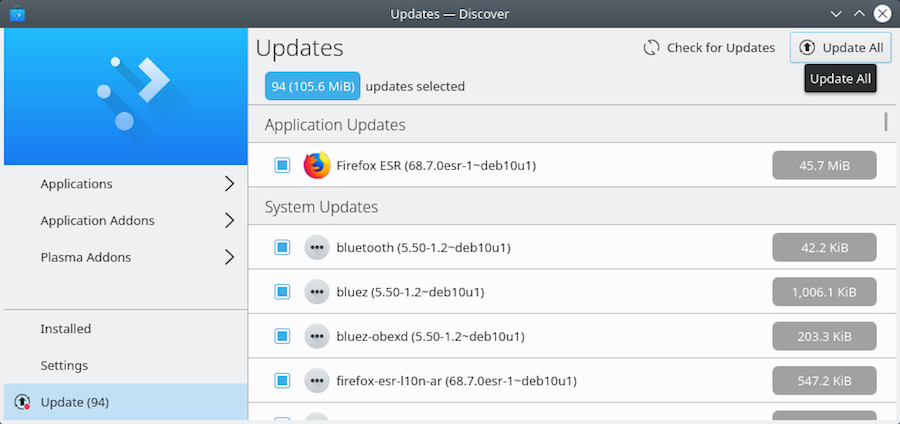
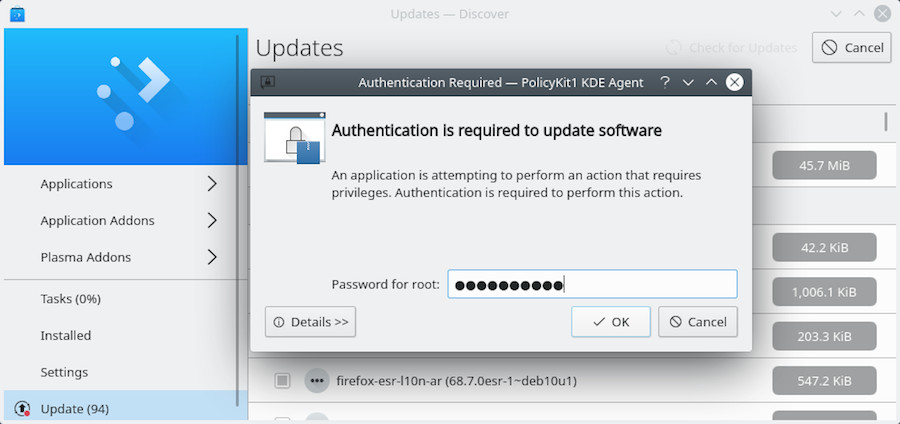
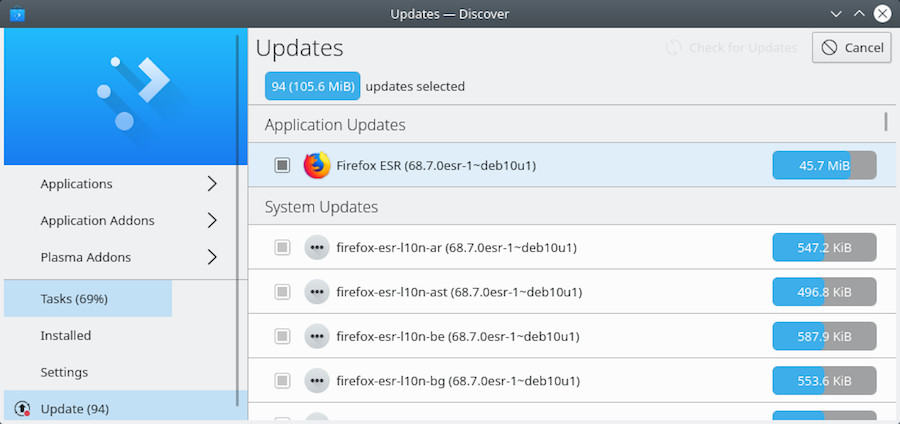
Likewise the software management, you can follow the process within the KDE notification area. And a message will inform you at the end of the process.
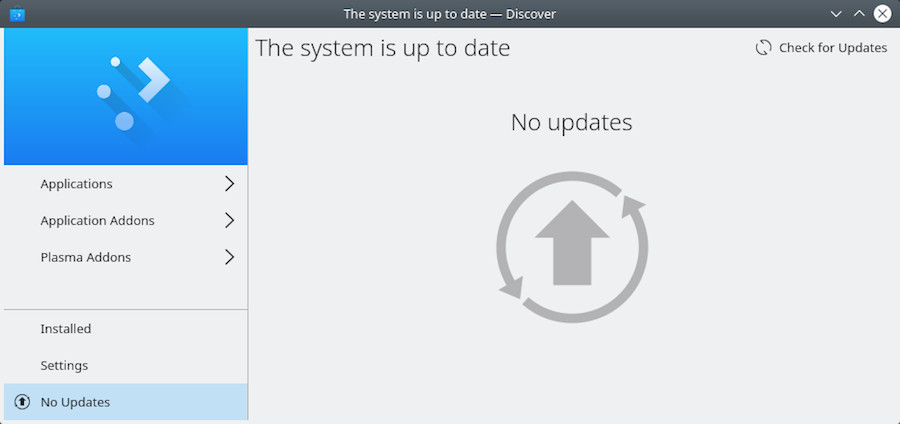
The KDE software library allows you to modify the sources of your applications without using the terminal. Go to the “Parameters” section of Discover, the entries display the repositories adresses of your sources.list:
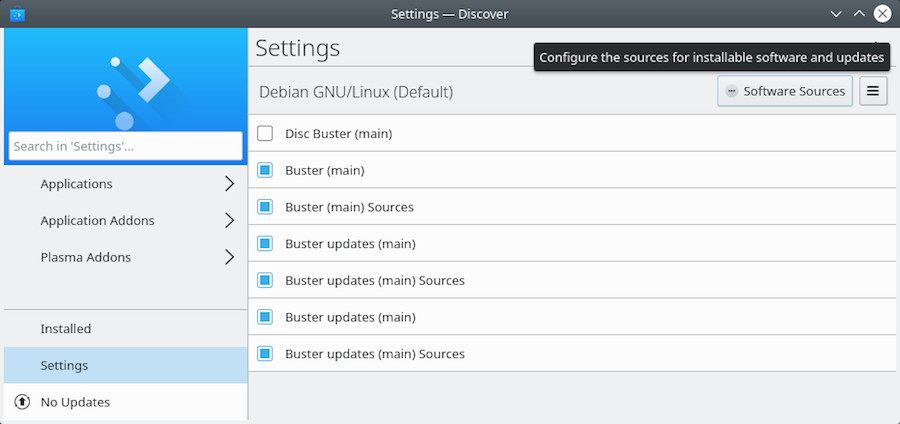

Synaptic is the comprehensive graphical interface of the Debian package manager. It allows a total vision of the proposed packages, whether installed or not. It is a lot more detailed than the Software Center, or Discover (see the previous chapters) since it displays the full set of available packages (including the libraries).
Warning : under Debian 10, Synaptic cannot be used within a “Wayland” session (Gnome environment), because, for security reasons, graphical applications in root mode are forbidden. However, Synaptic remains fully functional within a X session (X11, Xorg within Xfce or LXDE environments).
To find out if your environment is running under Wayland, identify your session type, within a terminal, by executing the command :
echo $XDG_SESSION_TYPEwhich will simply return either “Xorg” or “wayland”.
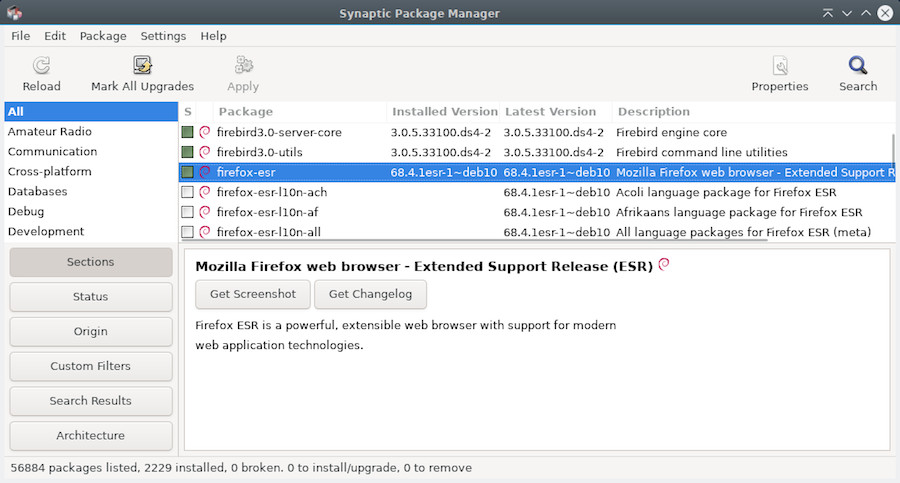
The Synaptic window is divided into 4 areas: the tool bar at the top, the left pane allowing different ways of sorting and selecting the packages, the center pane displaying the package list itself, and below it, the pane hosting the description of the currently selected package (the selection is done by a click).
In front of each package, you notice a little box (white for non-installed packages, green when they are installed, red when they are broken). Next to this status box, a Debian logo indicates that this package is “free” (as in freedom).
Don’t hesitate to click on all the different menus to explore Synaptic and become more familiar with it. It is a good way to discover its numerous functionalities.
Don’t be afraid to break your system since nothing will really happen until you click on the “Apply” button. On top of that, a message asking for confirmation will always be displayed first.
The very first thing to do when you launch Synaptic, is to click on the “Reload” button in order to update all the information (metadata) concerning the repositories, the packages and the available applications.
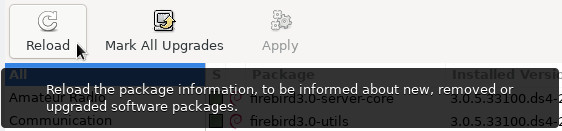
The repositories allow to update and install additional packages.
The repositories have been configured during the installation process but you can manage them at any time, if you need to. Open the Synaptic package manager (menu System > Synaptic package manager). In the top menu bar, click on “Settings, and then”Repositories".
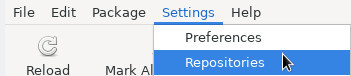
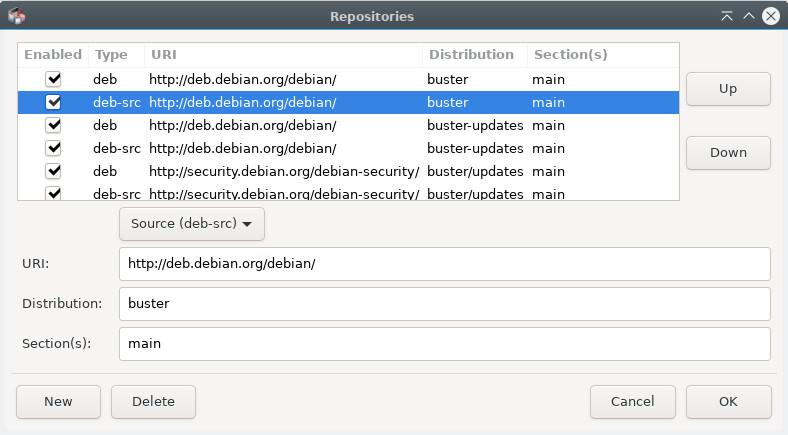
You’ll notice that the list corresponds to the contents of the /etc/apt/sources.list file mentioned in chapter 8.1.1.
Now, you can modify your repository sources at your entire convenience. Simply click on a source to modify it, or on the “New” button to add another source.
Once your modifications are validated, the application will invite you to reload the repositories list in order to take your changes into account.
Note that if you want to use a “check-box-only” simplified interface on one of the Xfce, LXDE or LXQt desktops, you need to install the “software-properties-gtk” package.
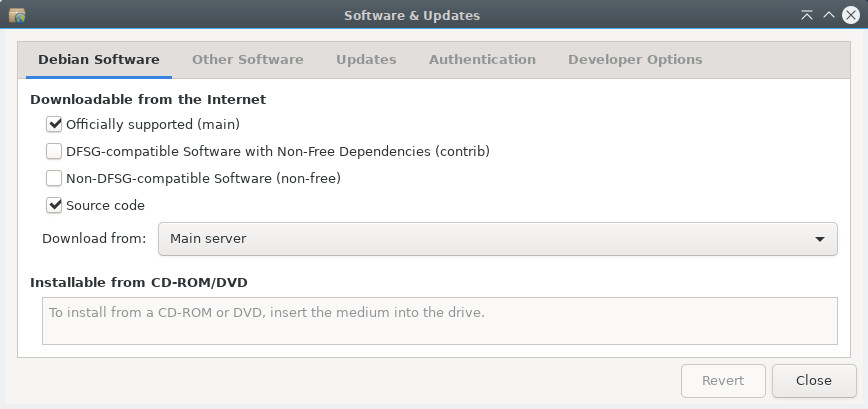
Before updating the system, it is necessary to “Reload” the package list, by clicking on the corresponding button, or by going in the menu “Edit > Reload Packages Information” (or even [Ctrl]+r if you want to use a keyboard shortcut). This action checks if the version of the packages residing on your system is the most recent one or not.
Then click on “Mark All Upgrades” or goto menu “Edit > Mark All Upgrades…”.
If nothing happens, after you clicked on “Upgrade everything”, this means that your system is already up-to-date. You can close Synaptic.
If some packages to install or update are available, they are specified. You can view them by selecting the “Status” section > “installed (upgradable)”:
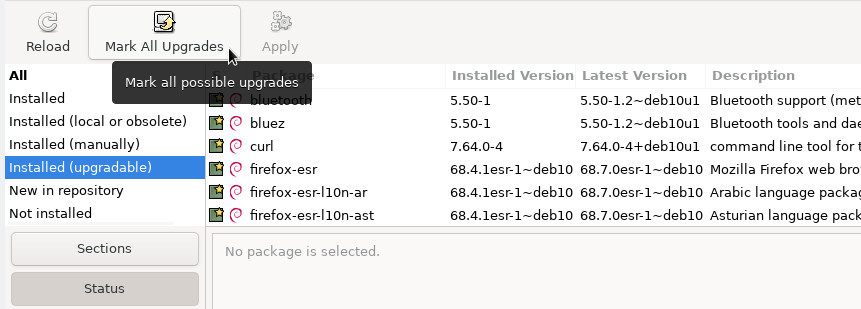
A new window appears with the list of the packages to be upgraded as well as the additional dependencies, if some are required:
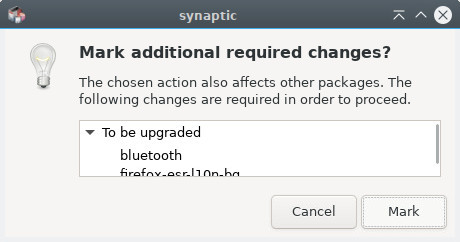
You only have to click on the “Add to selection” then “Apply” button, and accept the requested confirmation:
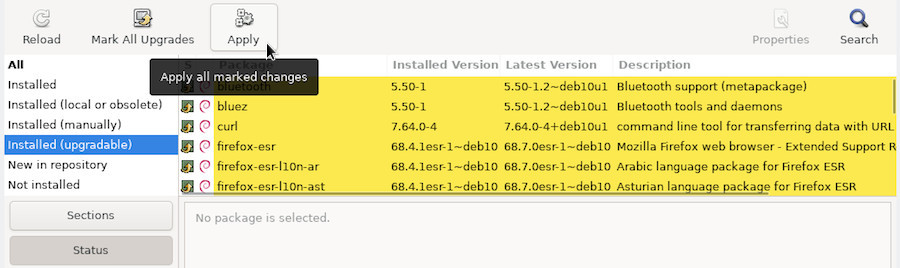

The system updating process begins by downloading the packages, and continues with their installation.
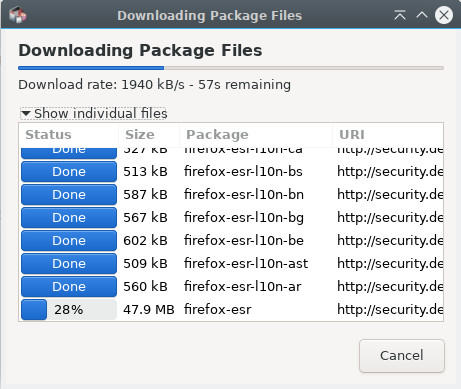
A message informs you that all the changes were applied.
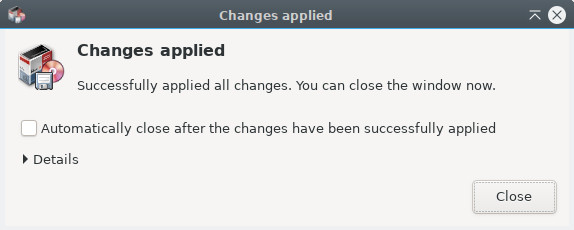
If you know the name of the package or if you are looking precisely for something, click on the search button (in the top bar) and enter the keywords of your search in the window which opens.
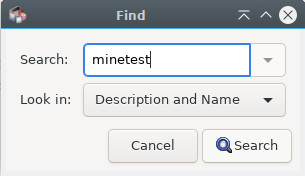
If you don’t know the name of the package you need, you can parse the list using the filtering by sections, status, origin, etc …
For example, if you are looking for a game, click on Sections in the bottom part of the left pane, scroll down to the “Games and Amusement” section, click on it, and all the packages concerning games and amusement are showing up in the center pane.
To install one or several packages, right-click on the little box in front of the package name, and select the “Mark for Installation” option.
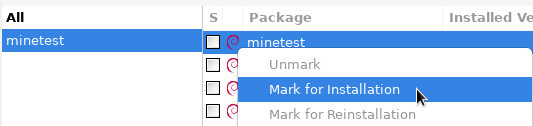
If, in order to be functional, this package requires the installation of other packages (the famous dependencies) they are automatically added to the selection.
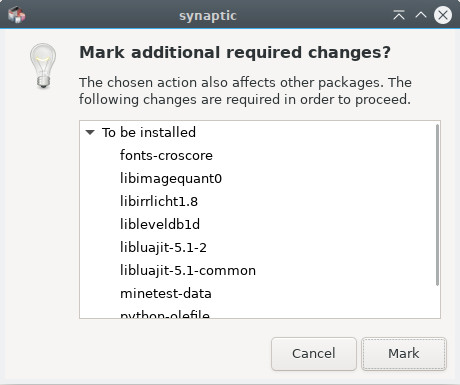
Then, you simply need to click on the “Apply” button, and confirm the summary of the changes to be applied.
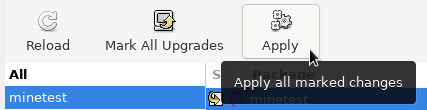
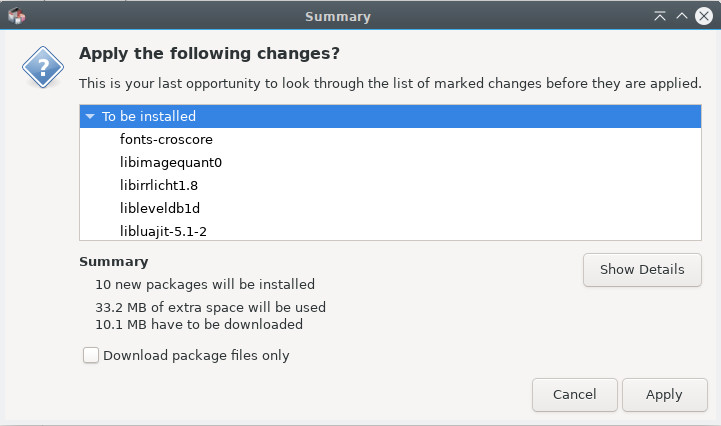
Packages are downloaded and installed. You can follow the whole process within the synaptic interface:
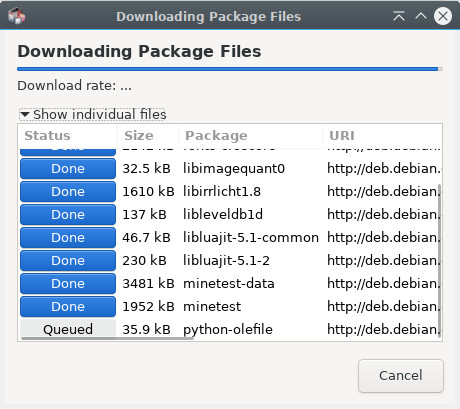
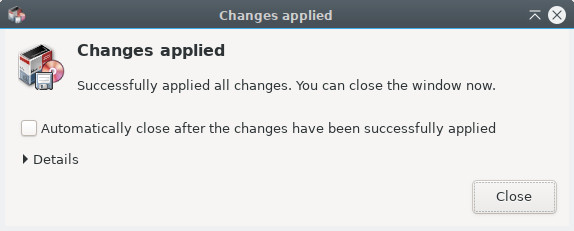
Sometimes we want to re-install a package which is already installed. In that case select the “Mark for Reinstall” option. This allows, for example, to restore the default configuration for the application if you modified it.
Like for the installation, right-click on the little box in front of the package name, and select the “Mark for Removal” option. Then click on “Apply”.
The simple removal keeps the package configuration files on your system, in case you would like to re-install it, later on.
To remove also the configuration files select the “Mark for Complete Removal” option (equivalent to the “purge” in a terminal command line)
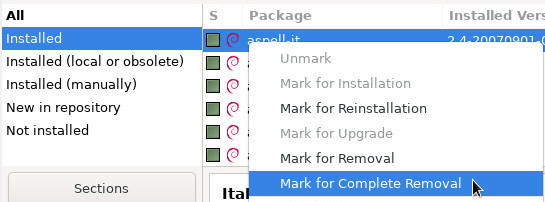
Often, when software is uninstalled, some packages (the dependencies) remain in the system while no longer useful, since all the packages needing them are gone. These useless packages can be easily removed with Synaptic.
When Synaptic is launched, click on the “Status” button at the bottom of the left pane. If the “Installed (Auto removable)” category shows up, click on it to display the corresponding package(s) (see image below):
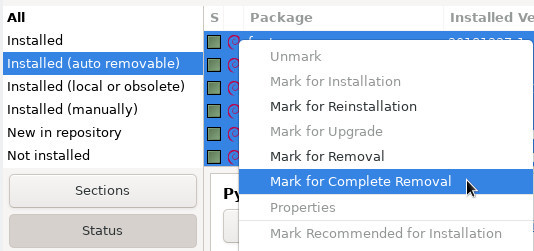
All you have to do next is a right-click on each package in the center pane, and select the “Mark for Complete Removal” option. Once all the packages are marked, click on the “Apply” button.
Although one choose to completely remove a software, some configuration residues might still remain in the system, but they can also be easily removed with Synaptic.
Click on the “Status” button at the bottom of the left pane. If the category “Not installed (residual config)” shows up, select it.
All you have to do next is a right-click on each package in the center pane, and select the “Mark for Complete Removal” option. Once all the packages are marked, click on the “Apply” button.
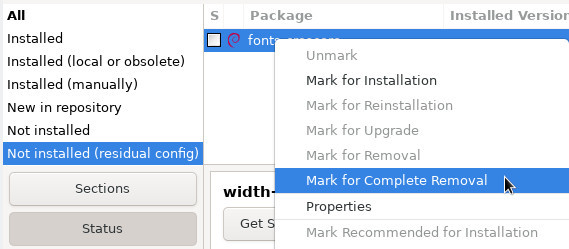
By clicking on a package, its description is displayed on the bottom center pane of Synaptic. To obtain even more information on a package, right-click on it, and select Properties, or go to menu “Packages > Properties”.
Then you will know everything - positively absolutely everything - on this package: dependencies, installed files, size and version.
“Preferences” is a well-named category, existing in most applications, and which is also present here…
But keep in mind that Synaptic is a very special case: it manages the full set of software installed on your system. When you remove a program, it does not go in the wastebasket (where you could have potentially retrieved it) !
After these scary warnings, let’s move to the settings available for Synaptic. the Preferences window (launched via menu Settings > Preferences) displays 6 different tabs:
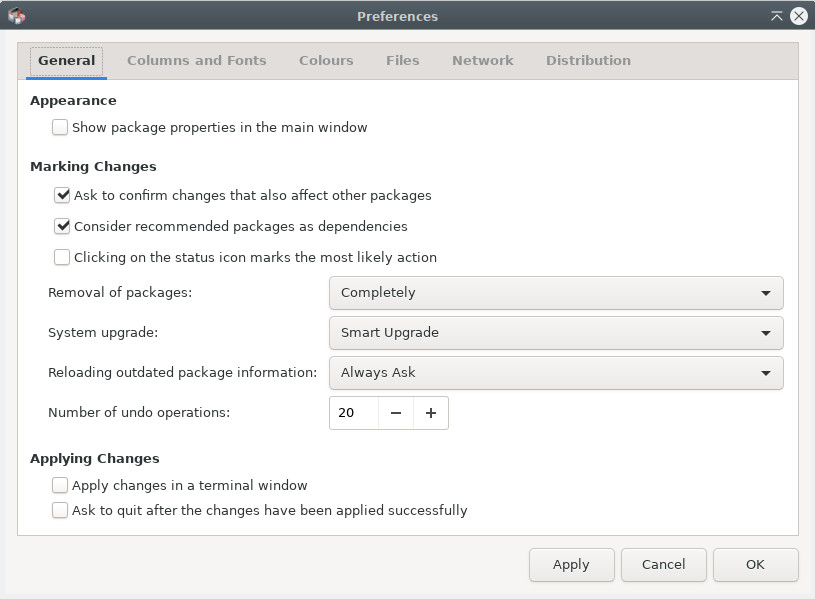
Remember: by using a terminal (chap.8.2) you can achieve the same results more quickly and with less manipulations.

Even if the capacity of hard disks increased dramatically during the last years, you might need some free space. Several scripts automate the disk cleaning process, however I must confess that I prefer to check before using the rm command (standing for remove. chap.11.2).
The first thing to do, of course, is to find out the used space on your disk. Several tools are available to you, starting with your terminal:
– Disk space in terminal mode – A summary of the disk space usage for each system mount points (disks and partitions) with th df command:
df -h
Filesystem     Size    Used Avail Use% MountPoint
udev           983M       0  983M   0% /dev
tmpfs          200M    8,1M  192M   5% /run
/dev/sda1       48G     16G   30G  35% /
tmpfs          998M       0  998M   0% /dev/shm
tmpfs          5,0M    4,0K  5,0M   1% /run/lock
– List your repertories sorted by decreasing size – View your directories bulky thanks to du and sort (the unit is the megabytes):
user@debian-pc:~$ du -ms * | sort -nr
585  Music
281  Videos
232  Documents
42   Pictures
26   Dowloads
1    Desktop
– Ncdu – A disk space analyzer in console mode. To launch it, simply type “ncdu” in your terminal. To install this software (in administrator mode):
apt update && apt install ncdu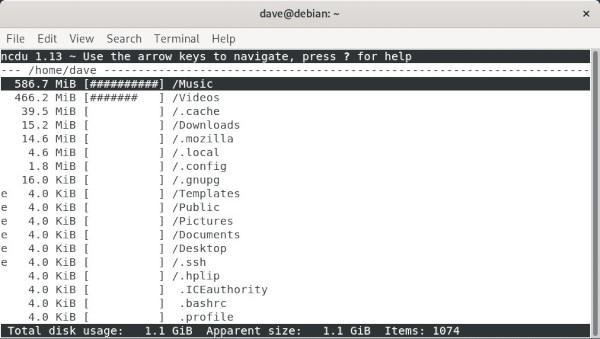
– Baobab – A disk space analyzer in graphic mode, integrated in Gnome but available in other environments with:
apt update && apt install baobab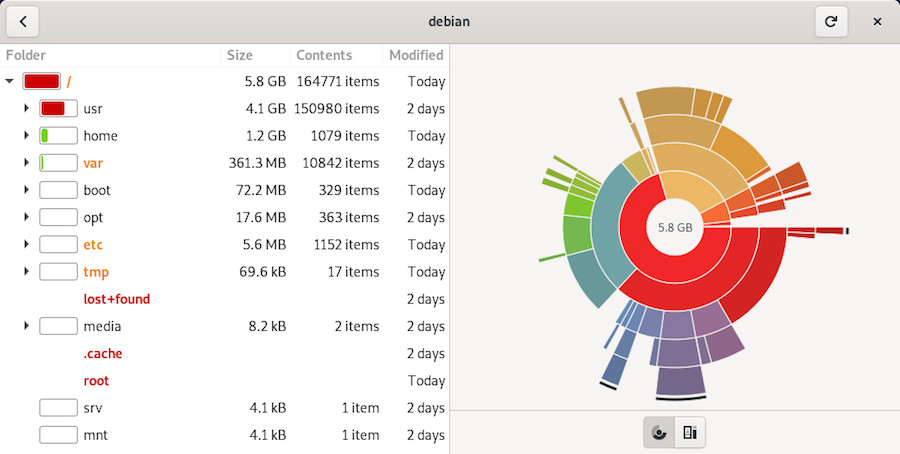
– Fslint – utility to find and clean various forms of unwanted extraneous files in your file system, like duplicates, broken links, empty folders, wrong encoding, etc … To be manipulated with extreme caution: double check carefully the pending changes before validating the whole process.
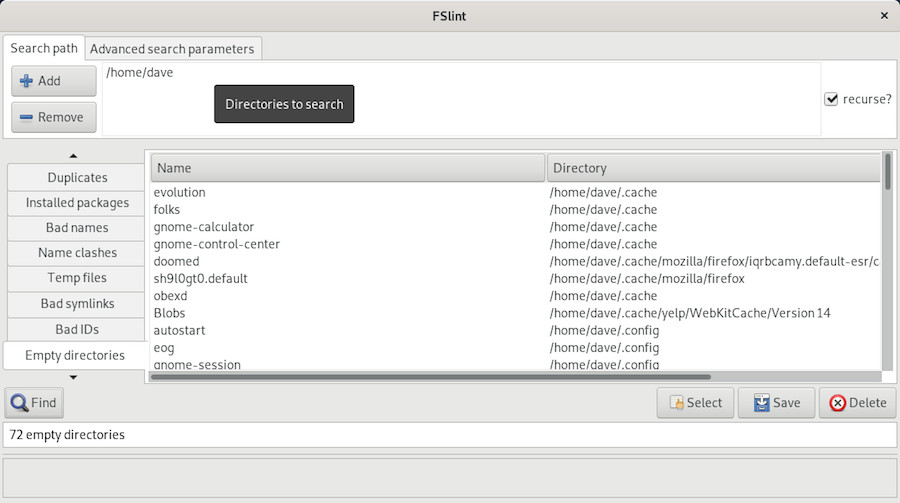
Apt/aptitude/dpkg are the usual Debian package managers. When you install a package its archive-source/deb file is stored in your system (in the /var/cache/apt/archives/ folder) to enable a potential re-installation without Internet connection. To clean the “apt cache” use a simple command in administrator mode (chap.3.8.3):
apt cleanOnce the cache of the installed packages is cleaned, you can also remove the useless packages from your system, as well as the configuration files. Warning! Remember to check carefully the list of the packages planed for removal, before accepting the operation:
apt autoremove --purgeThree different trash-bins (or wastebaskets) must be taken into account:
The user wastebasket : ~/.local/share/Trash/ . You can empty it with the system file manager (chap.3.6.2.5), or with a terminal:
rm -Rf ~/.local/share/Trash/*The administrator wastebasket : /root/.local/share/Trash/ . To empty it with the proper manner, use a terminal in administrator mode:
rm -Rf /root/.local/share/Trash/*The external wastebaskets : locates on your external disks, they are usually named ‘/media/your_id/your_disk/.Trash_1000’, where your_id corresponds to your login name.
Some applications use a “cache” folder, where they store images, videos, and miscellaneous information in order to run faster. Usually these data do not occupy too much disk space, however if (using the tools described above) you detect that a folder becomes too fat, don’t hesitate to remove it.
Each application has its own way to manage its own cache: some purge it systematically when they close, others store their data in the /tmp folder, which will be cleared during the session logout, others keep all their information in a specific folder.
For Firefox, as an example, you can purge the cache from the preferences menu, and even automate this action every time the application is closed.
Every time you open a folder containing pictures or videos, thumbnails are created to represent these graphic files. These thumbnails are stored in a specific folder to reuse them, rather than being forced to recompute them every time you access this kind of files.
The problem raises when you delete a graphic file, because its thumbnail is kept in the system, and this leads to a certain amount of disk space wasted to store obsolete thumbnails.
To purge them, it is enough to remove their corresponding folder:
rm -Rf ~/.thumbnailsThis folder will be created again, the next time the system needs to store a newly generated thumbnail.
Debian GNU/Linux uses the package repository system to better manage the software and increase the security of your system. But it may happen that you need an external package of the “.deb” format.
… but who is this “deb” ??
deb is the short for “debian”, the mother company. To distribute its software, Debian uses a specific archive file format: “.deb”. It is a compressed format, like the “.zip” that you use to save your data. These “.deb” archives are recognized by the different Debian package managers (APT and its graphical interface Synaptic) and thus can be handled more easily.
GDebi is a graphical utility with allows the installation of external packages of the “.deb” format, while managing the dependencies.
To install it, look for “gdebi” in your favorite package manager (Synaptic, Discover, Software) or more simply from a terminal in administrator mode using “su” (chap.3.8.3):
apt update && apt install gdebiWhen you download a Debian external package, right-click on it and select “Open with gdebi”.
Within the menu, click on File > Open and enter the path of the “.deb” file:

Then click on “Install Package”. Your password is requested to validate the install.
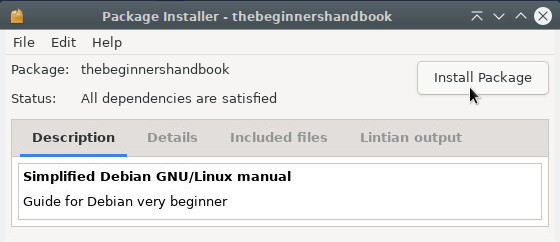
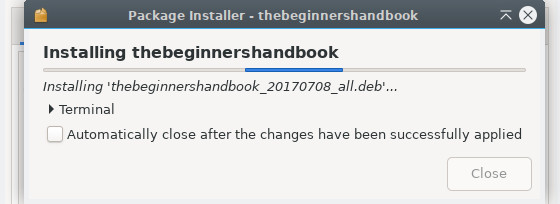
To uninstall it, very easy : enough to click on “Remove Package”.
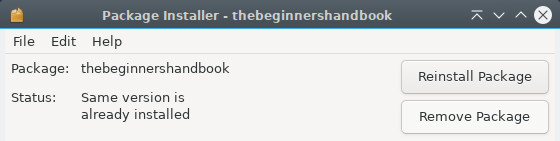
Dpkg is a software utility handling the packages, like does apt, but without managing the dependencies. This means that if you use dpkg to install external packages, you need to install the “dependent” packages one by one from your terminal. Dpkg is integrated in Debian by default, and must be used in administrative mode.
To install an external package:
dpkg -i package_name.debAn error message will let you know if some dependencies are missing. Then simply install them the classic way with apt:
apt install dependency_1 dependency_2 ...Then relaunch the installation of your external package.
dpkg -i package_name.debTo remove an external package:
dpkg --purge package_name
Flatpak (https://docs.flatpak.org/en/latest/getting-started.html) is a virtualization application system for GNU/Linux distributions. The objective is to provide a safe “sandbox” environment, isolated from the rest of the system, where users can run applications not validated by the distribution repositories (test versions, for example). dixit Wikipedia
… I virtualize in the sandbox …?
The applications that you download from the Debian repositories are “.deb” formated archives containing the application itself. These applications use common dependencies, are linked to each other, and have access to your entire system. Debian repositories are secure, so no worries about this issue. But then why should we use Flatpak?
The Flatpak format works differently: the application is compressed with all its dependencies, making it completely independent of the system on which it is installed. So, here you can install and use a freshly updated application or even a brand new one, compared to the Debian repositories.
The second advantage of this format is the famous “sandbox”. The sandbox is a kind of secure box in which the application runs, without having access to the rest of the system (with exceptions, when the user gives its authorization), thereby preventing malicious software from going through your application to contaminate your system.
The last advantage is that it enables you to run multiple versions of the same application (very practical for Minetest and servers in different versions).
The downside of this format is that it is not verified by the Debian security: when installing flatpaks, you should prefer trusted referenced applications (Gimp, VLC, Blender …).
To take advantage of applications in Flatpak format, you must first install the corresponding package. From your terminal in administrator mode (chap.3.8.3) :
apt install flatpakYou can now download and install flatpak packages by visiting one of the websites grouping these applications like Flathub (https://flathub.org/home). But the simplest way consists to add a repository to your sources in order to take advantage of the full applications lists without having to search through the site.
To add a repository like Flathub for example, and benefit from an easy search and a simplified installation, type in your terminal:
flatpak remote-add flathub https://flathub.org/repo/flathub.flatpakrepoYou will be asked for the administrator password. And you will have to restart your system to take the changes into account.

To take advantage of managing flatpaks within your software manager, you must add the plugin corresponding to your environment. For Gnome and its simplified software manager, in a terminal and in administrator mode (chap.3.8.3) :
apt install gnome-software-plugin-flatpakYou can now manage your flatpaks like any other applications (see chap.8.3)

Note the software source indicator at the bottom of the description.
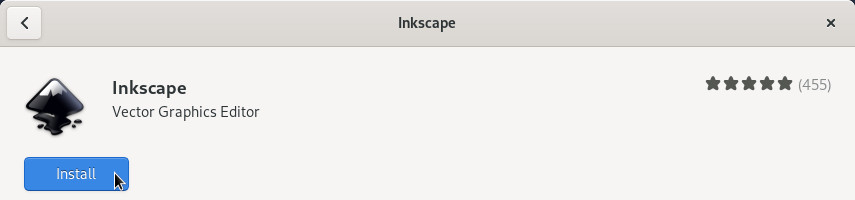
As with other applications, the administrator password will be requested for any installation. Your software will then be directly available in your applications menu.

To benefit from the management of flatpaks within Discover, under Kde, you must install the appropriate plugin. In a terminal and in administrator mode (chap.3.8.3):
apt install plasma-discover-backend-flatpakYou can now manage your flatpaks like any other applications (see chap.8.4).
During your search, you must click on the software file. Don’t click immediately on “Install” because Debian repositories have priority.
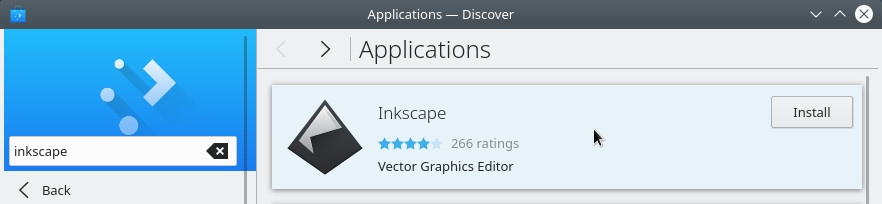
Select the flathub repository from the Discover “Sources” menu. Then launch the installation by clicking on “Install”:

As with other applications, the administrator password will be requested for any installation. Your software will then be directly available in your applications menu.
Here after, the basic commands to manage your flatpaks from your terminal:
| Command | Action |
|---|---|
| flatpak search flatpak_name | Search for a flatpak in all repositories |
| flatpak install repository flatpak_name | Installing a flatpak from repository |
| flatpak uninstall flatpak_name | Remove a flatpak |
| flatpak uninstall --unused | Remove unused dependencies |
| flatpak update | Update all installed flatpaks |
| flatpak run flatpak_name | Launch a flatpak |
Special case: install a flatpak for the current user only with the “--user” option. The files will be placed in the user directory ($HOME/.local/share/flatpak/).
flatpak --user install *repository* flatpak_nameExample with LibreOffice:
Installing LibreOffice from Flathub:
flatpak install flathub org.libreoffice.LibreOfficeTo launch the flatpak version of LibreOffice:
flatpak run org.libreoffice.LibreOfficeIf you have installed your flatpak graphically from Software or Discover, just delete it from the installed applications menu from your software manager: look for the flatpak to uninstall then start the removal from the dedicated button.
Note that if you want to uninstall all dependencies (software installed in addition to the flatpak for its operation), you will have to launch this command in your terminal:
flatpak uninstall --unusedTo help you in your research, find hereafter some repositories using the Flatpak format and the commands to execute in order to add their repositories. You can use the “--if-no-exists” option to avoid errors generated by duplicates:
Flathub repository https://flathub.org/ gathering a large number of applications:
flatpak remote-add flathub https://flathub.org/repo/flathub.flatpakrepoKDE Flatpak repository:
flatpak remote-add kdeapps https://distribute.kde.org/kdeapps.flatpakrepoGnome-nightly Flatpak repository:
flatpak remote-add gnome-nightly https://nightly.gnome.org/gnome-nightly.flatpakrepoFirst of all, one must know that several Debian distribution branches exist in parallel.
Namely the oldstable, stable, testing and unstable distributions, as well as an experimental branch.
The Stable distribution is the Debian official distribution, the one released at this moment, which is maintained and updated by the Debian teams. The only changes made to it concern the security updates and the bug fixes. It is recommended to favor this version.
The Oldstable distribution is the previous stable version. It is usually supported by the Debian teams during one year after the release of the new stable version. However it might live longer if enough individuals or companies continue to assure its maintenance. Then it is called a LTS (standing for Long Term Support) distribution: we extend its life span.
The Testing distribution is the future Stable version. It is used to prepared the next stable version. When everything is OK, when all the bit and pieces are functioning well together, when all the features targeted by the Debian teams are included, and after a period of software freeze and bug hunting, then the Testing version becomes the official new Stable distribution.
The Unstable distribution, nicknamed Sid, is the version which receives all the new packages versions, and sits at the cutting edge of innovation, but is not very stable: it’s a research lab. Nevertheless some brave adventurers use it on a daily basis.
The Experimental distribution is not a Debian distribution per se, but rather a repository where alpha or beta software versions are tested.
All these distributions are given a nickname picked among the characters of the Toy Story® cartoon. Currently, the name of the stable version is Buster, the name of the testing version is Bullseye, the name of the oldstable version is Stretch, the Experimental as no nickname.

The first version of Debian with a nickname was the Debian-1.1 “Buzz”, released as of June 17th, 1996. (see https://en.wikipedia.org/wiki/Debian_version_history)
The name of unstable is Sid, but who is this Sid guy?
Sid is the little boy, in the Toy story® cartoon, who keeps breaking all his toys (http://pixar.wikia.com/wiki/Sid_Phillips).
More detailed information on the dedicated Debian Wiki https://wiki.debian.org/DebianUnstable.

 Back up your data
No matter where your expertize level is, or what is the current state of your hardware, nobody is immune to a bad cockpit error, a technical failure, a heavy thunderstorm, a cup of tea/coffee spilled on the keyboard, or the cat messing around with the central unit …
The hard disk drive capacities are increasing every day and we are tempted to store on them more and more data (family pictures, videos, private copies of movies, etc). The risk of losing a large amount of data also increases at the same time, and that’s why we advise you to execute regular backups of your personal data, as well as your passwords and email messages.
This section will endeavor to provide you with simple keys to avoid the lost of your favorite files during a hardware or software failure.
The “cloud” is fashionable these days. Several on-line services are at your disposal to save your data on an external server…
First of all, you are not immune to a server failure, and secondly, you have no real control on what your data are going to be used for. The “cloud” is actually the computer of someone else, as Bibi (a friendly Debian user) told us recently.
I strongly advise you, in case of doubts (not all services are subsidiaries of the NSA …) to backup your data locally, that is on your own physical medium which you fully control.

Backups used to be made on floppy disks, then on CDs and then on DVDs. Even if you can still use this kind of support, the technology now gives you access to much larger capacities at little cost.
Depending on the amount of the data to backup, you can find external disk from 1GB (USB key type) to 2TB (2000GB), being powered directly over the USB cable, or by an external power supply. The prices range roughly from 5 to 200 US$, depending on their storage capacity.
Of course, if the size of your data is below 700MB, you can still use a CD-RW (re-writable CD-Rom) for your backups.

Debian hosts in its repositories several utilities (https://www.debian.org/doc/manuals/debian-reference/ch10.html#_copy_and_synchronization_tools) in the “copy and synchronization” section, each of them offers a graphical interface or “client”. Here we present one of the simplest backup tool: Deja-Dup.
Deja-Dup is more than enough to backup your personal data, but if you want to execute a “full system backup” (including your application and the whole installation) you must use more complex software, as described in the Debian documentation (https://wiki.debian.org/BackupAndRecovery).

Deja-Dup (https://wiki.gnome.org/Apps/DejaDup) is a “simplified backup tool”, which is a graphical interface to the Duplicity software (http://duplicity.nongnu.org/). It allows building secured backups of your data within a local folder, an external disk, a local network, a remote network or somewhere in the “cloud”.
It also allows the complete encryption and password protection of your backup files.
Deja-Dup offers a clear interface which does not require any computer knowledge.
Deja-Dup can be found in the Debian repositories. To install it using a terminal in administrator mode (chap.3.8.3):
apt update && apt install deja-dupOr using the graphical interfaces (chap.8.5), look for “deja-dup”.
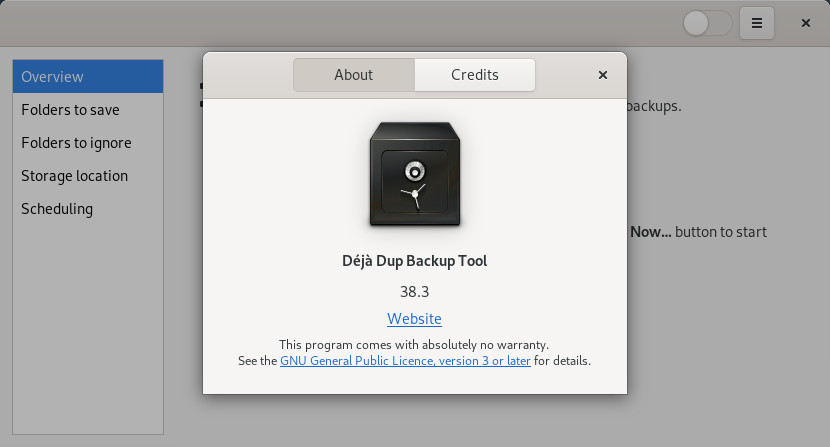
Deja-Dup will be accessible from the application menu > “Utilities” > “Backups”.
During the first launch, the Deja-Dup settings let you define how to automatically execute the future backups, where to save, what to save and at which frequency.
Its simple and intuitive interface will guide you through the whole process.
Start by adding folders to save, and then the folders to ignore:
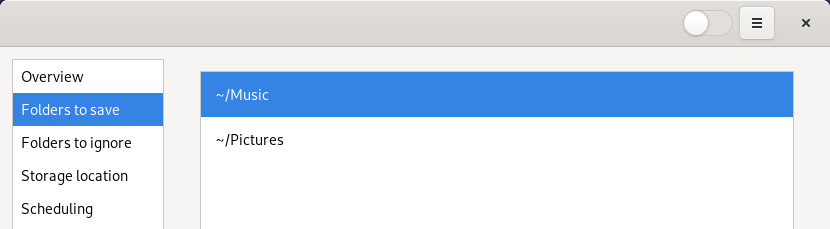
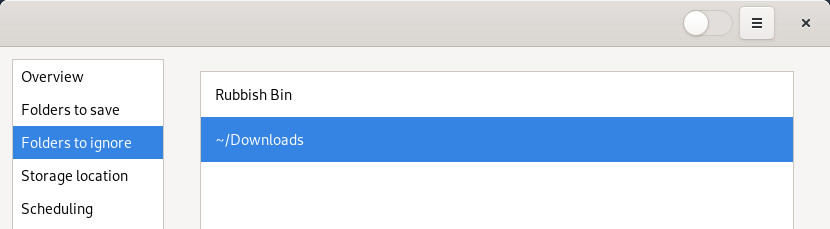
Once the included and excluded folders are defines, you need to define the backup location. You can select:
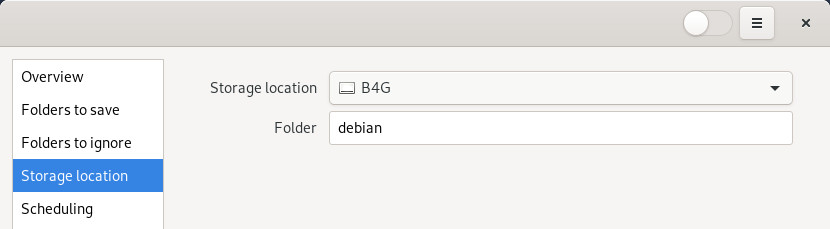
Depending on your computer usage, you can adjust the backup frequency. Please note that if you picked a USB disk as backup location, you would need to plug it in, at each backup time.
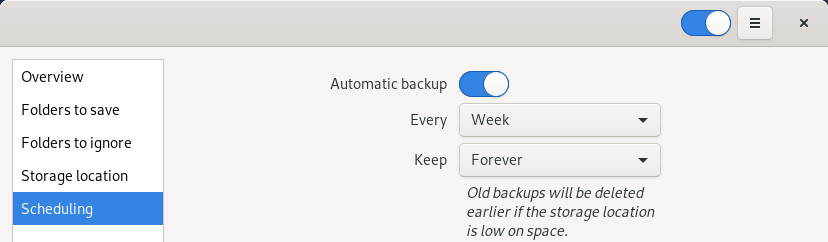
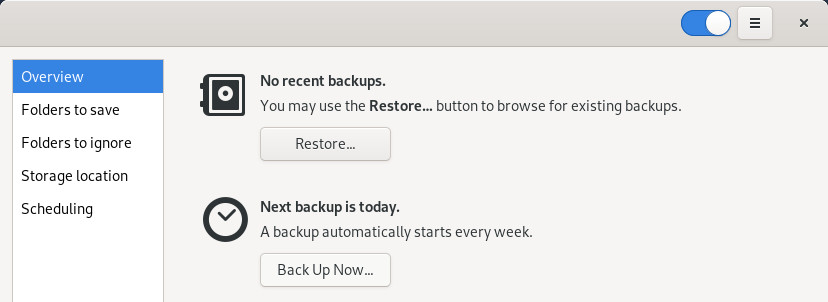
Once the settings are done, launch the first backup by clicking on the “Back Up Now” button residing under the “Overview” tab.
The very first backup execution will take some time, depending on the size of the data to be saved, but the following runs should be a lot faster since Deja-Dup will save only the modified files: this is an incremental backup.
An additional feature is the optional password setting during the configuration, which allows the encryption of the full set of backups:
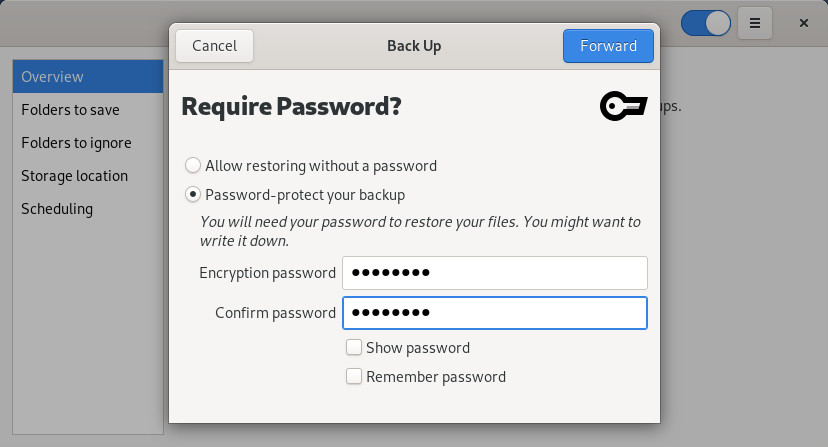
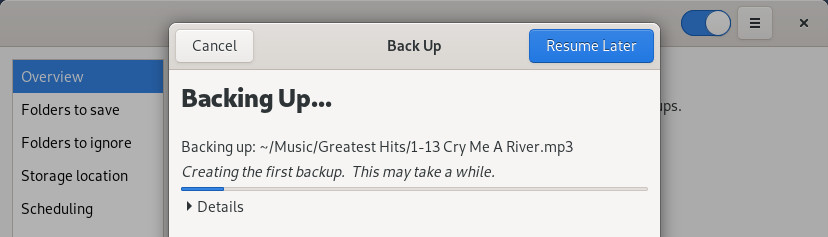
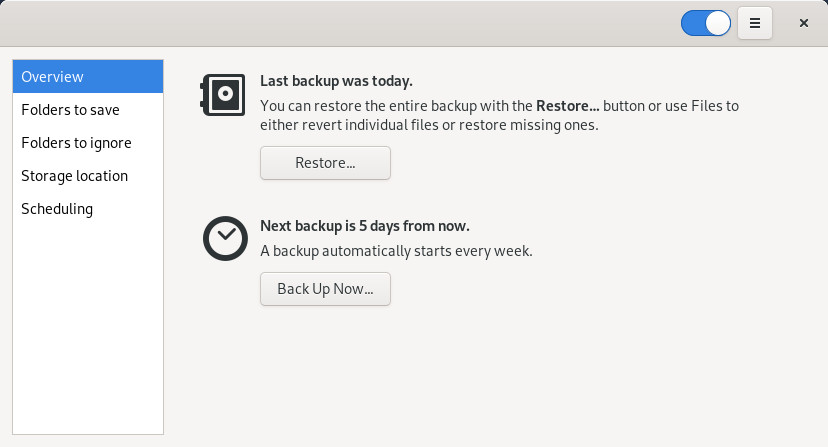
To restore a backup on a newly installed system, for example, simply install Deja-Dup on it, launch it and select “Restore” in the main window.
A series of simple windows will help you to find and restore your data. Likewise the saving process, restoring is rather intuitive :
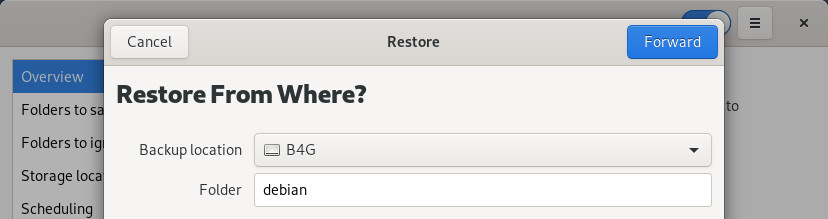
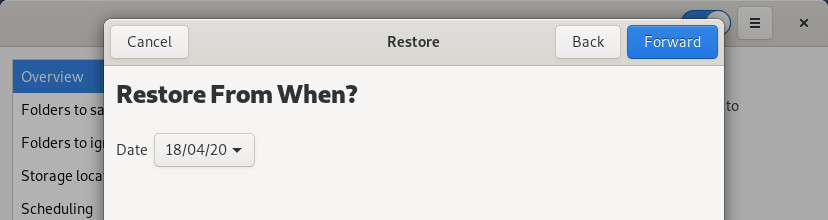
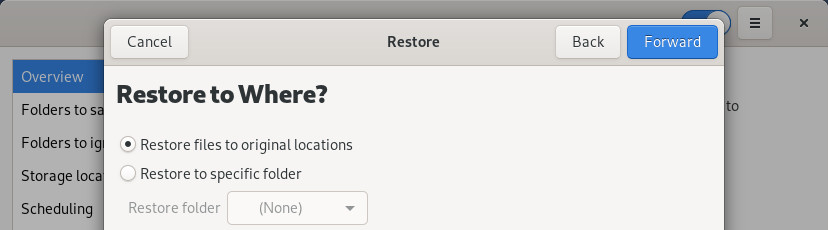

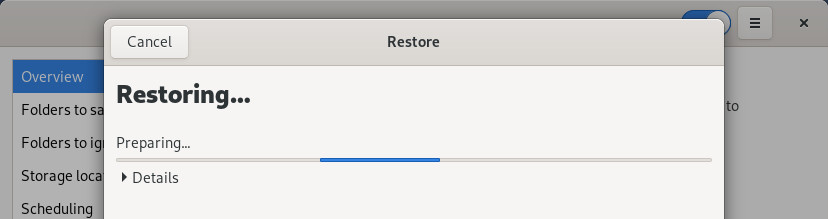
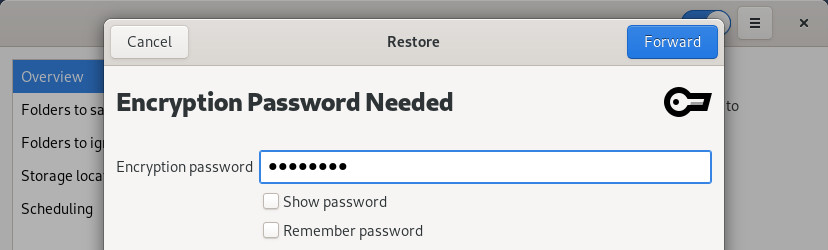
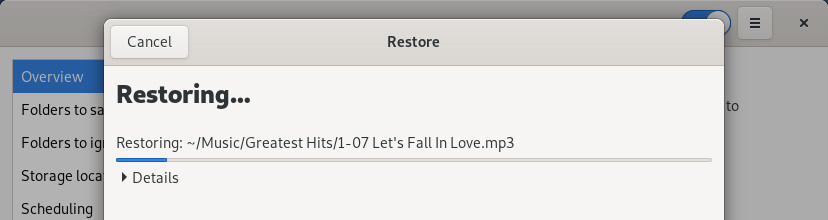
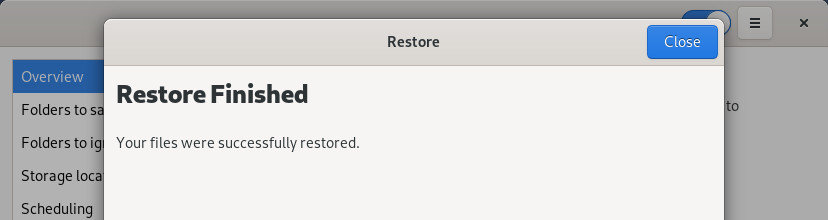
If you want to save just one folder or few of them, you can simply use the file system manager, or your archive manager (to reduce the storage space through compression).
The latter produces “real” archives: for subsequent consultation of these data, you need to decompress the archive.
From the file manager, select the folders to be saved, then right-click and take the “Compress…” (or “Archive”) action.
Then you just have to move the archive file on an external medium.
![]()
This is the complete solution ensuring a total safety for your data: cloning the entire hard disk.
Clonezilla Live (http://clonezilla.org/) is a Live CD based on the Debian GNU/Linux distribution, which includes the Clonezilla software. It allows the user to directly execute from its machine:
This Clonezilla version is able to connect to different servers: SSH server, Samba server, NFS server …
As its name suggests it, it works like a Live CD (CD-ROM, DVD-ROM) but can also be executed from a USB key, an external disk, etc. (source Wikipedia).
You can find an English tutorial on this page:
https://www.howtoforge.com/back-up-restore-hard-drives-and-partitions-with-clonezilla-live.
 Protect your data and your privacy
The news are crystal clear: Internet is being wire-tapped. It is not to alarm or frighten you, but you must realize that the “Internet” is not your private living room, and that each picture or text used on the web is potentially recoverable.
This is obvious, but let’s say it once and for all: if you want to protect your data, don’t leave your laptop everywhere! Don’t leave your computer wide open and in self-service at your home!
Your computer hosts your passwords (bank, administration, work …), your documents (administrative forms, pictures, etc.), your browsing history (the sites you visited and when), etc. You may think that these information are seemingly harmless, but they allow - for the best - to define your consumer profile, or - for the worst - to use your computer as a gateway to crack in other persons systems.
If you want to present the distribution you are using, or simply share your resources, we strongly suggest you create another user account (chap.7.3) that will not be able to access your data, nor to mess with your system administration.
If your computer is always on the road, we suggest you use the direct encryption during the system installation like mentioned in the chapter 5.5.3. By this way, even if your computer is lost or stolen, it will be extremely difficult to extract the data residing on your hard disk.
The software updates bring new functionalities, fix bugs and, above all, correct potential security flaws.
This is the big strength of the Libre-Software: the program sources are available, thus when a flaw is uncovered, it is publicized and fixed immediately.
This practice to be opposed to the proprietary systems, whose flaws are being kept secret, and continue to affect the daily life of all their users.
The security updates should not be considered as optional ones: you must install them as soon as possible.
Each year, tens of thousands of email accounts, Wi-fi access codes, phone PIN … are easily cracked, because users picked passwords too easy to guess. The top worst password for the year 2013 was “123456”, but there are other crazy sequences like “QWERTYUIOP”, “0000”, animal names, birthdays …
 All these passwords, far too easy to guess, must be avoided !
And, by the way, putting together two weak passwords, does not create a strong one ! “Independance1783” might be difficult to guess for a human being, but a “computer robot” will decipher it in the blink of an eye.
To increase the robustness of your password, in other words to increase its resistance against deciphering attacks, use as many characters as possible and mix their types (lowercase and uppercase letters, numbers, special characters).
There are simple tools which allow you to keep and organize your passwords like KeePassX (https://www.keepassx.org/).
The stronger my password is, the more difficult it is to memorize it. Isn’t it ?
You can use a "pass-phrase. Here we are talking about a long sentence, difficult to uncover, but easy to remember: few words put together produce a meaningless string, but which has a well defined sense for yourself.
For example, the sentence “grandma loves French pickles in her soup”, can easily becomes a robust password: “GrandmaLovesFrenchPicklesInHerSoup” … especially if one replaces few vowels by numbers (“i” by “1”, “e” by “3” and o by “0”):
“GrandmaL0v3sFr3nchP1ckl3sInH3rS0up”.
Note that it works with grandpa too .
It goes without saying … but it’s better by saying it …
External media containing your bakups hould not be left self-service at home: Make sure to reserve a hard drive for your saved personal data, and keep it out of sight (and fingers).
If you use Debian in “multi-user” mode, the data of the other users are readable by you, and yours too, by necessity. You may want to restrict the other users access rights to some of your data.
The graphical procedure is easy to execute (no need to open a terminal): right-click on he folder > properties > “Permissions”. Hereafter an example with the “Documents” folder:
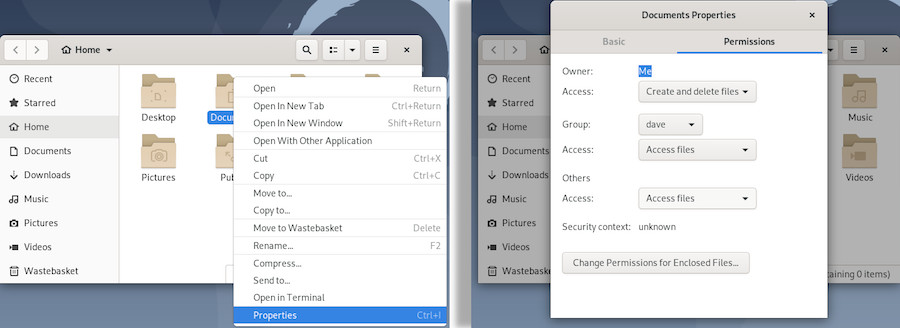
Select the “None” option for the “Others” access rights:
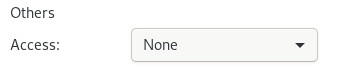
A window will ask you if you want to apply these modifications to all the files and folders embedded within the concerned folder, and we advise you to accept, in order to protect the full set of data included inside this folder.
You certainly ran into these warning messages talking about backing up your data …
and this is not for nothing! Please refer to the chapter 9 and get into the habit of saving your data on an external medium and on a regular basis.
Admittedly, the GNU/Linux systems are much less sensitive to virus attacks, but it is possible to find a virus on a GNU/Linux machine.
For the time being, updates are the only efficient protections against potential viruses, and adding an antivirus software on your system does not improve its security. Viruses embedded within documents originating from proprietary systems do not target the GNU/Linux environments, and as such, are totally harmless for your data.
However, if you want to monitor and control your data, ClamAv is the reference antivirus software. Note that it does not run continuously in the background, and the user should explicitly request a folder scan to verify its contents.
More information on the DebianHelp site http://www.debianhelp.co.uk/clamav.htm
Yes, one can find everything on Internet: the best and the worst, and often inappropriate images and contents for our children. In order to let them enjoy safely the digital world, you can use different parental control systems.
However, keep in mind that YOU are the best parental control !
The Internet Service Providers usually propose different parental control software. This method allows you to control all the devices on your home network, but does not exempt you to activate the parental control on your Web Browser.
More information on the site https://www.internetmatters.org/parental-controls/interactive-guide/
The settings of the parental control is reserved to the experienced users, because the procedure is rather complex … and is not 100% effective. In addition, the list of “prohibited” sites must be updated on a regular basis.
BlockSite is an extension, which automatically blocks websites of your choice. Additionally, this extension will disable all hyperlinks to these websites, by just displaying the link text without the clicking functionality. The addon website says: “The data collected is not used to identify individual users.”… Up to you…
An alternative solution is to use a search engine whis is going to filter the proposed results, like Qwant Junior: https://www.qwantjunior.com
It is difficult to remain completely anonymous on Internet. Unless you are a well equipped experienced user, you will always leave a trail behind you.
The most beautiful fingerprint you leave, on a daily basis, is your IP address. In fact, each device connected to Internet must have an IP address, which allows to know not only your ISP, but also your precise geographical location … A small test? visit this page to know your public IP address: http://whatismyipaddress.com/
In addition, even if you are not a great pastry chef, you are giving away a lot of “cookies” to all the sites you are visiting. Cookies are connection witnesses: they keep, for a given site, information like your preferences, your identifier, your password, your chosen language, the content of your digital shopping cart, etc. not only on your computer but also on the servers in the cloud. Thus, when you start a search request on a site, it is very capable to register this information.
Advertising companies come join the party, and automatically create your profile by looking at your browsing history.
Don’t be alarmed, numerous advises and software tools are at your disposal to easily become discreet.
Remember that the social networks, in their vast majority, are not there to help you, quite the contrary: they are big advertising agencies which collect everything they find about you. Then, these personal information are resold to advertisers, in order for them to better target your “needs”.
Intelligence on the social networks does not stop there: they continue to trace you on plenty of sites by using - for example - the “like” or “G+” buttons.
Furthermore, the latest scandals unveil the fact that personal data can be collected by several governmental intelligence agencies, even if you are not doing anything suspicious.
If you cannot resist to the temptation of opening an account on a social network (and I fully understand you: virtual encounters are very cool), you can try the Diaspora or the Mastodon journey and discover a decentralized network, which is respectful of your private life and data; Diaspora and Mastodon are designed on the “node network principle”, which means that several connecting points are available. Here is one to start with: https://www.joindiaspora.com/ and https://mastodon.social/about.
As far as the other “less social” networks are concerned, find hereafter few simple advises:

If you want to surf the Web without leaving traces on your computer, the latest versions of the Internet navigators include a “private browsing” feature. This mode functions very simply: once launched, the navigator does not keep the history of the visited sites, nor the cookies distributed by these sites, nor the passwords entered during this “private” session.
However, the visited sites keep track of your IP address: you don’t navigate in an “anonymous” way.
For Firefox, click on the menu (3-dash button at the top right) then select the “New Private Window” option.

Note: it is very possible that some Internet sites do not function well if some cookies are disable. Thus, it is best not to use this mode all the time.
Warning: private does not mean anonymous!
First avoid using non-free navigators, whose source codes cannot be analyzed by the first expert that comes along. The non-free navigators (Internet Explorer, Safari, Chrome …) can potentially spy on your navigation without your knowledge.
The main free navigator you can trust is Firefox.
The private navigation allows the removal of all navigation traces on your computer and can add few more protections against the tracking. It cannot guarantee your anonymity when facing some advanced tracking technology like the fingerprinting (https://wikipedia.org/wiki/Canvas_fingerprinting). But Firefox, in its latest releases, can block the digital fingerprint trackers. Go to the top right “burger” menu > Preferences > Privacy & Security tab. For more information : https://blog.mozilla.org/firefox/how-to-block-fingerprinting-with-firefox/

The two following Firefox extensions, can also make more difficult the tracking of your internet navigation, by modifying you navigator “profile” on a regular basis :
The “NoScript Security Suite” extension blocks the “tracking” scripts by automaticallydisabling some specific scripts. But you must realize that this can generate a lot of problems with numerous internet pages. To be reserved for the most seasoned! https://addons.mozilla.org/en/firefox/addon/noscript/
Stop doing like everyone else, even if supposedly “you have nothing to hide”.
If you want to become anonymous and mask completely your IP address, the best idea is to use TOR (https://www.torproject.org/index.html). To achieve this, we are going to describe two methods: installation of the Tor-Browser, and the usage of the Tails anonymous distribution.
… What’s this Tor stuff ??
TOR stands for The Onion Router, and is a software allowing us to become anonymous on the net by communicating with other TOR users. The principle is to define a random and indirect route on the network, between you and the exit node, which makes impossible the tracking of your IP address.
In addition, the data circulating on the TOR network are encrypted, which makes even more difficult to identify the flows, although they are spied on.
This functionality must not prevent you to keep some common sense … If you connect to an account, whatever it might be, with your usual pseudo and password, you will be quickly identified, even if you use TOR.
Debian offers the TorBrowser in its backports repository. The Thor navigator is not physically present in this Debian repository, but it is rather a launcher which will fetch its latest version on the official site and verify the package signature as well. In order to access it, add the “backports” repository. Don’t worry, the packages coming from this repository are installed only on demand… You won’t see any weird or hazardous update.
Within a terminal in admin mode:
printf "deb http://deb.debian.org/debian buster-backports main contrib" > /etc/apt/sources.list.d/buster-backports.list
apt update
Then to install the launcher itself from the new repository:
apt install torbrowser-launcher -t buster-backportsOnce this is done, we can initiate the TorBrowser download via the tor-browser-launcher (here on Gnome-Shell) :
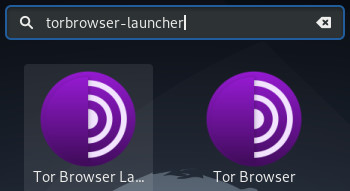
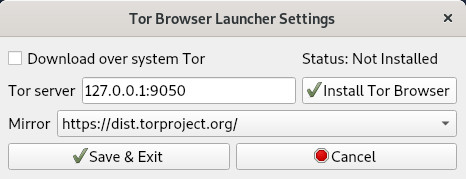
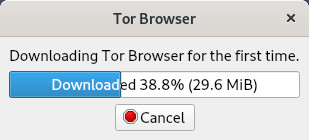
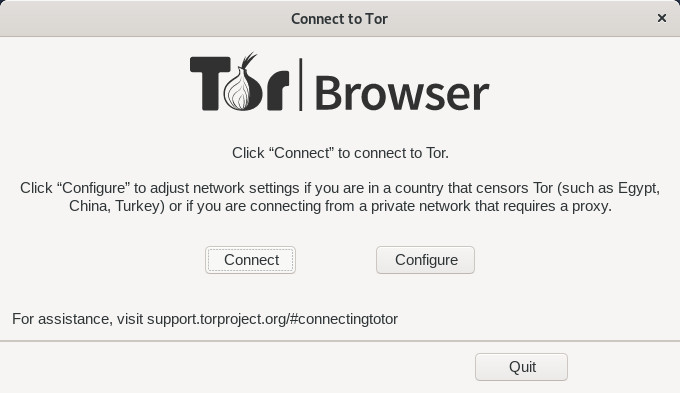
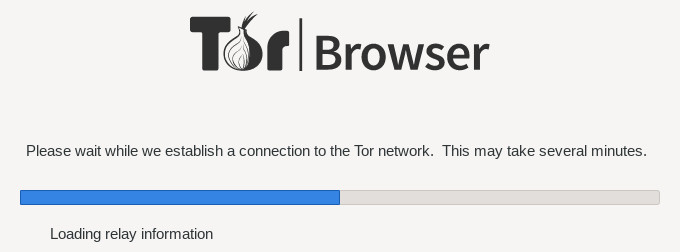
Note that Tor proposes its browser as a stand-alone archive (no need for backports repositories nor administrative password). You can download the archive from the official website: https://www.torproject.org/download/.
Decompress the downloaded archive, then navigate in the tree structure to the ./browser/start-tor-browser file; click on it :). You must leave this directory in place, and “manually” launch the Tor navigator, or drag-and-drop the “tor-browser.desktop” either on the desktop or within the task bar.

Tails is a GNU/Linux distribution based on Debian. It allows you to be totally anonymous on the net. It is installed on a DVD or a USB key, and likewise using other Debian Live (autonomous) images, nothing is saved on your DVD or USB key between two working sessions, and, in addition, you enjoy an anonymous navigation on Internet.
On the main website, you can read …
Tails is a live (autonomous) operating system that you can start on almost any computer from a DVD, USB stick, or SD card. It aims at preserving your privacy and anonymity, and helps you to:
For more information, you can visit the Tails download page https://tails.boum.org/install/download/index.en.html.
Note that the TOR navigation is often slowed down, and that some sites or functionalities will not be reachable, due to their embedded scripts or their “privacy” policies …
Is it the right time to sort out through all your bookmarks ?
No! You must be aware that internet browsing works thanks to a physical network of connected machines. A person with physical access to the different “connection points” will be able to observe the traffic and capture informations immediately, or to store this information for a further consultation.
In addition, computer monitoring is not the only way to identify you and your navigation: video surveillance of public or private places, labeling of machines “for your safety” are only examples of all the possibilities of the authorities and companies to access your valuable data.
It is up to everyone to define his “private life” and not spread it on the web … Or to move on to more political than technical considerations for the Privacy Protection .

 Basic Command Memo
Debian GNU/Linux systems have all the graphical applications needed to perform your daily tasks, so why to use the command line?
This section gathers some basic commands. For a more complete list, visit the Debian documentation: https://wiki.debian.org/ShellCommands.
#Command   #Action
#----------------------------------------------------------------------
pwd        Print Working Directory
cd foo     Change Directory to foo
cd         Change Directory to /home/$USER or ~/
cd ..      move up to the parent directory
ls foo     List information about file(s) in foo
ls -a      ls with hidden files displayed
ls -l ls with size and rights#Command #Action
#----------------------------------------------------------------------
mv source target move the file from source to target
cp source target copy the file from source to target
cp -R source target copy the directory source to target (recursively)
ln source link create a hard link from source to link
ln -s source link create a symbolic link from source to link
touch foo create the file foo or update its
modification date
mkdir dirA create the directory dirA
mkdir -p dirA/dirB mkdir with creation of parent directory if needed
rm foo remove file foo
rm -f file remove the write-protected file
rmdir dirA remove the empty directory dirA
rm -R dirB remove the directory dirB (recursively)
du -h file or dir display size of the file or the dir#Command #Action
#----------------------------------------------------------------------
wc file Prints byte, word and line counts of file
cat file displays the contents of a file
more file displays file page by page. 'Space'=next page,
'Enter'=next line, 'u'=up
less file displays file with fine navigation
Left/Right/Up/Down/PageUp/PageDown
head -n x file displays 'x' first lines of file
tail -n x file displays 'x' last lines of file
tail -f file dynamicaly displays last line of file
diff file1 file2 Displays differences between two text files
diff -u file1 file2 Displays differences between file1 and file2
with patch syntax
comp file1 file2 compares two binary files
comp file1 file2 n N compares two files, file1 from the octet n and
file2 from octet N#Command #Action
#----------------------------------------------------------------------
whoami Print the current user id and name
who Print all usernames currently logged in
id Print user and group id's (uid & gid)
id user Print user and group id's (root only)
finger user Print informations about user
write user Print a message on user's terminal
tty Print the current terminal's name
su - sudo Switch to administrator mode, superuser
passwd Change the password of the current user
adduser add a user
deluser delete a user
addgroup add a group
delgroup delete a group#Command #Action
#----------------------------------------------------------------------
ps Process Status. Lists running process
ps ax Print all running processes
ps aux Print all process identified by users
pstree Print all process in a tree
top List processes running on the system in a
semi-graphical table
kill signal pid kill a process using its pid
pkill signal name kill a process using its nameSignals used by kill/pkill
#Signal  #Mode    #Action
#----------------------------------------------------------------------
-1       HUP      Reload the process configuration file
-2       INT      Interrupt the process
-3       QUIT     Quit the process
-9       KILL     Kill the process (to avoid, try '-15' first)
-15      TERM     Complete the process properly
-18      STOP     Freeze the process
-20 CONT Resume execution of a frozen process#Command #Action
#----------------------------------------------------------------------
lsusb Lists connected USB devices
lspci Lists connected PCI devices
cat /proc/cpuinfo Displays processor information
cat /proc/partitions Displays mounted partitions
lspci | egrep "3D|Display|VGA" Display the graphics card model
lspci | grep -i "net" | cut -d: -f3 Show the Wifi card model
lspci | grep -i audio | cut -d: -f3 Show the soundcard model#Command #Action
#----------------------------------------------------------------------
hostname Print or set system name
ping machine Send a ping to a machine on the network
traceroute machine Displays a traceroute through machine
netstat Displays the use of the network by the processes
netstat -a Netstat with the display of the server processes
lsof Detailed list of file and network usage
ip address Displays the config of the interfaces
route Displays the routing table
curl ifconfig.me Displays public IPExample: displays its locap IP on enp0s3
ip address show enp0s3 | grep "inet " | tr -s " " ":" | cut -d: -f3#Command/Option #Action
#----------------------------------------------------------------------
locate pattern Search for file with a pattern name
updatedb Update locate database
find path options Search for file corresponding to options in path
find -name pattern Search for file with a pattern
find -type f/d/l Search by filetype: f=file, d=directory, l=link
find -exec cmd Execute *cmd* on the found filesExample: search for all png files in the ‘Images’ directory, then copy all files to tmp directory (‘{}’ stands for found files).
find $HOME/Images -name "*.png" -exec cp {} $HOME/tmp/ \;#Format #Compress #Extract
#----------------------------------------------------------------------
.tar.bz2, .tbz2 tar -cvjf archive.tar.bz2 directory tar xvjf
.tar.gz, .tgz tar -cvzf archive.tar.gz directory tar xvzf
.bz2 bzip2 file bunzip2
.rar - unrar x
.gz gzip file gunzip
.tar tar -cvf archive.tar files tar xvf
.zip zip -r archive.zip files unzip
.Z compress files uncompress
.7z 7z a files 7z x
.xz xz -z directory unxzVersion of the Linux kernel used, its name, the version of the compiler used:
cat /proc/versionVersion of the Linux kernel used:
uname -rList all kernels installed on your machine:
dpkg -l | egrep "linux-(header|image)"
 Free Software directory
You can find hereafter a list of the sites providing more detailed information concerning the Free Culture (in general) and the Free Software (in particular).
https://www.fsf.org/
The Free Software Foundation (FSF) is a non-profit organization with a worldwide mission to promote computer user freedom. We defend the rights of all software users.
Free software developers guarantee everyone equal rights to their programs; any user can study the source code, modify it, and share the program. By contrast, most software carries fine print that denies users these basic rights, leaving them susceptible to the whims of its owners and vulnerable to surveillance.
![]()
https://www.gnu.org/
Philosophy of the GNU Project: Free software means that the software’s users have freedom. (The issue is not about price.) We developed the GNU operating system so that users can have freedom in their computing experience.
Specifically, free software means users have the four essential freedoms: (0) to run the program, (1) to study and change the program source code, (2) to redistribute exact copies, and (3) to distribute modified versions.
Software differs from material objects — such as chairs, sandwiches, and gasoline — in that it can be copied and changed much more easily. These facilities are why software is useful; we believe a program’s user should be free to take advantage of them, not solely its developer.
https://www.linuxfoundation.org/
The Linux Foundation partners with the world’s leading developers and companies to solve the hardest technology problems and to accelerate open technology development and commercial adoption.
Founded in 2000, The Linux Foundation today provides tools, training, and events to scale any open source project, which by teaming all together delivers an economic impact not achievable by any other company.
![]()
This site is dedicated to one goal: to twist the neck to the most persistent rumor about GNU/Linux.
Of course I alm talking about: “Your linusque there, it sucks, there is no game which can run on it!”.
./play.it is a libre software that automates the build of native packages for multiple distributions from DRM-free installers for commercial games. The generated packages are then installed using the standard tools provided by the distribution.
Native Linux games are supported, as well as games developed for other systems, thanks to tools like WINE, DOSBox and ScummVM.
More detailed descriptions, including installation and usage instructions, are available in the documentation of the main distributions we support: Debian, Gentoo, Ubuntu (in French only).
Other distributions like Arch Linux are supported, as well as derivatives of these distributions like Manjaro or Linux Mint.
If your games are anything that still keeps you from getting rid of your dual-boot with Windows, the end of the tunnel is not that far away!
Homepage : https://www.dotslashplay.it/
Supported games list: https://wiki.dotslashplay.it/en/start
![]()
You all know Wikipedia the free on-line encyclopedia.
But actually Wikipedia is part of a large family, under the benevolent umbrella of the Wikimedia Foundation
The Wikimedia Foundation is a global movement whose mission is to bring free educational content to the world. Quoting the foundation home page :
“Imagine a world in which every single human being can freely share in the sum of all knowledge. That’s our commitment.”. https://wikimediafoundation.org/wiki/Home
![]()
wikipedia, the free encyclopedia https://wikipedia.org/
Wikipedia is an universal, multilingual encyclopedia, written and maintained by volunteers on the Internet, and functioning under the Wiki principle.
![]()
wikimedia commons, the multimedia library https://commons.wikimedia.org/wiki/Main_Page
Wikimedia Commons, which is often refereed to as Commons, is a media file repository making available public domain and freely-licensed educational media content (images, sound and video clips) to everyone, in their own language.
![]()
wikitionnary, the dictionary https://en.wiktionary.org/
Wikitionary was initially designed as the lexical companion to Wikipedia, the encyclopedia project, Wiktionary has grown beyond a standard dictionary and now includes a thesaurus, a rhyme guide, phrase books, language statistics and extensive appendices. We aim to include not only the definition of a word, but also enough information to really understand it. Thus etymologies, pronunciations, sample quotations, synonyms, antonyms and translations are included.
![]()
wikiquote, the free quote compendium https://en.wikiquote.org/wiki/Main_Page
The Wikiquote collaborative project, is a free online compendium of sourced quotations from notable people and creative works in every language, translations of non-English quotes, and links to Wikipedia for further information.
![]()
wikisource, the free library https://en.wikisource.org/wiki/Main_Page
Wikisource is a project to create a growing free content library of source texts, as well as translations of source texts in any language. This work is done by voluntary contributors.
Some things Wikisource includes are: Source texts previously published by any author, Translations of original texts, Historical documents of national or international interest, Bibliographies of authors whose works are in Wikisource.
Some basic criteria for texts excluded from Wikisource are: Copyright infringements, Original writings by a contributor to the project, Mathematical data, formulae, and tables, Source code (for computers), Statistical source data (such as election results).
Unless otherwise noted, all user contributions to Wikisource are released under the Creative Commons Attribution/Share-Alike License (CC-BY-SA) (replacing the previously used GNU Free Documentation License).
![]()
Wikibooks, the open-content textbooks collection https://fr.wikibooks.org/wiki/Accueil
Wikibooks is a collection of open-content textbooks. Wikibooks is for textbooks, annotated texts, instructional guides, and manuals. These materials can be used in a traditional classroom, an accredited or respected institution, a home-school environment, as part of a Wikiversity course, or for self-learning.
![]()
wikijuniors, the free textbooks for children https://en.wikibooks.org/wiki/Wikijunior|Wikijunior
Wikijunior produces non-fiction books for children from birth to age twelve. These books could take the form of macropedias, textbooks, or primers. These Wikijunior books are written with children in mind. The subjects of these books are chosen because they are appealing to kids. These books are richly illustrated with photographs, diagrams, sketches, and original drawings.
![]()
vikidia, the free encyclopedia for children https://en.vikidia.org/wiki/Main_Page
Vikidia is an English encyclopedic project, based on wiki technology, for 8-13 year-old readers and contributors, but not only.
The website is independent from Wikimedia Foundation which owns Wikipedia. It was launched in November 2006 in French and in 2013 in English. Vikidia is handled by the Association Vikidia, a non-profit-organization located in France.
![]()
Wikiversity, the open learning community https://www.wikiversity.org/
Wikiversity is a Wikimedia Foundation project devoted to learning resources, learning projects, and research for use in all levels, types, and styles of education from pre-school to university, including professional training and informal learning.
Teachers, students, and researchers are invited to join Wikiversity in creating open educational resources and collaborative learning communities.
![]()
wikispecies, the free species directory https://species.wikimedia.org/wiki/Main_Page
Wikispecies is a wiki-based on-line project supported by the Wikimedia Foundation. Its aim is to create a comprehensive free content catalog of all species; the project is directed at scientists, rather than at the general public. Wikispecies is available under the GNU Free Documentation License and CC BY-SA 3.0.
![]()
wikivoyage, the free travel guide https://www.wikivoyage.org/
Wikivoyage is a free web-based travel guide for travel destinations and travel topics written by volunteer authors (“Wiki-travelers” from all around the world). It is a sister project of Wikipedia and supported and hosted by the same non-profit Wikimedia Foundation. Wikivoyage has been called the “Wikipedia of travel guides”.
![]()
wikinews, the free news source https://en.wikinews.org/wiki/Main_Page
Wikinews is a free-content news source Wiki and a project of the Wikimedia Foundation. The site works through collaborative journalism. Wikipedia co-founder Jimmy Wales has distinguished Wikinews from Wikipedia by saying “on Wikinews, each story is to be written as a news story as opposed to an encyclopedia article.” The neutral point of view policy espoused in Wikinews distinguishes it from other citizen journalism efforts. In contrast to most projects of the Wikimedia Foundation, Wikinews allows original work under the form of original reporting and interviews.
![]()
wikidata, the free and open knowledge base https://www.wikidata.org/wiki/Wikidata:Main_Page
Wikidata is a collaboratively edited knowledge base operated by the Wikimedia Foundation. It is intended to provide a common source of data which can be used by Wikimedia projects such as Wikipedia, and by anyone else, under a public domain license. This is similar to the way Wikimedia Commons provides storage for media files and access to those files for all Wikimedia projects, and which are also freely available for reuse. Wikidata is powered by the software Wikibase.
This project was launched by Wikimedia Deutschland. It was presented during the Semantic Tech & Business Conference in February 2012, and the site was open to the first contributions on 30 October 2012.
![]()
wikimedia Meta-wiki, the global community site for the Wikimedia projects https://meta.wikimedia.org/wiki/Main_Page
Meta (or Wikimedia’s Meta-Wiki) is a wiki-based web site that is auxiliary for coordination of all the Wikimedia Foundation projects.
Meta currently serves as one of the major avenues of discussion for Wikimedians including Wikipedians, the others being the mailing lists, the IRC channels, and the talk pages of individual articles and users. Meta is an independent and autonomous project from the English language Wikipedia and thus has its own policies and customs, which often differ from those here.
Originally focused on the English language version of Wikipedia, Meta has, since its upgrade to Wikipedia’s custom MediaWiki software, become a multilingual discussion forum used by all Wikimedia language communities.
![]()
wikimedia incubator, where possible new languages for existing projects are tested https://incubator.wikimedia.org/wiki/Incubator:Main_Page
The Wikimedia Incubator founded on 2 June 2006, is a wiki-based website hosted by the Wikimedia Foundation. It serves as a platform where anyone can build up a community in a certain language edition of a Wikimedia project (Wikipedia, Wiktionary, Wikibooks, Wikinews, Wikiquote and Wikivoyage) that does not yet have its own sub-domain, provided that it is a recognized language.
This is where potential Wikimedia project Wikis in new language versions can be arranged, written, tested and proven worthy of being hosted by the Wikimedia Foundation.
![]()
mediawiki, a free software open source Wiki package, supporting all the Wikimedia projects https://www.mediawiki.org/wiki/MediaWiki
MediaWiki is free server-based software, licensed under the GNU General Public License (GPL). It’s designed to run on a large server farm for a website that gets millions of hits per day.
![]()
Debian, the universal operating system, aka the “Mother” of numerous children distributions https://www.debian.org/index.en.html
By the way, Debian provides more than a pure OS: it comes with over 43000 packages, precompiled software bundled up in a nice format for easy installation on your machine.
Debian is also a democratic community organization, which aims at the development of operating systems exclusively based on free software.
![]()
Emmabuntüs (http://www.emmabuntus.org) a distro for all seasons.
Emmabuntüs is a distribution designed to facilitate the refurbishing of computers given to humanitarian associations, in particular the Emmaüs community (http://www.emmaus-international.org/en/) (hence, the name of the distribution), to help the discovery of the GNU/Linux world by beginners, and limit the the electronic wastes generated by the hardware overconsumption, by extending the lifespan of aging computers.
![]()
Mageia (https://www.mageia.org) is a free operating system, based on GNU/Linux. It is a community project (https://www.mageia.org/en/community/), supported by an association law 1901 consisting of elected contributors.
The goal of Mageia: to make superb tools for people. Beyond a secure, stable and sustainable operating system for your computers, the goal is to establish stable and credible governance to coordinate collaborative projects.
Contributions are based on their own license (https://www.mageia.org/en/about/license/) and the community complies with a Code of Conduct (https://www.mageia.org/en/about/code-of-conduct).
Mageia has an active community and detailed documentation. https://www.mageia.org/en/support/
![]()
Fedora (https://getfedora.org/) is a polished, easy to use operating system for laptop and desktop computers, with a complete set of tools for developers and makers of all kinds.
Fedora comes with a “Server” release, a powerful, flexible operating system that includes the best and latest datacenter technologies. It puts you in control of all your infrastructure and services.
![]()
https://www.gnu.org/distros/free-distros.fr.html
This page lists the GNU/Linux distributions that are entirely free as in freedom.
The Free Software Foundation seems quite tough in what concerns the real freedom … But can we put the blame on an organization which is seeking a situation that should be commonplace.
Equivalence between proprietary software: A list of free alternatives proposing functionalities close to those of proprietary software, well established in their application domain. This list is far to be comprehensive, and does not have the goal to spotlight particular software, but rather to present different (proprietary or free) software within the same application domain. http://wiki.linuxquestions.org/wiki/Linux_software_equivalent_to_Windows_software
The Free Software Directory: FSD, or simply Directory is a project of the Free Software Foundation (FSF). We catalog useful free software that runs under free operating systems — particularly the GNU operating system and its GNU/Linux variants. https://directory.fsf.org/wiki/Main_Page
h.node: This project aims at the construction of a hardware database in order to identify what devices work with a fully free operating system. The h-node.org website is structured like a Wiki in which all the users can modify or insert new contents. The h-node project is developed in collaboration and as an activity of the Free Software Foundation (FSF).
https://h-node.org/home/index/en
 Glossary
=> With great power comes great responsibility…
The administrator is a person in the IT department who is responsible for managing the company server. He takes care of the system updates, verifies its proper functioning, creates new accounts, sets permissions and configures file sharing, emails, backups, security scheme …
On a computer for private use, the administrator is the one who has the system management rights: in this case, yourself.
ADSL means broadband Internet. ADSL (Asymmetric Digital Subscriber Line) is practically deployed throughout most of the industrial countries and allows you to take advantage of speeds up to 30 Megabits/s, which permits you to watch videos, download files and navigate the Web very easily.
ALSA (Advanced Linux Sound Architecture) is a Linux kernel module which gather the functionalities of several different sound drivers into one. It is used to detect sound cards whatever they are; it is very popular and very efficient. It greatly simplifies the sound management on Linux and is often updated.
Apt (Advanced Packaging Tool) is the Debian package manager using the .deb package formats. There are graphical interfaces like Synaptic for those who are not comfortable with the typing of command lines in the the terminal window.
Aptitude is an alternative to Apt. It offers other options such as the construction of dependency tree, update of package status and many others. While Apt does not care about broken packages on your system, Aptitude will try to repair them during the next update or upgrade, by presenting alternative solutions as well as their consequences and let you decide what to do about them.
Finally, it is also interesting to see the behavior of Aptitude when removing software: it computes useless dependencies and deletes them. On the other end, Apt does only what you clearly ask for.
The “at” symbol ‘@’ is small “a” with a circle curling around it. It is used to form email addresses (e.g. user@isp.com). This symbol is not used in the web addresses, but only for electronic mail addresses.
An Audio format is a data format used to represent sounds, music and voices in digital form, with the purpose of either store or transport them.
Autonomy is the time that a battery enables a mobile unit to operate without having to be recharged by an electric outlet. The autonomy of a laptop is of few hours and that a mobile phone of few days, in theory.
Computer name when it’s big and powerful.
BIOS stands for Basic Input Output System. The BIOS is the software (firmware) embedded on the motherboard which allows you to perform basic tasks when you turn the computer on (e.g. read one sector of a hard disk).
This is the program that launches at startup, allowing the choice of booting the computer with one among several operating systems. The most popular, Lilo and Grub are usually installed in the MBR (Master Boot Record) or the GPT (GUID Partition Table) of the hard drive. Although Windows has a similar piece of software, it is more difficult to use, when implementing a dual-boot Linux/Windows (for example), than using Grub.
Software used to surf the Web.
A bug is an unwanted operation in a computer or a computer program. We are talking about bugs when the software does not do what you asked, whenb it stops working, or when it does something weird or shutdown suddently…
The computer language (following the A and B languages) which has become one of the most widely used programming languages of all times.
An evolution of the C programming language. Warning: C+ does not exist!
Live chat rooms on the Internet are spaces where you share information via text with a group of other users. The ability to converse with multiple people in the same conversation differentiates chat rooms from instant messaging programs, which are more typically designed for one-to-one communication.
A click is the action of pressing and releasing (almost) immediately one of the mouse buttons. An unspecified “click” actually means a “left-click”.
Common type of architecture on the Internet and more generally in computer science: A server contains information, clients connect to it and submit a request. Corresponding treatments are performed by the server and the results are sent back and displayed on the client computer. The Web is a good example of client/server application.
Cloud computing is concept gaining wide acceptance: rather than installing a program on our computer, which is going to take some space, the current trend is to do the work online, without the need to download the software. This is a way to do office work with Google Docs without installing anything on the computer, a browser is enough.
to write a program, or to speak the “machine language” (no, it does not mean “make a beep beep beep sound” …).
The source code is the text file written by the software developer, which can be understood by the compiler and transformed into a directly executable program. Some source codes are freely available to developers in particular in the context of free software.
Start a command that converts source code into an executable program.
Also named terminal, it is (or not) a graphical window giving access to the shell interpreter allowing you to type command lines to be executed.
Files sent by some websites and stored on your hard drive. On subsequent connections, your computer let the Web site retrieve the data that you previously entered. Cookies can only be read by the website that issued them and may contain only data that the user voluntarily provided to the site, or that can be retrieved from the connection itself (source IP address, etc). They can not read the disks contents nor contain an executable program. You can set your browser to reject cookies, but you lose then an interesting usability (like storing your preferences or passwords).
Copy and paste represents the action of duplicating a file from one location to another. The file is cloned into a new destination. The copy-paste operation is done, for example, by right-clicking on a selected file and choosing the “Copy” action, and then right-clicking in the destination folder and choosing the “Paste” action. The keyboard shortcuts for these two actions are the popular [Ctrl]+‘c’ and [Ctrl]+‘v’.
A program crashing under Unix has the effect of copying its entire memory contents into a file named “core”. Not a good news … but becoming seldom these days.
Cut and paste, moves a file without duplicating it: the file will no longer exists in its original location, but only in its destination. The keyboard shortcuts for these actions are [Ctrl]+X and [Ctrl]+V.
=> arrow, which you have a hard time to follow the moves on the screen…
The cursor is following on the screen the movements of your mouse. Often symbolized by a slanted arrow cursor, it lets you point an element: an icon, a menu, a button to click on in order to activate a function.
=> The mommy of many distributions
Debian is a community and a democratic organization whose purpose is the development of operating systems based exclusively on free software.
Debian differs from most of the distributions based on it by its non-commercial nature and the cooperative governance of the association managing the distribution.
It is said that there is a dependency, when a package depends on another one to be installed and/or to run smoothly.
In the Unix world, a DE is a set of programs that provide a user friendly graphical interface to the operating system. It usually consists of a window manager and a lot of software that fit well with the environment, first and foremost file managers, control panels, web browsers, text and image editors, games, and even office and messaging suites.
A device is a piece of hardware that is connected to a computer. USB key, keyboard, mouse, printer … are all devices.
A dialog box is a small window that appears when the system or an application wants you to make a choice. You must therefore read the message and click the button that corresponds to your choice (Yes or No, Save or Cancel, …).
Distribution is a GNU/Linux system with a collection of software, which forms a complete operating system, ranging from the command line up to the graphical environment. The goal is to put together a stable and coherent set of software aiming at a particular audience. Distribution provides different tools to easily obtain and install the software.
Some distributions are commercial, that is to say, manufactured and distributed by companies, which adhere, more or less, to the free software spirit. Others, only developed by volunteers, are completely free.
Drag and drop is the action of moving the cursor on an icon, pressing and holding a mouse button, moving the mouse cursor to another location, and then releasing the button: the selected file follows the mouse and moves directly into this new location.
An email can be written in plain text or in HTML format. In the HTML case, some text embellishments are possible (bold, color, image, tables) but some mail client software (increasingly rare) do not read messages in HTML format.
Ergonomics refers to the ease of handling, understanding and using an equipment (e.g. a phone, a software or a website). More ergonomic it is, and faster the end user will master it. An ergonomic system is intuitive.
A file manager or file browser is a computer program that provides an user interface to work with file systems. The most common operations performed on files or groups of files include creating, opening (e.g. viewing, playing, editing or printing), renaming, moving or copying, deleting and searching for files, as well as modifying file attributes, properties and file permissions. Folders and files may be displayed in a hierarchical tree based on their directory structures. Some file managers contain features inspired by web browsers, including forward and backward navigational buttons. Some file managers provide network connectivity.
A file system (FS) , represents the way data are organized in a disk partition. GNU/Linux has its own FS, called ext2, ext3, ext4, ReiserFS, btrfs … and handles a multitude of file systems from other architectures, including FAT , VFAT (ie FAT32), NTFS (DOS/Windows file systems), ISO 9660, etc.
A file system is called “journalized” when it keeps a record (log) of the operations being performed, and then saves them on the disk.
These types of file systems (for example ext3/4 or Reiserfs and also NTFS) are more tolerant to system crashes because they keep the system consistent (no need anymore to use fsck or scandisk at start-up).
The firewall is a software protection located at the entry point of a computer, or a local network, to prevent intrusions from the outside. It controls the inputs and outputs and transmits only the authorized signals.
A firmware is a program used to connect smart devices (hard drive, DVD burner, scanner, ADSL modem) to your computer. It is written in the language understood by the electronic device. We can compare the firmware of a device to the BIOS of a computer. It is responsible for initializing the device and then executes the commands received from more advanced programs.
A font represents a range of characters with a particular size, weight and style of a typeface.
It is often used in a figurative sense to designate a “branch” or a “differentiation” from a common root. It is often through this differentiation process that new Linux distributions emerge. More precisely the whole idea is to take a basic known kernel or program, to modify it according to some purpose and to redistribute it.
File Transfer Protocol. Protocol used to transfer files over the Internet. Also the name of the program implementing this protocol. It is necessary to have a specialized program in order to access the FTP servers (Example: Filezilla)
Although the word may have a broader connotation, a geek is a computer enthusiast, usually passionate about other subjects (e.g. science fiction) and generally curious. Geek does not mean technology obsessed: geek do not like to only use the technology, they love to understand how that works and they do have a critical mind.
The graphics card is a component of the central unit responsible for the on-screen display. Powerful graphics cards also handle the rendering of 3D displays (for video games). The main manufacturers of graphics cards are Nvidia and ATI.
The graphical user interface refers to how the software is presented on the screen to the user. It is the positioning of the elements: menus, buttons, features in the window. A well defined graphical interface is ergonomic and intuitive: designed in such a smart way that the user understands it immediately.
GNOME stands for GNU Network Object Model Environment. It is a user friendly free graphical environment which goal is to make the GNU operating system usage available to the greatest number of people. This interface is currently very popular on the GNU/Linux systems and runs also on most of the UNIX-like systems.
The GNU project (“GNU’s not Unix”) is a community initiated in 1983 by Richard Stallman to create a free alternative to the Unix operating system.
GNU is particularly known in the software world because it made major contributions such as the development of the GNU compiler collection (GCC), the improvements of existing Unix commands or the definition of the free GNU General Public License (GPL).
GNU has also worked on a kernel called HURD, but ultimately it is Linux which emerged and became the kernel enabling the usage of all the other bricks of the project.
An inelegant but effective solution to a computing problem. Sometime also called a workaround.
The hard (disk) drive is an important component of a computer. It is the computer shed, since its role is to store data. The hard drive contains partitions that contain your installed system and your personal data
=> note : Soft Drive does not exist …
The collection of physical elements that comprise a computer system (the beast, cards, chips, drives, processor, etc.), as opposed to the Software part.
High Definition is the successor of the television set as we knew it before. HDTV is a television system providing an audio quality and an image resolution which are substantially higher than those of a standard-definition television. The difference is really obvious. Video games (PS3 and Xbox360) and Blu-Ray (successor to the DVD) also benefit from this technology. However you will need some money and compatible hardware to enjoy it (compatible HDTV set, HDMI cable, Blu-Ray player …).
HDMI stands for High-Definition Multimedia Interface. HDMI is a standard for connecting together High Definition devices. It is replacing the Scart socket. You can connect a Blu-Ray player for example to an HDTV with an HDMI cable, and even a PS3 or a Xbox 360.
An icon is a pictogram, accompanied by a name, representing an element: folder, file, software, shortcut … clicking on an icon will launch a predefined action: open the file, launch the software, display the content…
IM stands for Instant Messaging, and refers to a software where you can communicate directly (or chat) with friends and family, possibly share files, using the microphone to talk and the webcam to see each others. Unlike a chat, instant messaging lets you talk with some people of your contact list, and not just anyone on the web.
Internet includes all interconnected (wired and wireless) networks in the world and their associated websites. With an Internet access, you can visit all the websites of the world in one click, listen to music, communicate, watch videos, learn … let it be from your computer, your tablet or your smart phone.
Inputs/Outputs (or I/O) characterize the exchange of information between the processor and its associated devices. In practice, within an operating system, the inputs are the keyboard, the mouse, the disks, the incoming data from the network. When the outputs are the screen, the disks, the printer, the outgoing data to the network etc …
Single address across the Internet network, to uniquely identify a machine. It is usually represented by a group of four numbers. If your computer is connected to the Internet, it has an IP address that is usually provided at the beginning of the connection by your Internet Service Provider (ISP).
Internet Service Providers which let you enjoy Internet. Each of them provides an interface allowing you to connect to the Internet, to have an unlimited land-line phone and even access to digital TV programs.
Internet Relay Chat. Discussion System in real time on the Internet. There are several IRC networks themselves divided into “channels” themes.
Multi-platform programming language by Sun. The principle is that a program written once in Java can run on any computer as long as it has the specific runtime environment called “Java Virtual Machine”. This converts Java virtual machine instructions into specific instructions to your computer while requiring it to meet certain safety rules.
Java programs can be embedded within web pages, and in that case they are executed while the container page is being displayed. They are named Applet.
You should be extremely careful, because Java applet can be used as malware on your computer.
graphics file format producing an impressive compression ratios compared to previously defined formats, but at the expense of the image quality. Actually, the compression method is usually lossy, meaning that some original image information are lost and cannot be restored, possibly affecting image quality. The corresponding file extension is JPG.
The core of an operating system, or simply the kernel, is one (if not the most) important part of the system. It manages the computer resources and allows different components - hardware and software - to communicate with each other.
A keyboard shortcut is a combination of keys pressed simultaneously on the keyboard to perform a specific action on the computer. The most commonly used keyboard shortcuts are for saving ([Ctrl] + s), to copying ([Ctrl] + c), pasting ([Ctrl] + v), or closing a window ([Alt] + F4) …
The KISS principle, “Keep it Simple Stupid”, is a method which advocates seeking simplicity in design and avoiding unnecessary complexity. Example: Give me a KISS.
Run … very … slowly. Lagging like a snail.
A live CD (or a live USB key) is a bootable medium. The system starts booting the computer and then runs the OS without installation. It actually uses the volatile memory (RAM) to run, and does not affect the permanent memory (hard disk).
“Free Software” is a concept of free applications and operating systems, whose source codes are left open by the developers, in order for everybody to inspect and improve them. One example is the GNU/Linux initiative which regroups free and gratis operating systems like Debian, but also the LibreOffice suite, the free alternative to Microsoft™ Office, or Firefox and Chromium the free alternatives to Microsoft™ Internet Explorer.
Sentence used by the computer people to say that they still have 2 hours to finish (the time to compile, test, fix, compile, test, fix, compile …)
mail refers to a letter sent by Internet via email software (e.g. Icedove). The mails are free, usually limited to 10MB, which can be accompanied by attachments (images, documents …) and sent to recipient(s) (At :) and potentially people in copy (CC :). Unwanted mails are called junk or spam.
A memory card is a small device able to permanently store digital data, likewise a USB key. The memory card is intended to be plugged into digital cameras or camcorders. It can store photos and movies, and can be read back by computer featuring a memory card slot. Among the most popular formats, we find the MemoryStick card for Sony devices, and SD for most others. A recent memory card can store thousands of photos.
The motherboard is the main component of the CPU. Its role is to centralize and process all the data exchanged between the processor and the peripherals. The motherboard therefore manages the hard disk, the CD/DVD drive, the keyboard, the mouse, the network, the various USB ports …
Nolife is an insane geek or nerd so passionate by his computer activity that he/she spends all his time with his/her passion neglecting everything else and in consequence has no (or very few) social life. No comment …
The “Noob” term (derived from “newbie” or novice) refers to a computer novice. It is not necessarily a pejorative term.
The notification area is usually located at the right of the taskbar. You can usually find in there, the time, the network indicator, the sound volume. This is where the messages appear when the system has something to tell you (e.g. the battery is running empty, updates are available …)
This is the set of software that manages the computer hardware and provides common services for the application programs. By extension, it is also viewed as the main interface with the end users.
Some examples of operating systems : GNU/Linux, Windows, Mac OS X, FreeBSD.
Operating System.
A package manager is the software which installs, updates and uninstalls the system packages. On Debian, Synaptic is the graphical front-end of the APT Debian package manager.
To use certain media such as hard disks, we need to structure them, to break them down into rather large subsets: partitions. In turn, each partition is then structured as a separate file system. Splitting a hard drive into multiple partitions allows, for example, the coexistence, on the same disk, of two different operating systems like GNU/Linux and Windows, which use different file systems.
Phishing is a scam practice which tricks an user by sending him an email with a forged sender address and including a link to a fake website mimicking its bank site, or an e-commerce site, and asking him to update its information … If the user get trapped (or phished) then his sensitive information (private data, bank account details, …) can be used to evil ends.
a Pixel is the smallest controllable element of a picture represented on the screen. A pixel can display one color at a time. Thus the screen is composed with million of these pixels, spread in both directions (height and width), and they come together to form the screen image. A pixel is so small that you can barely see it with the naked eye. The more pixels compose an image and the sharper it is.
A plugin is a software component that adds a specific feature to an existing computer program. Allowing for example a web browser to read more image, video, animation or sound formats. Sometimes also called “add-on”.
PS/2 port represents a couple of plugs located in the rear of the system unit. The purple plug connects the keyboard, while the green one connects the mouse.
Having said that, we should mention that the PS/2 port is not used very often these days and replaced by the universal USB ports. One of the big disadvantage of this port is that it is not a hot-plug : a device connected after the computer startup won’t be recognized.
The processor, also named Central Processing Unit (CPU), is the electronic circuitry within a computer that carries out the instructions of a computer program by performing the basic arithmetic, logical, control and input/output (I/O) operations specified by the instructions.
In particular, it handles the data exchanges between the various components of the system (hard drive, memory, mouse, graphics card …) and performs all the computation needed to interact with the you through the data displayed on the screen.
There is also the Graphics Processor Unit (GPU) which is a special component of the graphics card which accelerates the creation of images in a frame buffer intended for output to a display.
Used in the sense of “waiting in line”. For example different files to be printed are put first in the printer spool queue.
Terminate the execution of a program. Example : give me a pay raise or a quit my job.
RAM stands for Random-Access Memory. It is the computer volatile data storage. Its major advantage is the speed at which one can read from or write to it, as opposed to other direct access data storage media where the time required to read and write data items varies, depending on their locations and/or some mechanical limitations such as the media rotation speeds and arm movement delays.
A right-click is the action of pressing and releasing (almost) immediately the mouse right button. A right-click will display a contextual menu corresponding to the pointed element. In particular, it allows to copy, move, delete and rename the pointed element when it is a file or a folder.
Means “Read The Fucking Manual”. This is an abbreviation that is thrown wildly at the head of someone asking a question, to encourage him to do first his home work in reading the documentation.
This is because people sometimes ask trivial questions, whose answers are readily available in the man pages or on the Internet, and often these people are not used to the power of the documentation in the Unix world.
A search engine is a large software system, hosted by a website and which is designed to search for information on the World Wide Web. It lets you ask questions or type some key words to be searched for. The engine will then return the most relevant results.
A shortcut is an icon placed anywhere and providing a quick access to a software or a location on your computer. Most of the time a shortcut is used to launch a program. Deleting a shortcut does not uninstall the program it is associated with, and does not delete either the linked file.
Everything that makes a computer running, except the hardware part. Applications are software, for example.
Generally present in modern Internet browsers, tabs allow to browse multiple sites simultaneously. To switch from one site to another, you just have to click on its corresponding tab. Tabs are represented like tabs in a workbook.
We call a terminal, the command line console which is available and essential in all GNU/Linux distributions.
Even though many GUIs are available for virtually any application, nothing is more efficient, for example, than updating your entire system by typing one single command line.
Note : a terminal is a very useful tool to debug a program.
In the world of Usenet, forums of all kinds, mailing lists, IRC, and all these places open to online discussions, a troll is a person who sows discord by starting arguments or upsetting people, by posting inflammatory, extraneous, or off-topic messages with the intent of provoking readers into an emotional response. By extension the subject of the argument itself.
Known examples : “GNU/Linux or Windows”, “Women in Free Software”.
For a desktop, the central unit is the box containing all the electronic equipment that allows the computer to operate. The Keyboard, mouse, monitor, speakers etc. are all connected to it. The hard disk drive is located in this central unit, for example.
For a laptop, there is no Central Unit. All the electronic components are grouped under the Keyboard.
Unix is a multitasking, multi-user computer OS. The original Unix system was developed in 1969. Several versions were created later on, and today, GNU/Linux is taking its inspiration from this family and continues with the same philosophy.
Unix systems are characterized by a modular design that is sometimes called the “Unix philosophy,” meaning that the OS provides a set of tools, each of which performing a well-defined function, and an unified file system to perform complex work-flows.
The main Unixes (or Unices) are : the BSD family (NetBSD, FreeBSD, OpenBSD), AIX, Solaris, HP-UX, Mac Os X.
An update is a new version of a program that fix a problem existing in its the previous version. The update may fix a security hole, add a new functionality, solve an algorithm error …
The URL (Uniform Ressource Locator) points to the address of a website like “http://www.debian.org”. By typing an URL in the browser address bar, you go directly to the desired site, without having to go through a search engine. You never need to type the %%“http://www.”%% address header, simply enter “debian.org”.
USB stands for Universal Serial Bus. It is the cable with a rectangular connector that wants to be universal: almost all current hardware devices are connected to your computer via USB. Computers now have USB ports on the back, on the front of the Central Unit, and even sometimes on your monitor.
It usually requires 3 steps to plug an USB connector: try to plug it in a first try, it does not work. Turn over the connector and retry, it does not work too. Retry with the initial position and the connector will fit in. This is as mysterious as the sock which disappears in the washer…
It is the full set of the workspaces available on a GNU/Linux desktop. It is like having on hand several desktops (with task bar and included windows). Very handy to get organized !
Video Graphics Array (VGA) refers to the display hardware first introduced with the IBM PS/2 in 1987. The term can also mean either an analog computer display standard, the 15-pin D-subminiature VGA connector or the 640x480 resolution itself. While this resolution was superseded in the personal computer market in the 1990s, mobile devices have only caught up in the last few years.
Stands for Virtual Private Network, and refers to an encrypted network on the Internet, which allows a company whose premises are geographically dispersed to communicate and share documents in a completely secure manner, as if they were all connected in a local area network.
Web is the most common Internet network and refers to all the interconnected networks that run across the whole world and connect computers together in the manner of a spider web.
Surfing the Web means : browse the Internet.
An Internet browser is a software application that allows you to visit websites, download files and make some research.
A wiki (Hawaiian word meaning “quick”) is a web site whose pages are editable by visitors, enabling the creation of collaborative contents. (And aren’t you afraid to give the keys to strangers ?).
A window is a rectangular area that appears on the screen to display, for example, the contents of a folder, or a text file, or some software output. The window can take all the space (full-screen) or only a part of the screen real estate. It is possible to view multiple windows simultaneously and drag items from one to another using the drag and drop technique.
The window manager is the X (graphical) client software that controls the placement and appearance of windows (title bar, framing, moving, resizing, etc..) within a windowing system in a graphical user interface. Most window managers are designed to help provide a desktop environment.
Applications, handle the inside of the window they created and manage their content and the interaction with the user.
It is possible to change the window manager and see all the look and feel of the screen change completely.
When the window manager can do many other things in addition to what has been described here, it is a desktop environment like XFCE.
Initials of the World Wide Web.
X Window System, commonly called X Windows, X11 or just X is the graphics subsystem of GNU/Linux. X Window is not only a driver for the video card, it is mainly an interface (API) for applications, so that they appear on the screen and receive input from the keyboard and mouse.
Free X server used by GNU/Linux distributions.
Yes we can make you understand your computer, use it to do what you want and share knowledge…
“Stay zen”, means keep calm. Zen Buddhism has always been appreciated by hackers. This is a fundamental virtue of good programmer, especially in the debugging phase …
A very popular file compression format. Requires a specific program for decoding (expanding) the compressed file.
Program that ended but whose father, informed of its death, does nothing (in keeping with the quilt analogy, he is not concerned by the funeral nor the administrative procedures). It does not exist anymore but is not deleted from the system process list, so it is still a bit alive … In turn, a program whose father was destroyed is an orphan.
 Sources & licenses
Sources of this manual are freely available on its main server:
https://arpinux.org/lcdd/buster-en/download/thebeginnershandbook-src.tar.gz
Sources edition: Geany https://www.geany.org/ & VIM http://www.vim.org/
Pictures edition: the Gimp https://www.gimp.org & XnViewMP https://www.xnview.com/en/xnviewmp
External exports: Pandoc http://pandoc.org/
Debian package export: equivs
https://debian-handbook.info/browse/stable/sect.building-first-package.html
PDF edition: Exiftool https://en.wikipedia.org/wiki/ExifTool
Screenshots & tests made on Virtualbox https://www.virtualbox.org/
The various sources that helped me in the development of this manual:
Debian 8 Administrator HandBook: https://www.debian.org/doc/manuals/debian-handbook/index.html
Debian main site: https://www.debian.org/
The Stretch beginner’s handbook: https://arpinux.org/lcdd/stretch-en/
Debian-Facile documentation (fr): https://debian-facile.org/wiki
The beginner’s handbook scribbled by arpinux under free license WTFPLv2 (http://www.wtfpl.net) unless otherwise stated.
English translation by Saby43, member of the Emmabuntüs community (https://emmabuntus.org/a-propos/).
This manual integrates logos (Debian, Firefox, etc.) under copyright (each one its own, otherwise it’s not funny) as well as some images and texts under license CC-BY-SA (https://creativecommons.org/licenses/by-sa/3.0/) (specified and credited under images and texts concerned)
The icons used come from the Gnome themes: https://commons.wikimedia.org/wiki/GNOME_Desktop_icons & Tango: https://commons.wikimedia.org/wiki/Tango_icons
Debian : Copyright © 1997-2020 SPI (http://www.spi-inc.org/) and others; See license terms (https://www.debian.org/license)
Debian is a registered trademark (https://www.debian.org/trademark) of Software in the Public Interest, Inc.
Previous releases of the beginner’s handbook were made with the kind contributions of humans. Thanks to… bendia, nIQnutn, Atapaz, Severian, deuchdeb, martinux_qc, mercredi, nazmi, chalu, bruno-legrand, Thuban, Starsheep, arpinux, smolski, Trefix, desmoric, nono47, yanatoum, PengouinPdt, èfpé, fiche, BibiSky51, titiasam, Firepowi, dcpc007, rhyzome, Péhä, kyodev, saby43 & Caribou22.
For this Buster release, thanks to Caribou22, otyugh, fiche, JCE, ubub, captnfab, vv222, Swith_T, raleur & samtux ;).
Thanks to saby43 for the english translation,
and to my wife <3
Special thx 2 Péhä for his drawings (under CC-BY-SA) and his free spirit
https://lesptitsdessinsdepeha.wordpress.com.