 7.Tweaking of your environment
Do you feel you took control of your system ? Now we are going to tweak the configuration of your workstation.
Basically, you can modify everything you want on the Debian GNU/Linux desktops and tailor your environment to make it fit your personal needs and tastes.
To achieve this, the right-click is the quasi-ultimate weapon !
7.1.User interface
 The GNU/Linux environments are known for their great flexibility in terms of configuration. However, some desktop are more flexible than others, because of their main interface.
Grossly speaking, they all work the same way: a "Control Center" to handle them all in the same place, and the right-click for the settings of individual elements.
Most of the functionalities have been addressed during the presentation of the desktops (chap.4.2). But let's return to the two Debian main desktops: Gnome and KDE .
7.1.1.The Gnome-Shell interface
Gnome is the default desktop for the Debian installations. This desktop features an "all-in-one" interface which makes it a fluid and intuitive environment.
Gnome-Shell88) provides a "uniform" interface: this is what brings this great fluidity. This means also that you will not be able to modify everything you want, like on the other desktops built with a modular design. But instead of talking about the few things you cannot make, let's talk about all the settings available to you  .
.
Let's take the direction Gnome Activity menu > "Tweak Tool".
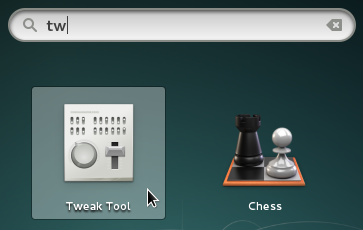
The opening window includes all the elements of your Gnome-Shell desktop. The changes are applied and visible immediately.
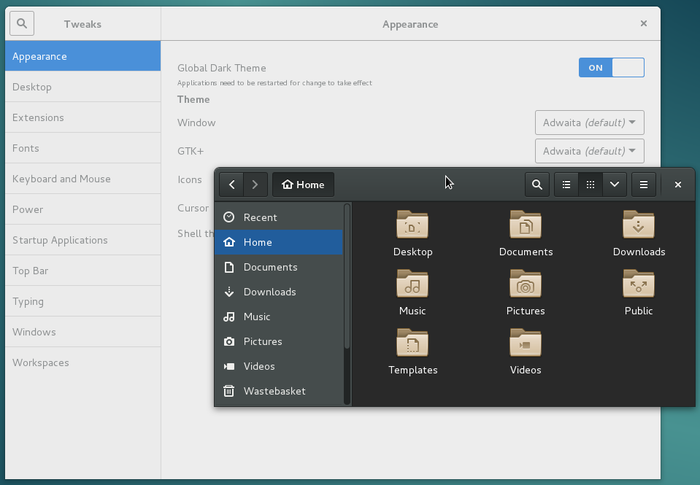
Gnome
-Shell
: configuring the interface
After few "clicks" on the various categories, you will easily understand how to install, in the top bar, the Application menu, the Places menu or the weather forecast.
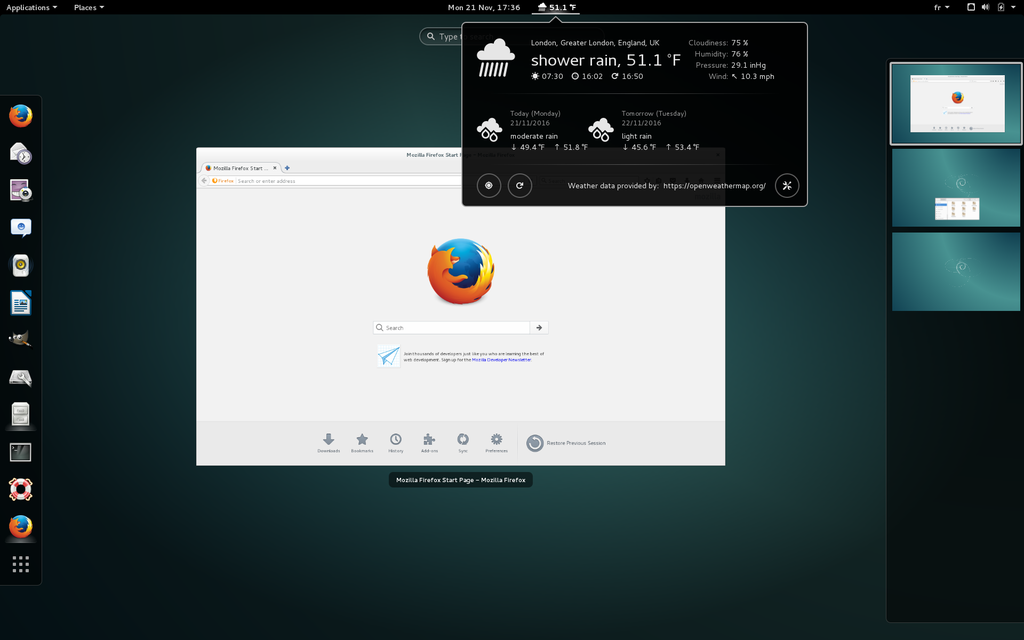
Gnome
-Shell
:
Gnome
desktop configured with theses extensions
7.1.1.1.Adding Gnome-Shell extensions
You can add extensions to Gnome -Shell directly from the on-line Gnome catalog 89 . In the configuration window, and the "Extensions" section, click on the "Get more extensions" link at the bottom right.

Gnome
-Shell
: adding extensions
You will be redirected to an Internet page which displays a list of the available and directly installable extensions. Start by allowing the "Gnome Shell Integration"

Gnome
-Shell
: authorize the on-line service
Then enjoy all the Gnome-Shell extensions:
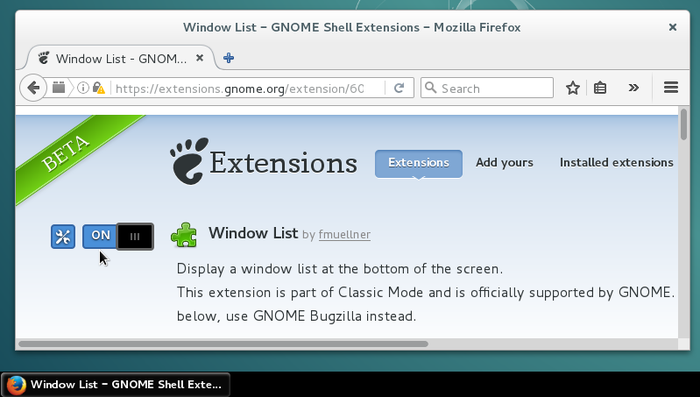
Gnome
-Shell
: activation of the "Window List Display" from the on-line catalog
The site takes into account the modules already installed on your system and let you also configure them by using the appropriate icon tool:  .
.
7.1.1.2.Gnome-Shell keyboard shortcuts
In order to be more efficient, and even if Debian is "mouse-click-oriented", we suggest you use the keyboard shortcuts: pressing the "Windows" key, for example, switch between the Activities overview and desktop. The overview displays the open activities, the dock and the virtual workspaces.
7.1.1.3.All Settings panel of the Gnome Desktop
Your desktop "All Settings" panel is available from the Parameter launcher and gives you access to all the settings of your environment.

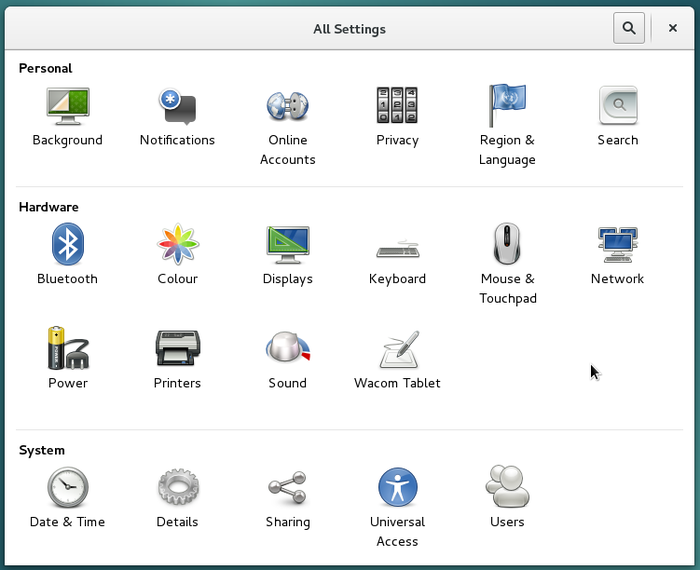
Gnome
-Shell
: All Settings
Panel
7.1.1.4.The Gnome Classic interface
If you want to use a more "classical" interface, you can take this option during your session sign in: click on the little gearwheel to select the "Gnome Classic" option before pressing the "Sign In" button:
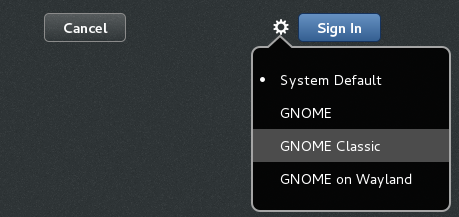
Gnome
classique: Environment selection during Sign In

Your session then opens with a more conventional version of Gnome, but you keep your main settings and your tools.
The "Classical" interface is lighter, but offers less visual effects (usefull or useless, depending on the view point)
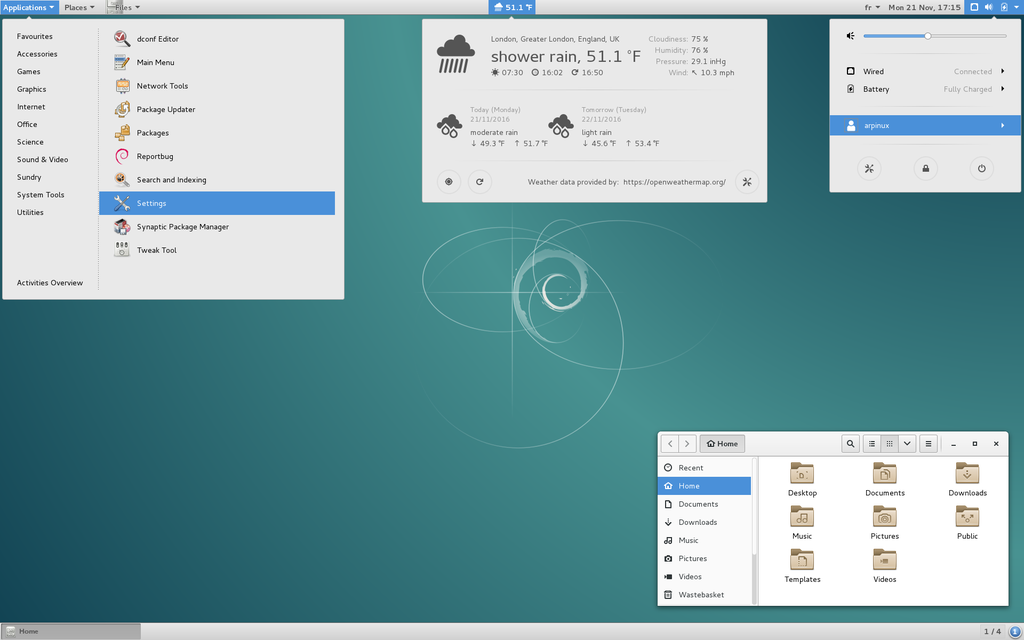
Gnome
Classic
desktop on Debian 8 Jessie
In order to come back to the default Gnome-Shell interface, select the "Gnome" option of the gearwheel menu, next time you Sign In.
7.1.2.The KDE Plasma interface
KDE is one historical desktop for the GNU/Linux environments, and did always put the emphasis on its extreme customization. The transition to the Plasma 90 rendering engine did not change a bit on that point: everything on KDE is modular, movable, configurable, and accessible from a very detailed System Setting Center .
7.1.2.1.The System Settings panel
This is where you are going to tweak all your computer and Debian system settings.
Network, audio, video, window appearances, default language, and also the way you sign in, and a lot more … Virtually everything is configurable from this panel. Even some desktop special effects integrated in KDE, in Compiz style, can be managed from here.
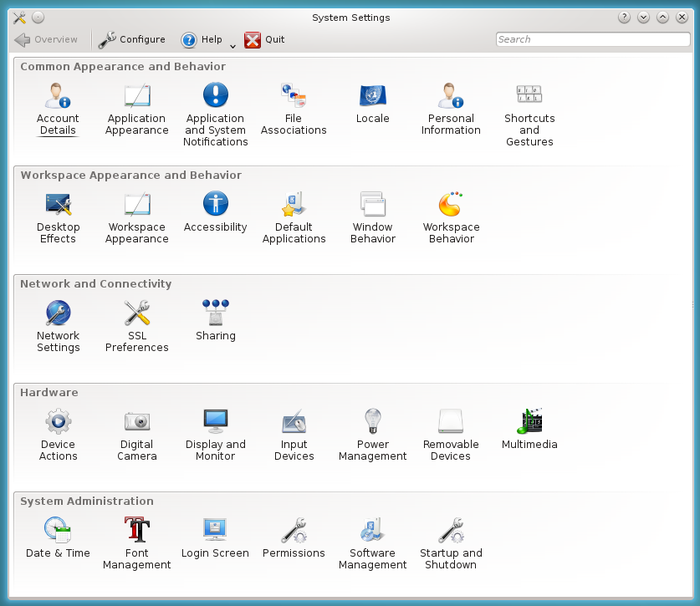
KDE
: Debian System Settings on
KDE
Plasma
To obtain a lighter KDE 4 you can uncheck the Strigi file indexer as well as the Nepomuk semantic desktop in the Desktop Search tab of the Workspace Appearance and Behavior section. You can also uncheck some desktop effects ( windows transparency, for example).
If you wish a more "out-of-the-box" like environment, and if your computer configuration allows it, you should prefer Gnome or Cinnamon which offer less detailed (and less complex) interfaces.
7.1.2.2."Desktop layout" on KDE
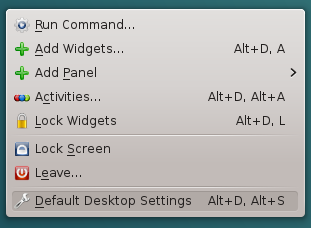
KDE allows a pre-configured layout of your workspace. Start with a right-click on the desktop > "Default Desktop Settings"
In the window which opens, besides the wallpaper settings, you can access to different desktops from the appropriate drop-down menu:
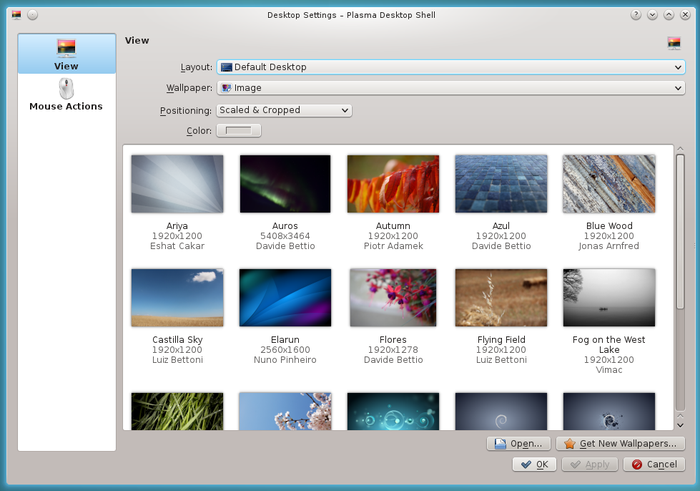
KDE
: configuration of the "desktop layout"
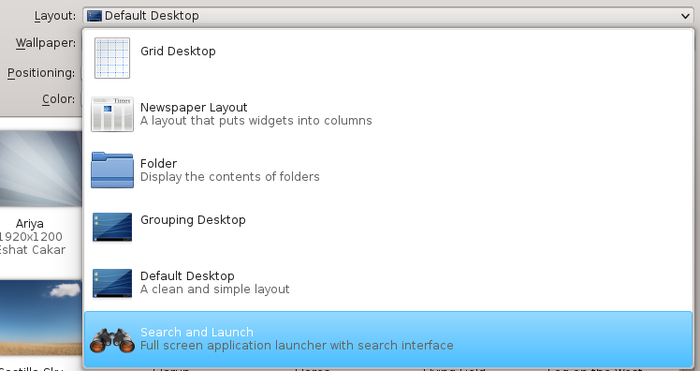
The default desktop can be replaced by the "Search and Launch" desktop:
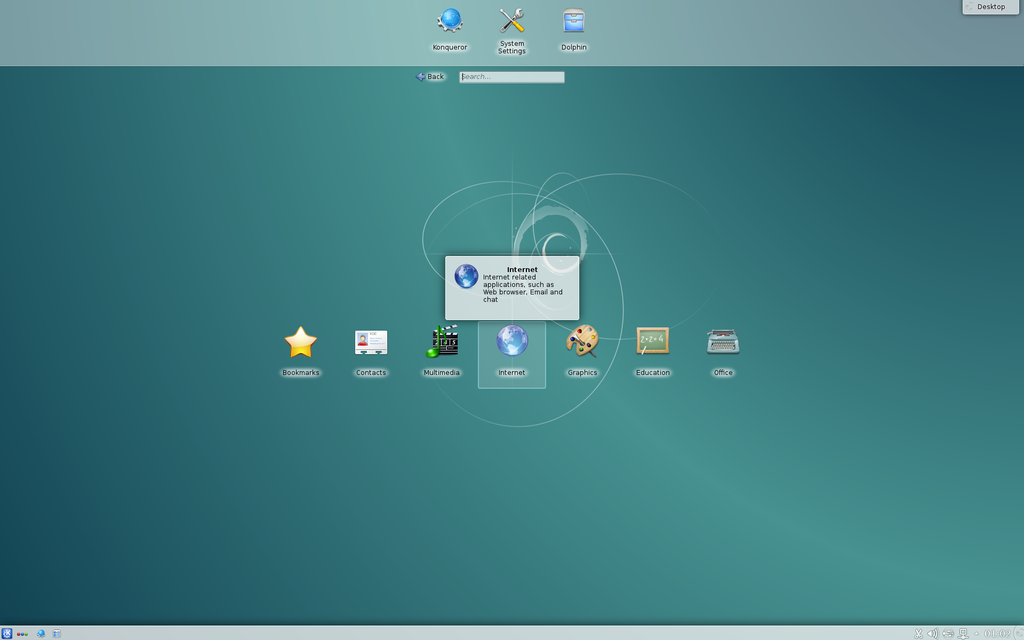
KDE
: "Search and Launch" desktop
With KDE, the possibilities are very numerous and I invite you to visit the detailed external documentation or be adventurous and play with your mouse to snoop all over the system interface.
For more detailed information, visit the KDE.org summary page91 of the KDE4 Plasma functionalities.
7.2.System Preferences
 The configuration of your system directly impact you user experience. Instead of writing a complete chapter about the different ethical and technical concepts which led to the Debian software organization, we are going to examine their consequences on your daily usage.
In the rest of this chapter, you might be asked to activate the "contrib" and/or "non-free" sections of the Debian repositories , in order to access some "less-free" software . In that case, follow the method documented in the chapter 8.1.3 .
7.2.1.Root-User / su-sudo
During the installation, Debian ask you to enter the password for the "root" administrator account. TYHis account is common to all the GNU/Linux systems and allows to execute administrative tasks on the system.
However, this account is not mandatory. During the installation process, you can pass over the the "root" account configuration (leave empty the root password fields), and doing so, avoid its creation.
In this case, this is the first user registered during the installation who will assume the "root" role.
OK …. and then ?
Then, this changes the way you launch commands to administrate the system: in this manual, every time we ask you to execute a command in "root" mode, we use the " su " command. But if the "root" account was not created, you must use instead the " sudo " command, which switch you and "root", and give your own password .
In a nutshell to launch an administrative command:
If the "root" account was created , use "su" + administrator password + command launch:
If the "root" account was NOT created , use " sudo + command" + your user password :
7.2.2.Read a commercial DVD
The DVDs sold commercially are "copy protected" and usually are not readable by default on free systems.
The Entertaining Companies consider that we do not have the right, on a free system, to make a private copy of the DVDs we bought  .
.
To remedy that, if you really need this functionality, you must install the libdvdcss2 package. This package is not present by default in the Debian repositories , but you can find it in the repositories of Videolan (the site of VLC, the well known multimedia player).
The principle consists in adding the Videolan repositories to your system, adding the signature keys to secure the communication with these repositories and finally installing libdvdcss2.
In practice: 3 commands and that's it !
-
Open a terminal in administrator mode ( see chap.3.8.3 ) with su , then launch this command to add the Videolan repositories in a separate file:
-
echo "deb http://download.videolan.org/pub/debian/stable/ /" > /etc/apt/sources.list.d/videolan.list
-
wget -O - http://download.videolan.org/pub/debian/videolan-apt.asc | apt-key add -
-
apt update && apt install libdvdcss2
You can realize these modifications in graphical mode only, by using the Synaptic package manager, but it takes a lot of time to click with the mouse all over the places …
Your Debian GNU/Linux system is now able to read the "protected" commercial DVDs, and to make private copies of them.
7.2.3.Using FlashPlayer
Adobe Flash Player is a non-free platform used to add animation, video , and interactivity to Web pages. Flash is frequently used for advertisements and games.
A free reader exist: Gnash92. It is an alternative to the Adobe reader but does not allow to have access to all the Flash functionalities. You can find it in the "backports" repositories of Debian-8 Jessie.
Be aware that the current trend for site developers is to move away from flash in favor of HTML5 93 , thus it is more and more easy to survive on the Internet without the proprietary flash player.
This manual being intended for beginners, we are not going to ask you to remove all the bookmarks pointing to sites still using the flash reader (although that could help making a faster transition), so we will detail below how to install the flash player by default, because yes, on top of that, there is several of them …
7.2.3.1.Installing the generic Flash Player
In order to install the non supported default version of the Flash Player for Linux, you should modify your repository sources to add the "contrib" section.
-
Open a terminal in administrative mode ( see chap.3.8.3 ) with the " su " command and then edit the repositories :
apt edit-sources
-
Modify the sources as follow (add "contrib" after "main"):
###### Debian Main Repos
deb http://ftp.fr.debian.org/debian/ jessie main contrib
deb-src http://ftp.fr.debian.org/debian/ jessie main contrib
###### Debian Update Repos
deb http://security.debian.org/ jessie/updates main contrib
deb-src http://security.debian.org/ jessie/updates main contrib
deb http://ftp.fr.debian.org/debian/ jessie-updates main contrib
deb-src http://ftp.fr.debian.org/debian/ jessie-updates main contribSave the changes with [Ctrl]+x then answer "Y" for "Yes" in the nano terxt editor.
-
Launch the following command to reload the repositories and install the Flash Player:
apt update && apt install flashplugin-nonfree
-
To update the Flash Player , always in "root" mode:
update-flashplugin-nonfree --install
-
To remove the Flash Player:
update-flashplugin-nonfree --uninstall
apt-get remove flashplugin-nonfree
More detailed information about the other available plugins on Debian dedicated page94
7.2.4.Installing a graphic card driver
The Debian GNU/Linux system includes free drivers and some firmware in order to operate the integrated graphical functions (chipsets) of the motherboard or the external graphical card.
 … I need a
driver
to manage the card of my mother ??
… I need a
driver
to manage the card of my mother ??
Your computer is designed around its "motherboard", a plastic board on which the various elements of the processor (the central compute unit) are fixed, as well as the chipsets, the graphical component being part of them (the graphical display computer, to make a long story short).
In order to send the right instructions to these elements the GNU/Linux kernel (the program managing the interactions of the hardware with the system) uses pieces of code, called drivers (and sometimes "firmware" to be loaded on smart devices during the initialization phase). The Linux kernel includes by default a set of free drivers. These drivers are usually sufficient to manage the screen display. But it may happen that proprietary drivers are needed to optimize the screen resolution.
You can try to install these proprietary drivers if, during a live session or once your system is installed, you find out that:
-
resolution is wrong, with stretched and distorted images,
-
the screen remains black after start-up, even if the system was installed without any errors.
-
the colors are badly handled
-
the system is heating too much when watching videos
-
returning from the "suspend" mode is somewhat erratic …
Please note that installing proprietary
driver
s is a non-free alternative, and as such, not followed by the Debian developers. If your
computer
is very recent, don't hesitate to ask the support of the
community
before tinkering with your system
 (
see chap.1.5
).
(
see chap.1.5
).
7.2.4.1.Identifying your hardware
The first thing to do is to identify your graphic device (or graphic card). Open a terminal as simple user, and enter the following command:
lspci | egrep "3D|Display|VGA"
which will display this kind of result for a nVidia controller:
01:00.0 VGA compatible controller: NVIDIA Corporation G96GLM [Quadro FX 770M] (rev a1)
or this kind of result for an ATI controller:
01:00.0 VGA compatible controller [0300]: Advanced Micro Devices, Inc. [AMD/ATI] Barts PRO [Radeon HD 6850] [1002:6739]
("lspci" lists the devices connected to the PCI bus, and "egrep" selects only the information we are interested in, rather than displaying everything. Here we are looking only at graphical components).
As you can see the identification is rather easy … we got the manufacturer and the model on the same line. Should you have the slightest doubt concerning the installation of additional driver s, don't hesitate to ask the Free Community for help (chap.1.5).
7.2.4.2.Installing the generic firmware
In all cases, and before the installation of any
proprietary
driver
, you should add the
non-free
firmware
delivered by Debian. (More information on
firmware
here:
https://www.debian.org/releases/jessie/i386/ch02s02.html.en
)
To add the Debian non-free
firmware
to your system, start with
modifying your
repositories
(chap.8.1.3) by adding the
contrib
and
non-free
sections to your sources.
-
Open a terminal in administrative mode ( see chap.3.8.3 ) with the " su " command (the administrator password is requested), then launch the command:
apt edit-sources
-
Modify the sources.list file by adding the contrib and non-free section, like this:
###### Debian Main Repos
deb http://ftp.fr.debian.org/debian/ jessie main contrib non-free
deb-src http://ftp.fr.debian.org/debian/ jessie main contrib non-free
###### Debian Update Repos
deb http://security.debian.org/ jessie/updates main contrib non-free
deb-src http://security.debian.org/ jessie/updates main contrib non-free
deb http://ftp.fr.debian.org/debian/ jessie-updates main contrib non-free
deb-src http://ftp.fr.debian.org/debian/ jessie-updates main contrib non-free(The mirror address indicated here ' http://ftp.fr.debian.org ' might well be different in your case)
Save your modifications with [Ctrl]+x in the Nano text editor, then "Y" for "Yes". -
Reload the repository informatin, and install the non-free firmware:
apt update && apt install firmware-linux firmware-linux-nonfree
-
Restart your machine to test again your screen display before installing the proprietary drivers.
If no real improvement is noticed, continue with the following sections … The sources.list file is already set for the next steps.
7.2.4.3.ATI/AMD card configuration
This is the "generic" driver to install if your card is not listed in the specific sections (Radeon, Catalyst).
To install it from an administrator terminal ( voir chap.3.8.3 ):
apt install libgl1-mesa-dri xserver-xorg-video-ati
Restart your computer to load the microcode (firmware) of the graphic peripheral.
the Radeon driver of Debian 8 "Jessie", supports the graphic processors from R100 to Hawaii (Radeon 7000 - Radeon R9 290). See the Radeon package page95 to verify your card.
To install it from an administrator terminal ( see chap.3.8.3 ):
apt install libgl1-mesa-dri xserver-xorg-video-radeon
Restart your computer to load the microcode (firmware) of the graphic peripheral.
The proprietary "AMD Catalyst Linux Graphics Driver " (alias fglrx ) delivers a hardware acceleration optimized for the OpenGL applications. It is suitable for the graphic processor s of the Radeon R9 200, Radeon R7 200, Radeon HD 8000, Radeon HD 7000, Radeon HD 6000 and Radeon HD 5000 series (see the complete list 96 )
 This driver is not compatible97 with the Gnome desktop, because it does not support the EGL interface. It is advised to to use instead the Radeon free driver.
To install it from an administrator terminal ( see chap.3.8.3 ):
apt install fglrx-modules-dkms fglrx-driver linux-headers-$(uname -r) fglrx-control
To configure the graphic server:
aticonfig --initial -f
To take the modifications into account, restart your computer.
To verify that the microcode/firmware was correctly loaded, enter in a terminal:
glxinfo | grep 'direct rendering'
Which should return a line like:
direct rendering: Yes
For more detailed information, visit the official Debian documentation98.
7.2.4.4.nVidia card configuration
Debian uses a software tool to detect and indicate the driver to be installed: nvidia-detect . To install and use it, open a terminal in administrator mode ( see chap.3.8.3 ), then launch:
apt update && apt install nvidia-detect
To launch the detection, simply launch the command:
nvidia-detect
which will return this kind of result:
Detected NVIDIA GPUs:
01:00.0 VGA compatible controller [0300]: NVIDIA Corporation G96GLM [Quadro FX 770M] [10de:065c] (rev a1)
Your card is supported by the default drivers and legacy driver series 304.
It is recommended to install the
nvidia-driver
package.
In this example, the card is natively supported by the default driver and by the "legacy series 304" driver; Depending on your machine, you can install two types of drivers: the 340.xx series (for the GeForce 8x and more) and the 304.xx series (for the GeForce 6x and 7x). Older models are supported natively by the free driver.
For a complete list of the supported cards , visit the dedicated documentation: 340.xx series page 99 - 304.xx series page 100
Installation of the 340 series driver : for the GeForce 8xx or newer model
-
Open a terminal in administrator mode ( see chap.3.8.3 ), and install the driver s:
apt update
apt-get install linux-headers-$(uname -r) nvidia-kernel-dkms nvidia-driver -
Creation of a configuration file xorg.conf : since the driver is not auto-detected, you need to declare it, always from a terminal in administrator mode:
create the appropriate configuration file:mkdir /etc/X11/xorg.conf.d
Fill the file directly from your terminal with:
echo -e 'Section "Device"\n\tIdentifier "My GPU"\n\tDriver "nvidia"\nEndSection' > /etc/X11/xorg.conf.d/20-nvidia.conf
-
Restart your computer to automatically blacklist (I.E. tell the kernel NOT to load it) the free driver, and use the one which was just installed.
Installation of the 304 series driver : for the GeForce 6xx or 7xx
-
Open a terminal in administrator mode ( see chap.3.8.3 ), and install the driver s:
apt-get update
apt-get install linux-headers-$(uname -r) nvidia-legacy-304xx-kernel-dkms nvidia-legacy-304xx-driver -
Creation of a configuration file xorg.conf : since the driver is not auto-detected, you need to declare it, always from a terminal in administrator mode:
create the appropriate configuration file:mkdir /etc/X11/xorg.conf.d
Fill the file directly from your terminal with:
echo -e 'Section "Device"\n\tIdentifier "My GPU"\n\tDriver "nvidia"\nEndSection' > /etc/X11/xorg.conf.d/20-nvidia.conf
-
Restart your computer to automatically blacklist (I.E. tell the kernel NOT to load it) the free driver, and use the one which was just installed.
7.2.4.5.Loss of the graphical session
If, following a driver installation, you are facing a black screen, you need to return to the previous configuration.
Boot in " recovery mode " : from the Grub loader menu, select the "Advanced options" entry and then the " recovery mode " entry.


The system launches a console and invite you to continue the startup sequence (by using the [Ctrl]+d short-cut to quit the console) or enter the administrator password, and this is what you do:

Removal of the xorg.conf configuration file
: during the installation of the
proprietary
driver
, you created a X configuration file located in /etc/X11/xorg.conf and/or /etc/X11/xorg.conf.d/xxx.conf. It must be removed.
Always from the console and depending on the file created, remove it with the command: "
rm
":
rm /etc/X11/xorg.conf.d/20-nvidia.conf
Here this is the file corresponding to nVidia which was removed, to be adapted to your situation .
Uninstallation of the proprietary driver s : The same way you were able to install a driver , you can uninstall it, here an example with the nVidia driver , to be adapted to your situation :
apt remove nvidia-kernel-dkms nvidia-driver
Restart your computer with a simple " systemctl reboot "
7.3.Adding a new user
 If you are not the only
user
of your
computer
, you can create new
user
accounts in order to
preserve your data and preferences
. By adding a new
user
, a new folder will be created in the system. This folder, named by the pseudo of the new
user
, will receive the default parameters delivered during the system installation.
If you are not the only
user
of your
computer
, you can create new
user
accounts in order to
preserve your data and preferences
. By adding a new
user
, a new folder will be created in the system. This folder, named by the pseudo of the new
user
, will receive the default parameters delivered during the system installation.
It will be readable (you can consult the data of the other
user
) but not writable (you cannot create or modify its data).
Debian includes a simple graphical tool to execute this task, but you can also use the terminal and the "adduser" command (described in the next section).
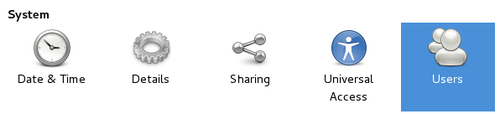
From a menu or the application list, "System" category, select "Users and Groups":
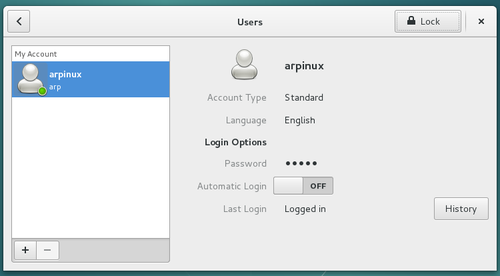
The window which opens, displays the detailed information of your user account. You can then modify the parameters of your account, or create a new account. But you need first to "unlock" the application by clicking on the lock button at the top, and enter the administrator password .
To add a new account , click on "Add" (or the " + " button) at the bottom of the left pane:
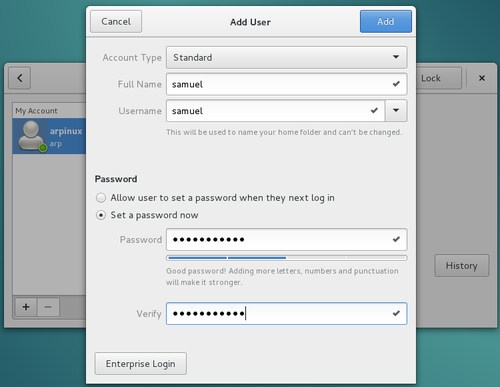
You must enter the full name of this new user, as well as its username (the pseudo or login name used when connecting to a new session). On the Gnome system, you can let the user to define its password during the first connection, or enter it immediately:
The user account is created … and here you go:
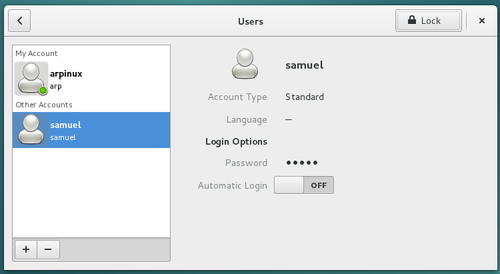
Advanced settings allow you to define the rights and permissions for each user.
7.3.1.Adding a new user using the terminal
-
Open a terminal in administrator mode ( see chap.3.8.3 ).
-
In the terminal window, enter the command which creates the new " user name" account.
Note that you should enter here the user ID (or pseudo), not the full name which will be asked later on .adduser identifiant_du_nouvel_utilisateur
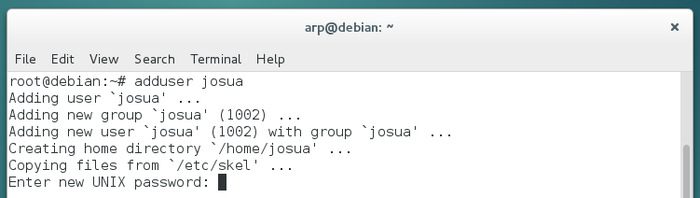
The user account creation process is started and you must enter the password twice (without any echo, its normal).
-
Once the account is created, we can enter additional information: full name, room number, work phone, home phone, and any comments in the "Other" field.
Once done, a confirmation is requested. If these information are correct you can type [Enter] or [Y] to finish the account creation process:
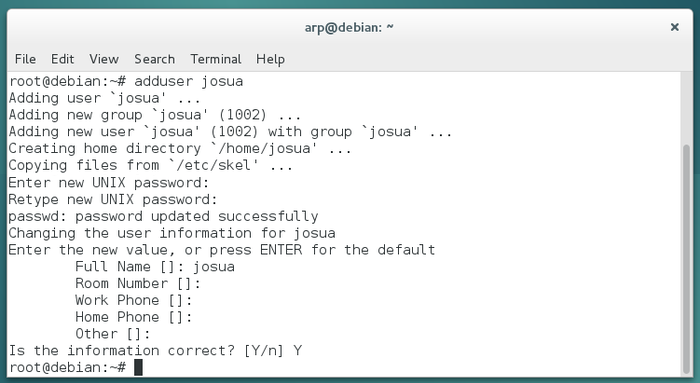
This new user will be able to login with its username and password at computer startup. It will be able to store and manage its data and configure its environment without any risks for your own data and preferences.
88 https://wiki.debian.org/GnomeShell
89 https://extensions.gnome.org
90 https://www.kde.org/workspaces/
91 https://www.kde.org/workspaces/plasmadesktop/
92 https://packages.debian.org/jessie-backports/gnash
93 https://en.wikipedia.org/wiki/HTML5
94 https://wiki.debian.org/FlashPlayer
95 https://packages.debian.org/jessie/xserver-xorg-video-radeon
96 https://support.amd.com/en-us/kb-articles/Pages/AMDCatalyst14-9LINReleaseNotes.aspx
97 https://www.debian.org/releases/jessie/amd64/release-notes/ch-information.en.html#gnome-fglrx
98 https://wiki.debian.org/ATIProprietary
99 http://us.download.nvidia.com/XFree86/Linux-x86_64/340.65/README/supportedchips.html
100 http://us.download.nvidia.com/XFree86/Linux-x86/304.125/README/supportedchips.html