 6.Fast boot after installation
The first things to do after the installation.
Remember that before proceeding with the real installation, it is highly recommended to run a test in "Live session" mode to check your hardware compatibility (network connection, screen resolution, peripherals …) with the system.
 … but what is exactly a "
Live
session" ?
… but what is exactly a "
Live
session" ?
Recall that we presented this feature in the section 5.2.1.4 . This is a session that let you test the operating system without risk. The system is installed from a CD or USB key, directly into the computer RAM . Then you can test your WI-fi connection, your print er etc … None of the settings made during this session will be saved after the computer shutdown.
6.1.Network connection setting
 Using either an Ethernet wired connection or a Wi-fi wireless connection, your Debian system is expected to access the network. The Ethernet connection is recognized natively. As far as the Wi-fi is concerned, it is sometimes necessary to use a non-free driver.
-
If your Wi-fi connection is recognized natively , jump directly to the Network manager sections (forthe Gnome, Mate, Cinnamon or Xfce desktop), Wicd (for the LXDE desktop) or the connection editor under KDE.
-
If you network device is not functioning , you need to go to the "material recognition" section.
6.1.1.Check if the driver is present
In order to check if the driver is present, we are using the command:
/sbin/ifconfig
which should return a result like:
eth0 Link encap:Ethernet HWaddr xx:xx:xx:xx:xx:xx
BROADCAST MULTICAST MTU:1500 Metric:1
RX packets:0 errors:0 dropped:0 overruns:0 frame:0
TX packets:0 errors:0 dropped:0 overruns:0 carrier:0
collisions:0 lg file transmission:1000
RX bytes:0 (0.0 B) TX bytes:0 (0.0 B)
lo Link encap:Boucle locale
inet adr:127.0.0.1 Masque:255.0.0.0
adr inet6: ::1/128 Scope:Hôte
UP LOOPBACK RUNNING MTU:65536 Metric:1
RX packets:552 errors:0 dropped:0 overruns:0 frame:0
TX packets:552 errors:0 dropped:0 overruns:0 carrier:0
collisions:0 lg file transmission:0
RX bytes:37827 (36.9 KiB) TX bytes:37827 (36.9 KiB)
wlan0 Link encap:Ethernet HWaddr xx:xx:xx:xx:xx:xx
UP BROADCAST RUNNING MULTICAST MTU:1500 Metric:1
RX packets:638993 errors:0 dropped:0 overruns:0 frame:0
TX packets:412031 errors:0 dropped:0 overruns:0 carrier:0
collisions:0 lg file transmission:1000
RX bytes:617235341 (588.6 MiB) TX bytes:42145548 (40.1 MiB)
If the interface named "wlan0" or "eth1" does not appear in the list, this means that the Wi-fi driver is missing.
6.1.2.Identifying a network device, and installing its driver
If your network connection is not functioning, it is usually a driver issue. In order to select the right one, we need to identify first the network device.
Within a terminal, in user mode, launch the command:
lspci | grep -i "net" | cut -d: -f3
which will return a result like:
Intel Corporation 82567LM Gigabit Network Connection (rev 03)
Broadcom Corporation BCM4322 802.11a/b/g/n Wireless LAN Controller ...
Here, the detected Wi-fi device is the Broadcom BCM4322
If I run a simple Internet search, like " Debian Broadcom BCM4322 ", I found quickly the right page 58 which tells me to install the firmware -b43-installer .
The Wi-fi connection setting is a very touchy subject for the GNU/Linux distributions, due to the non-free nature of the drivers to be installed.
More information on the Debian Wi-fi Wiki: https://wiki.debian.org/WiFi
6.1.3.Network-manager-gnome
This is the network manager delivered with Gnome, Mate, Cinnamon, and Xfce.
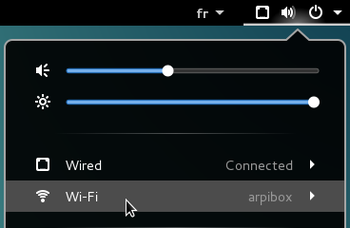
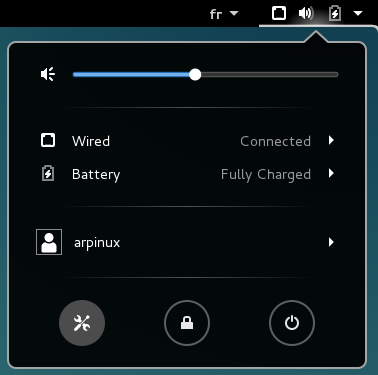
It is accessible from its icon within the notification area:
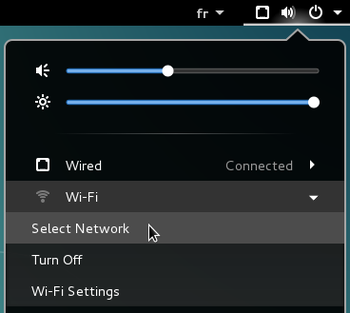
Network management on
Gnome
a
n
d
Xfce
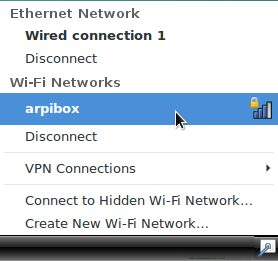
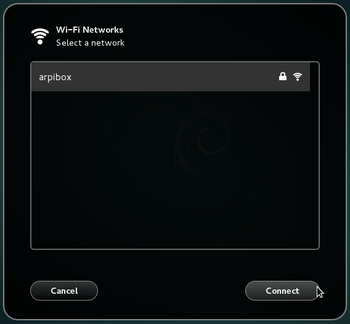
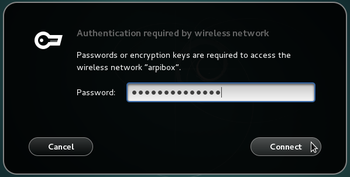
All the active or inactive connections are listed here, and the Wi-fi networks are detected as well. Left-click on the network you want to connect to, and a dialog box will pop up. Select your network then "Connect". A password is then required (the one given by your Internet Service Provider). Here on the Gnome desktop:
Then enjoy your Wi-fi connection:
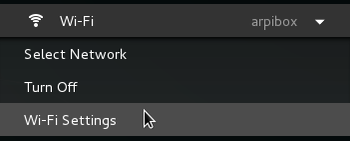
To tweak the Wi-fi settings, select the dedicated entry in the main menu:
You will be able to modify the connection settings, and even "Forget" it:
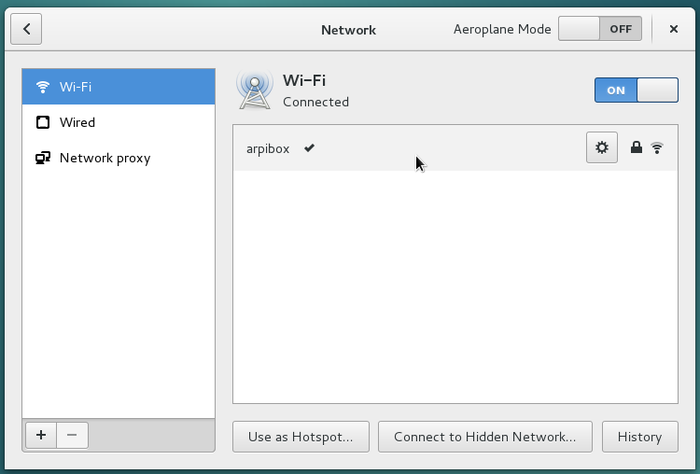
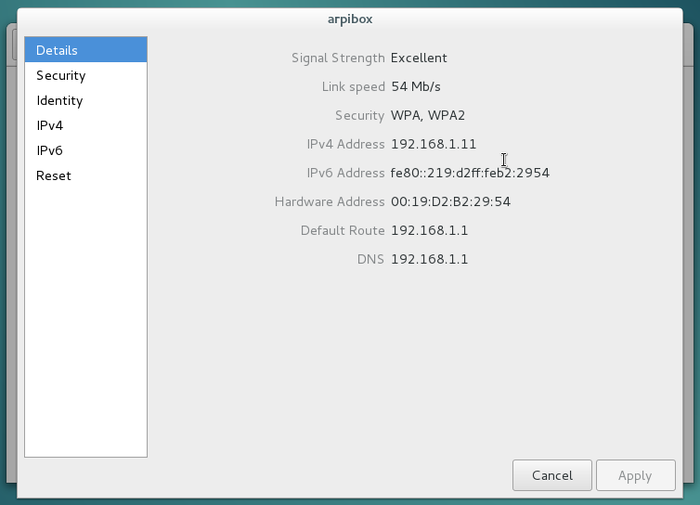
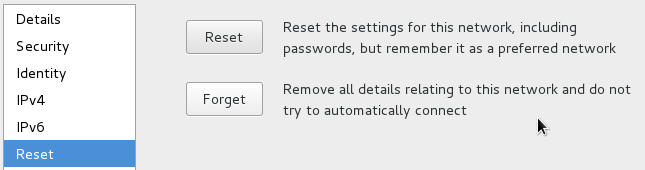
Wi-fi
connection settings on
Gnome
-Shell
6.1.4.Wicd
Wicd
59
(
W
ireless
I
nterface
C
onnection
D
aemon) is an independent
network manager
delivered with
LXDE
.
However, it can be used on any other desktop.
Its interface is slightly different compared to the one of the Gnome manager, but the functionality is the same.
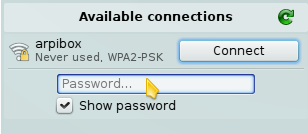
Wicd is available from its icon in the task bar (usually at the bottom right, in the notification area); A left-click opens the main interface which let you select your network access:
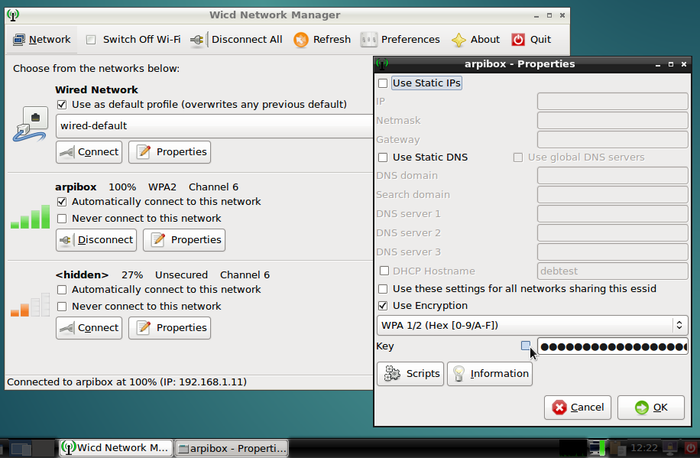
Wicd:connection properties
If the network does not show up, verify first that in the Wicd "Preferences", the right interface (the very one found in the previous chapter: "wlan0" for example) is selected for the Wi-fi network.
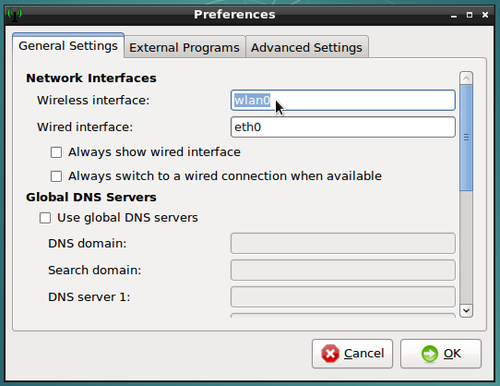
Wicd: Connection manager preferences
6.1.5.KDE Connection editor
On KDE, the network connections are managed like on the other desktops: through a graphical interface. A left-click on the network icon in the notification area and you access to the list of available networks. A click on "Connect" and KDE ask you to enter the network Wi-fi key:

When this is done, you can connect your computer using this Wi-fi network and/or modify its settings.
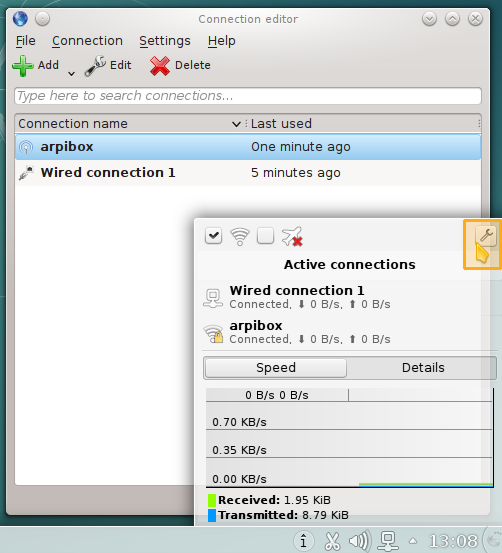
KDE
: network connexion editor
6.2.Configuring your printer
 C.U.P.S
60
, is an acronym for
C
ommon
U
nix
P
rint
ing
S
ystem
, and as its name suggests it, a
print
er management system created by Apple Inc. for OSX and other Unix-like systems. It is used by default on Debian to manage
print
ers. To achieve this,
CUPS
uses the Internet
Print
ing Protocol (ipp) to drive both the local and the network
print
ers.
C.U.P.S
60
, is an acronym for
C
ommon
U
nix
P
rint
ing
S
ystem
, and as its name suggests it, a
print
er management system created by Apple Inc. for OSX and other Unix-like systems. It is used by default on Debian to manage
print
ers. To achieve this,
CUPS
uses the Internet
Print
ing Protocol (ipp) to drive both the local and the network
print
ers.
What is enough to remember is that CUPS is the tool managing the printers 
If you chose an exotic installation, you might need to install yourself some Debian packages.
Within a
terminal
in
administrator
mode (thanks to "su"
see chap.3.8.3
):
apt update && apt install --install-recommends task-print-server
Likewise Wi-fi devices, printers need external drivers. However their detection by default is much better, which enables Debian to embed a simplified printer setting interface (detailed in the first section of this chapter). Methods may vary from one manufacturer to another.
-
for Brother: visit the dedicated page 61,
-
for Epson : add the following repository (chap.8.1.3) to your " sources.list " file:
-
deb http://download.ebz.epson.net/dsc/op/stable/debian/ lsb3.2 main
-
for HP : make sure the hplip package is installed on your machine. If your print er is very recent, visit the dedicated page 62 , download the packages corresponding to tour print er for the Debian system (file ending by ".deb") and install these packages using either the dpkg or gdebi tool (see chap.8.7).
To check your print er compatibility , you can visit the dedicated page of the open print ing.org site: https://www.open print ing.org/ print ers
 Regardless of the chosen method, don't forget to plug the power cord at both ends, to verify that the paper tray is not empty, to connect the printer either directly to your computer, or to the local network, and turn its power on.
6.2.1.Simplified graphical method with system-config-printer
The Debian GNU/Linux desktops include the system-config- print er tool, a simplified graphical manager to add and configure your print er.
If you followed the Debian classic installation procedure, this tool is already present on your system and can be found usually at "Sysem > Print Settings", or in the Control Centers for Gnome or KDE. If you don't find it, simply open a terminal and launch:
In the first window which opens you can press the "Add" button to add a printer.
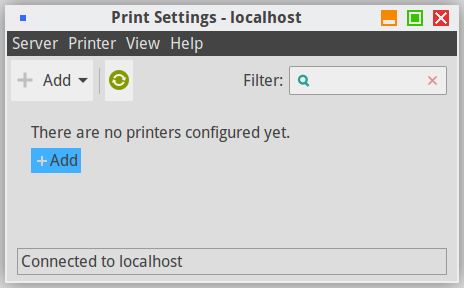
System-config-
print
er: interface by default
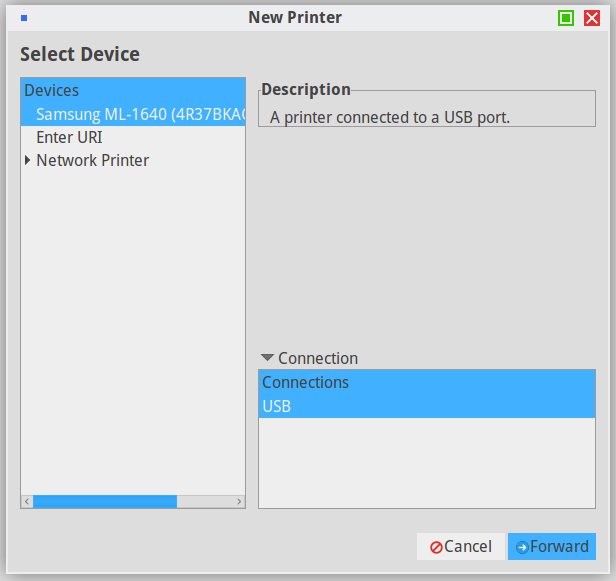
Then you access the "New Printer" window which presents the local or network "Detected Devices" list. Select your printer and click the "Forward" button:
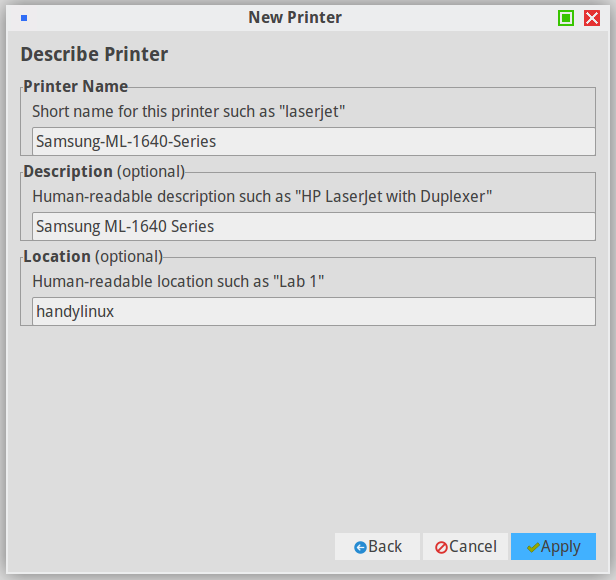
If your printer was correctly detected, its driver has been selected for you. You can describe your printer in the next window. Once you are done with the modifications click on the "Apply" button:
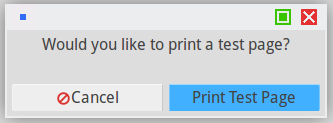
The installer then ask you if you want to test the printer:
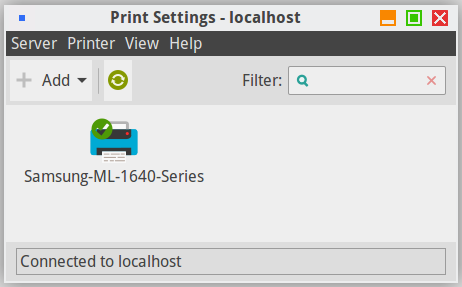
The printer is now correctly added to your machine. It is available for the printing tasks executed by any of the installed applications on your system (LibreOffice, Evince (for pdf files), etc.).
To change your printer settings, double-click on its icon:
Small hint: to change the print er behavior in case of error, go to your print er settings, click on the "Policies" category, and select the " Abort job " option (instead of " Stop print er ") in the "Error policy" field.
6.2.2.Universal graphical method with CUPS
The simplified interface is handy, but the classic CUPS interface is no longer as austere as it used to be. You can access it from your Internet navigator since CUPS is a print server offering a web interface. So let's meet on the page http://localhost:631/ print ers/ which displays all the detected print ers (don't forget to connect your print er either directly to your computer , or to the local network, and to turn its power on).
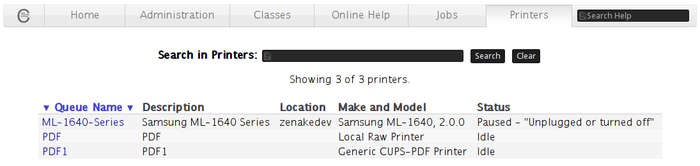
CUPS
: "
Print
ers" tab of the web interface
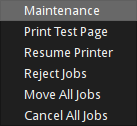
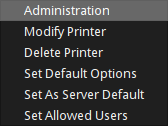
A left-click on your printer opens the dedicated page:
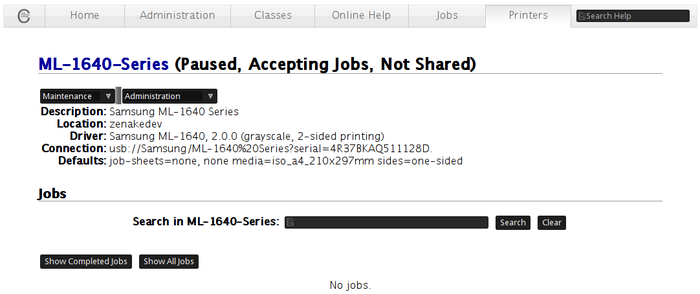
which includes the "Maintenance" and "Administration" menus. Depending on the selected operations, the administrator password will be requested.
More information of the Debian System Print ing Wiki: https://wiki.debian.org/System Print ing
6.3.Check for updates
 Debian
updates
have nothing to do with
Windows'
updates
…
Debian
updates
have nothing to do with
Windows'
updates
…
The GNU/Linux system updates are the direct evidence of one of the free software strengths: the public sources .
As opposed to the proprietary systems, hiding their software flaws (since they sell it) as long as possible, the free distributions publish their software flaws as soon as they are discovered and fix them immediately.
So, when a small window suddenly pops up and invite you to update your system, say yes, of course, and your computer will thank you a all lot.
-
Updates using the Synaptic package manager (chap.8.3.3)
-
Updates using Apper on KDE (chap.8.4.1)
-
Updates with the simplified Debian software center (chap.8.5.2)
6.3.1.Update with a terminal
The terminal, this little box which frightens you so much, whereas it is actually your friend … yes yes … your friend  .
.
You want a proof ? Easy: we are going to update the entire system using just one line.
We start by opening a terminal and log in as administrator. That is (depending on your environment) from the Applications menu > System > "Administrator Terminal", or in the more classic way, open a terminal and type the command:
su
In both cases, the administrator password is requested ( see chap.3.8.3 ). Once connected as "root" in the terminal , cut and paste this line:
apt update && apt dist-upgrade
 … wait a minute, what does that mean exactly ?
-
"update": reload the information concerning the available packages ;
-
"&&": once this is done without error, launch what follows ;
-
"apt": the same application verifies and applies the modifications ;
-
"dist-upgrade": execute a complete update of the installed applications, adding or removing packages as necessary. A confirmation to proceed will be requested. For a complete example have a look on the Administrator example in chapter 3.8.3.
6.3.2.Updates notification
The GNU/Linux desktops use
APT
(standing for "
Advance Package Tool
") on the Gnome, Xfce and LXDE interfaces, or
Apper
(package management tool using
PackageKit
) on the KDE interface, and both tools include a
notification
function.
Thus, your system checks the
repositories
on a regular basis (when the network is available, of course), without even bothering you and displays a notification at the beginning of a new session when some
updates
are available. It is enough to accept the
updates
, or to click on the notification bubble opening up, to display the update manager tool integrated in your system.
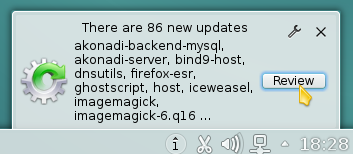
Update notification on the KDE interface
If you want to manually check for available updates , you can use the procedure listed at the beginning of this chapter.
6.4.Retrieve your email account
 If you have an
online messaging service
like gmail.com or free.fr, you can access it from your Firefox
web browser
(launches from the application
menus in the "Internet" section). Enter the address of your online account provider (openmailbox.org, yahoo.fr, orange.fr, google.com …) in the address bar and launch by pressing [Enter].
If you have an
online messaging service
like gmail.com or free.fr, you can access it from your Firefox
web browser
(launches from the application
menus in the "Internet" section). Enter the address of your online account provider (openmailbox.org, yahoo.fr, orange.fr, google.com …) in the address bar and launch by pressing [Enter].
If you are using a local email client , a dedicated Thunderbird-like software , Debian offers Icedove , which is the free equivalent.
6.4.1.Icedove: your free mail client
 Icedove
is primarily an
emailer
, but it is also a communication hub that allows you to read and write within newsgroups, chat with others (discussion group), and read RSS feeds provided by some websites.
Icedove
is primarily an
emailer
, but it is also a communication hub that allows you to read and write within newsgroups, chat with others (discussion group), and read RSS feeds provided by some websites.
If you have two or more email accounts, it might not be very practical to access each of them using the browser! Icedove is an application that brings together all the mail boxes of all your email accounts, in one single convenient interface.
Icedove is a clone of Mozilla Thunderbird , the eMail client of ,the Mozilla foundation. Due to legal issues around its icon copyrights, Thunderbird is not integrated into Debian but Icedove provides exactly the same functionality.
To open Icedove, from an application list or a menu, select the "Mail client" from the "Internet" category.
6.4.1.1.Icedove setup
At first startup, Icedove provides temporary configuration interface and a foreground window that allows you to create an account with two suppliers and partners.
If you want to take advantage of this option, fill in the fields and let you guide, the configuration will be automatic.
If you are not interested you can click on "Skip this step and use my existing address".
Another window opens. Then provide the requested information about your account. You can choose whether Icedove must remember the password. If you uncheck this option, you must enter your password each time you connect.
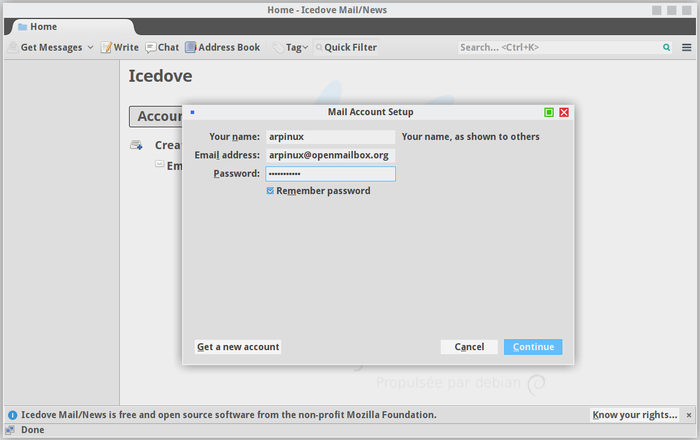
Icedove: mail account configuration
Click on "continue". Icedove then searches in its database then specific parameters for your eamil account. When finished click on "done".
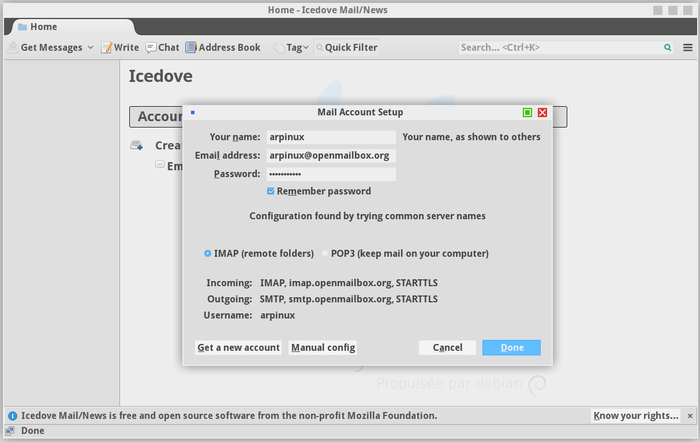
Icedove: mail account verification
Icedove now displays your account details in the right column, starts downloading all your emails and, depending on your provider, all your contacts (this may take sometime). Now click on your account in left pane to unfold it, then on "Inbox". The interface takes its normal appearance:
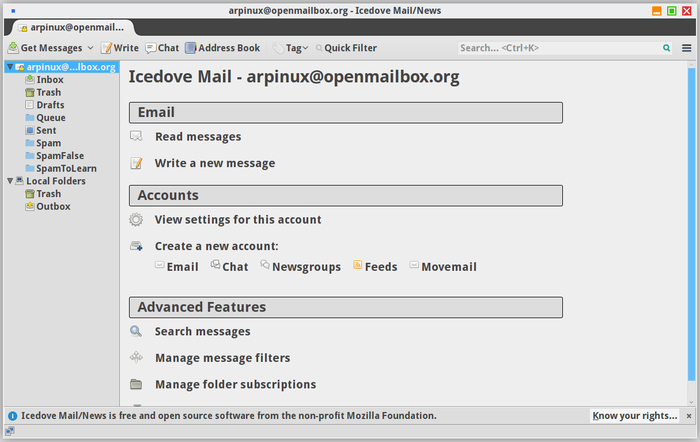
Icedove: default display
6.4.1.2.Icedove interface
The Icedove interface is relatively intuitive. In the top tool bar you can check your mail, compose a new message, open a chat session, access your address book, put a label on a message, or filter your messages.
At the right of the menu bar you can find the Icedove menu, represented three small horizontal bars, from which you set your preferences, and launch various actions.
For example if you click on the Message menu (or right-click on given message), a list of actions is proposed like Reply, Forward, Archive, Mark as Junk, etc …
If you are looking for a specific message you have several options:
-
Type few characters in the search field of the top menu bar;
-
Click on one of the column headers ("Subject", "From", "Date", "Attachments", "Star", "Tag" if you tag your messages, Read/Unread status, etc.): your messages will be sorted immediately according to the selected criterion (defined by the header name), which will let you find quickly an old message rather than scrolling through an endless list of emails. By clicking a second time on the column header the sort will be done in reverse order. Thus, by using this tool, you can customize the way your messages are presented according to your own criteria.
6.4.1.3.Retrieve other email account(s)
If you have more email accounts you want to access via Icedove, click on the Icedove menu (the three small horizontal bars at the right of the tool bar) and select "New Message" > "Existing Mail Account …" and continue the Mail Account Setup procedure like explained above.
6.4.1.4.Icedove settings
In the modern presentation of Icedove (as well as other communication tools like Firefox and Chromium, for example) the application menu is define by the three small horizontal bars at the top right of the window. From this menu you have access to the parameters of the application.
If you prefer the classic presentation, with the menu bar at the top of the window, click on this Icedove menu and then "Preferences" and tick "Menu Bar" on.
It is advisable to visit the Preferences setting window, where you can define the handling of junk mails, define a master password for all your account, customize your tag list, among all the settings available in there.
6.4.1.5.Protect your new and forwarded e-mails
 … Encrypt your e-mails … what does that mean?
Let us take the example of the regular mail, sent via post-mail. You send a postcard to your mother-in-law for example, you know that what is written on it can be read by the postman or anyone else. Well, with your e-mails, it's exactly like the postcard,if you do not encrypt them.
"Does not matter" you say, " I don't care if someone knows that I wrote to my mother-in-law that the weather is fine during our vacations" . Perhaps. But you can write more than just mundane wordings in your messages, and you never know what can happen to them. You are not convinced? I ask you to reconsider if you really have nothing to hide by visiting this page on the FSF website: https://emailselfdefense.fsf.org .
 To effectively protect your electronic exchanges, use
EnigMail
!
https://www.enigmail.net
To effectively protect your electronic exchanges, use
EnigMail
!
https://www.enigmail.net
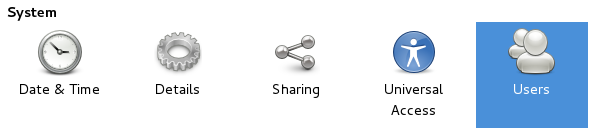
6.5.Login configuration
GNU/Linux systems follow the principle of rights and permissions by default. When you install Debian, a password is requested for the primary user. This password is requested at the beginning of the session.
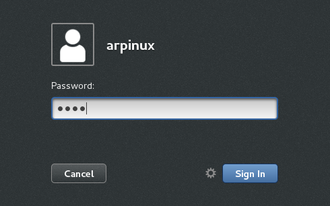
Gnome
: authentication at session startup
If you are using Debian in single- user mode, you can disable this password request in order to begin your working session directly when the computer is started. Debian uses three different default connection managers: GDM (on Gnome & Cinnamon ), LightDM (on MATE , LXDE & Xfce ) and KDM (on KDE ).
6.5.1.Autologin with GDM
GDM3
63
is the default
Gnome
Display Manager for the default
desktop environment
on Debian 8 "Jessie". To enable automatic
login
, you need to edit its configuration file in
administrator
mode (
see chap.3.8.3
). The GUI way
with the mouse
just follows
 :
:
-
Open a " root " terminal with the " su " command, the administrative password will be asked.
-
Copy (to backup) then edit the appropriate file with this command:
-
cp /etc/gdm3/daemon.conf /etc/gdm3/daemon.conf.bak && nano /etc/gdm3/daemon.conf
At the beginning of the file, locate the following lines:
Edit it to obtain this result:
Don't forget to adapt "my_login" to your login.
Save the file with [Ctrl]+x then answer "Y" for "yes":
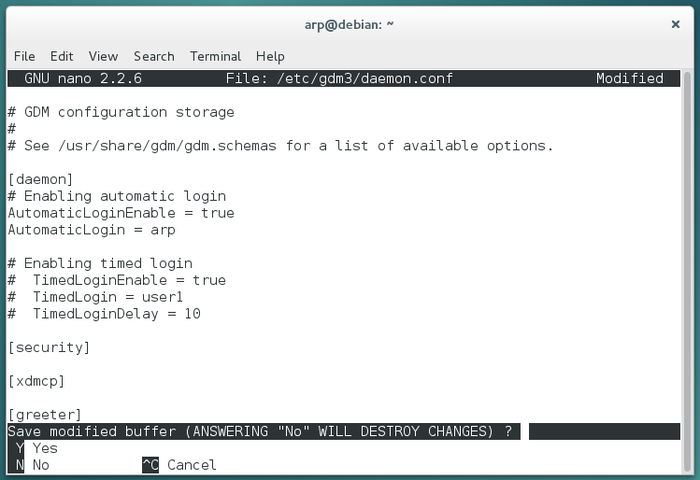
GDM: editing configuration file in Nano CLI editor
You can close your terminal, the next time you restart, you will not be prompted for your password.
In case of problem, you can retrieve your original file with this command in administrator mode:
mv -f /etc/gdm3/daemon.conf.bak /etc/gdm3/daemon.conf
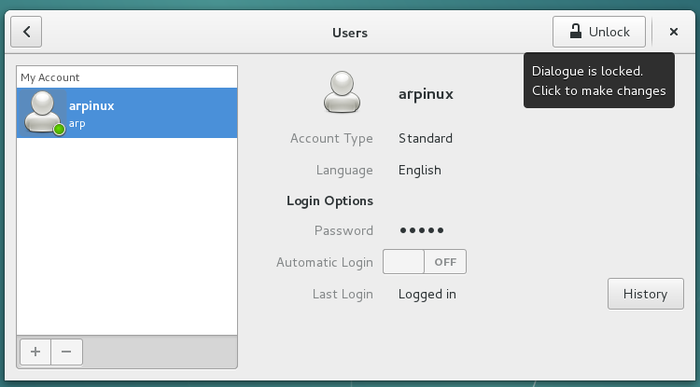
6.5.1.1.The graphical method

6.5.2.Autologin with LightDM
You can setup LightDM 64 by editing its main configuration file. To enable auto login , you'll have to edit it with a root terminal ( see chap.3.8.3 ).
Open a terminal and become root with the " su " command. The administrator password will be asked. Once connected in root terminal , copy (to backup ) and edit the dedicated file with:
cp /etc/lightdm/lightdm.conf /etc/lightdm/lightdm.conf.bak && nano /etc/lightdm/lightdm.conf
This command opens the configuration file in the CLI Nano editor. Use arrows to scroll and locate those lines:
#autologin-user=
#autologin-user-timeout=0
Remove the "#" in front of each line then add your login like that:
autologin-user=my_login
autologin-user-timeout=0
With "my_login" remplaced by your login.
Save the file with the [Ctrl]+x shortcut, the answer "Y" for "yes":
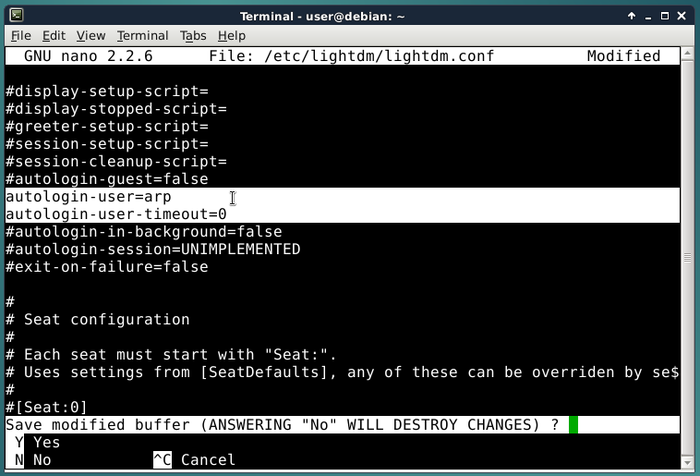
LightDM: edition of the configuration file in Nano CLI editor
You can close your terminal: your password won't be asked anymore at login time.
In case of troubles, just enter this command in administrator mode to restore your previous LightDM configuration:
mv -f /etc/lightdm/lightdm.conf.bak /etc/lightdm/lightdm.conf
6.5.3.KDM configuration on KDE desktop
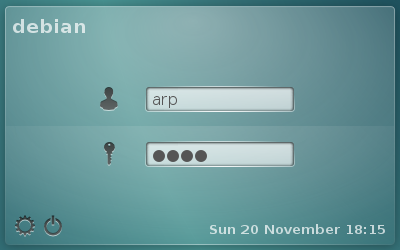
KDM:
KDE
login
screen
on Debian 8
KDE is a truly complete environment and KDM 65 provides you with a graphical interface to configure your login screen . The configuration tool will allow you to manage the wallpaper, the language used, some options and of course, the automatic connection.
So open KDE 's KickOff menu > Applications > Settings > System settings > System administration > Login screen .
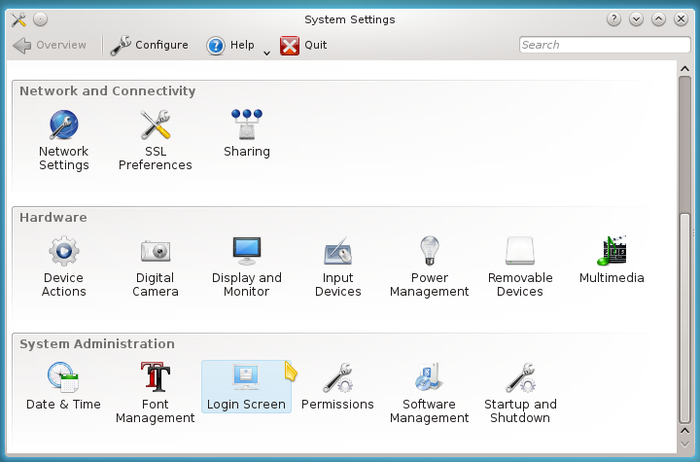
KDM:
login
screen
configuration launcher on
KDE
Enable autologin from the "Convenience" tab:
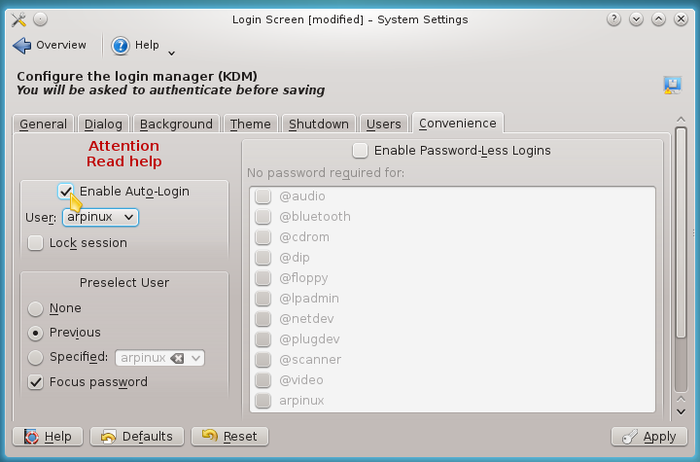
KDM: configuration interface
Tick the case "Enable Auto-login" then select the user int the "User" drop-down menu. As this configuration is part of the system settings, the root password will be asked:

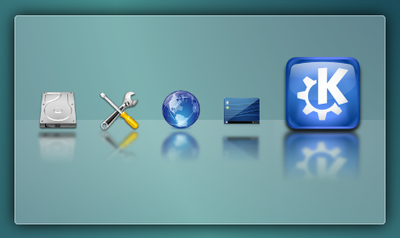
KDE
:
administrator
password
request
Your password won't be asked anymore at login time.
6.6.Navigate on Internet
6.6.1.About Internet browser
 The primary function of a web browser is to let you consult information available on the Web (World Wide Web).
The user gives the browser the web address of the resource to consult. There are three ways to give a web address:
-
Type yourself the web address in the address bar of the browser,
-
Select a favorite in your list of bookmarks , knowing that each is associated with a favorite web address,
-
Follow a link on a web page, knowing that each link is associated with a web address.
The browser connects to the web server hosting the target resource. The communication protocol commonly used is HTTP or HTTPS (secure version).
-
If the resource is an HTML page, a compatible video file, or a PDF file, the browser display a page.
-
If the resource is unknown or not handled by the browser, the choice is yours: download or open the resource with an external application.
6.6.2.Firefox: a free web browser
Mozilla Firefox 66 is an open and free web browser , developed and distributed by the Mozilla Foundation 67 with the help of thousands of volunteers using the free software /open source development methodology (dixit wikipédia 68 ).
Debian integrates Firefox-ESR , the " E xtended S upport R elease" version, aimed at large organizations (and small ones) for mass deployments. This version is maintained for 10 months from its release date and only benefits from security updates , ensuring a stable and secure browser.
Firefox on Debian
The main window consists of the following elements (from top to bottom):
-
The tab bar displays the open Internet pages and allows you to switch from one to another with a single click.
-
The tools bar displays: the forward button, the address bar, the search field, bookmarks button, the main Firefox menu.
-
the browsing pane displays the web pages contents.
-
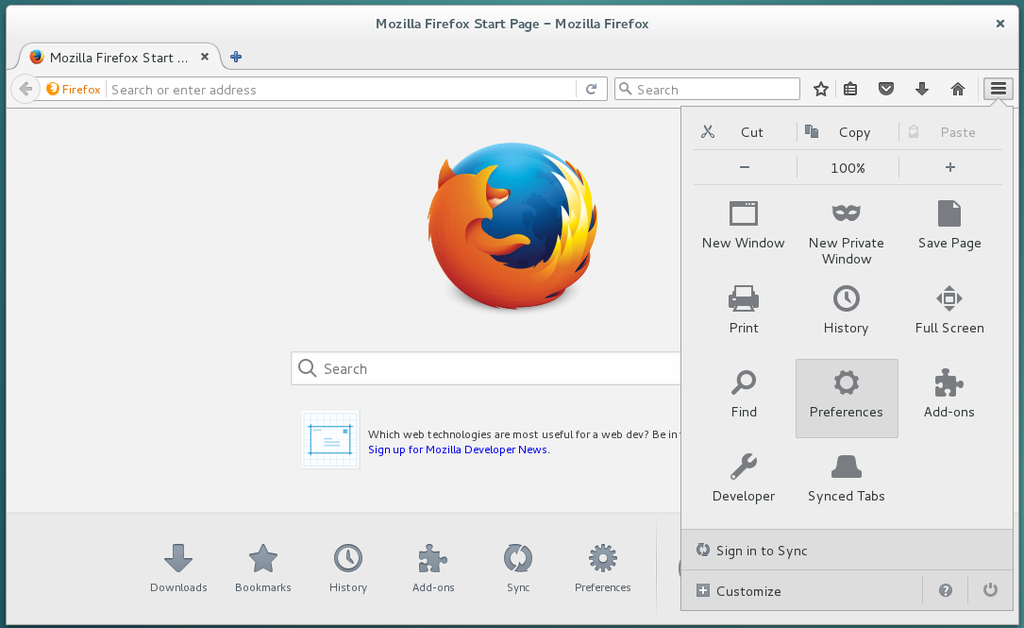
Customize and configure Firefox through its main menu that appears when clicking on the 3 bar menu icon (at the right end of the tool bar):
-
The first line of the menu allows you to perform common editing operations (cut/ copy/paste ).
-
Then comes the zoom line … it's explicit.
-
Several tools are available to navigate in "private mode", view your history or directly print a web page.
-
The Preferences button takes you to the main configuration menu: 8 tabs with explicit entries.
-
The Addons button takes you to the extensions configuration menu (active or inactive).
-
The Customize button launches the "edit mode" of Firefox: the left pane presents "Additional Tools and Features" that you can move either to the Firefox main menu (currently open) or directly in the tool bar, and vice versa … Well, you tweak the look of the browser by just dragging and dropping items in the interface.
When you are done click on "Exit Customize" at the bottom of the main menu. -
The " ? " button takes you to the official Firefox on-line help. Mozilla contributors have worked well. Online help 69 is comprehensive and detailed: you can explore there all the possibilities of your browser.
To add features to your Firefox browser, navigate to Preferences > Add-ons. In the tab that opens, select "Get Add-ons" and choose from the available modules70.
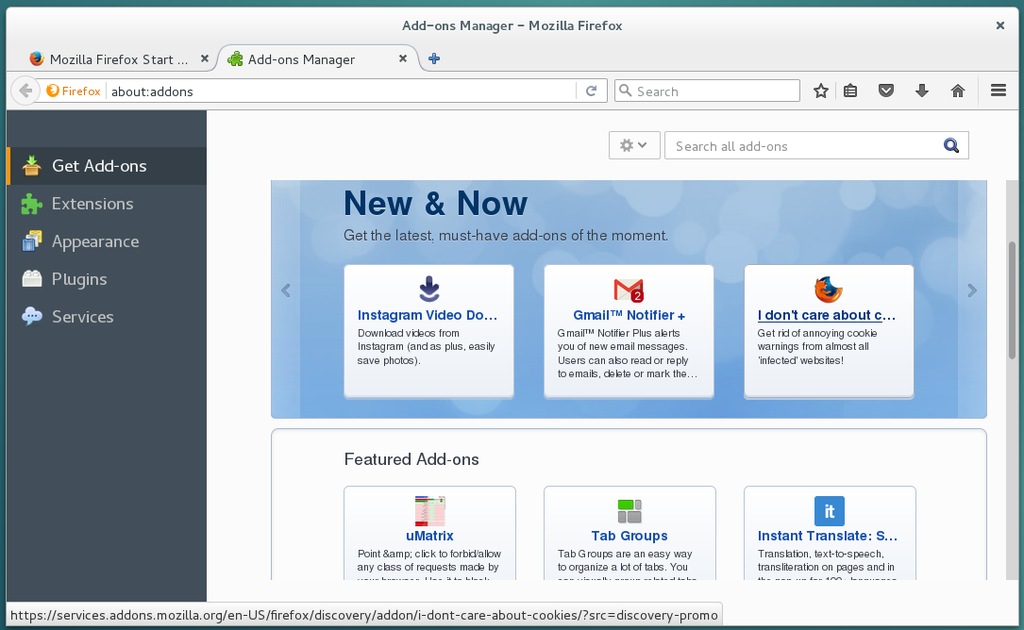
Firefox: Add-ons catalog
 The default version of Firefox on Debian "stable" can be a bit old (v45). If you wish to obtain a more recent version (v49), use the external repositories of the Mozilla Foundation (
see chap.8.1.3.2
).
The default version of Firefox on Debian "stable" can be a bit old (v45). If you wish to obtain a more recent version (v49), use the external repositories of the Mozilla Foundation (
see chap.8.1.3.2
).
6.7.Watch a video
 Debian GNU/Linux comes with a video player on each Desktop Environment (DE like Gnome or Xfce). Debian natively recognizes most common video formats (ogv, mkv, mp4, avi, webm…).
Once your system is installed (or in Live session), a double-click on a video file will open it with the default player of your DE.
For Gnome or Cinnamon, it's the "Videos" player (Totem) that is automatically launched when double-clicking on a video:
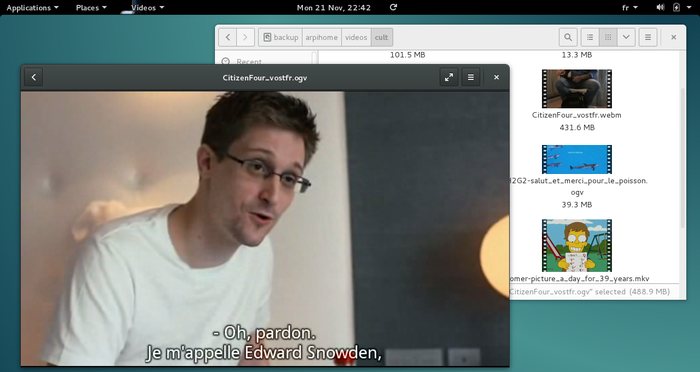
Totem: "Videos" and "Places"
windows
on
Gnome
-Shell
Its use is very simple and intuitive. At the slightest movement of the pointer, the playback menu is displayed and allows you to browse the video file, set loop playback (the vertical bar formed by 3 points) or adjust the volume. The main menu gives you access to other functions:

Each DE integrates its own player, all featuring the same basic functions, largely enough for a first use of a Debian system. As usual on Debian, you can add the multimedia software of your choice. I'll let you visit the list of applications available on the Debian wiki71.
The Xfce desktop comes with a multi-platform media player widely used by Windows®: VLC , a way to get started on Debian without changing your habits.
6.7.1.VLC: a multimedia player
VLC 72 is a free media player and a system capable of playing most multimedia files as well as DVDs, Audio CDs, VCDs, and various broadcasted protocols.
VLC opens with a double-click on a video file (if this is the default application defined for this action and this type of file) or from the applications menu > Multimedia > VLC Media Player.
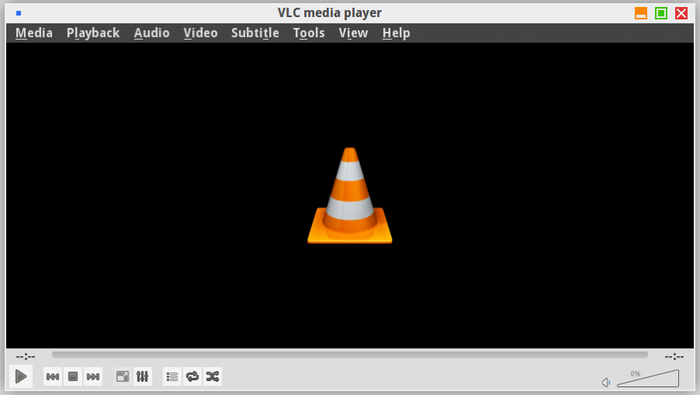
To open a video media : click on the " Media " tab.
VLC is able to:
-
play a file on disk,
-
list and play all media files in a specific directory,
-
read a DVD,
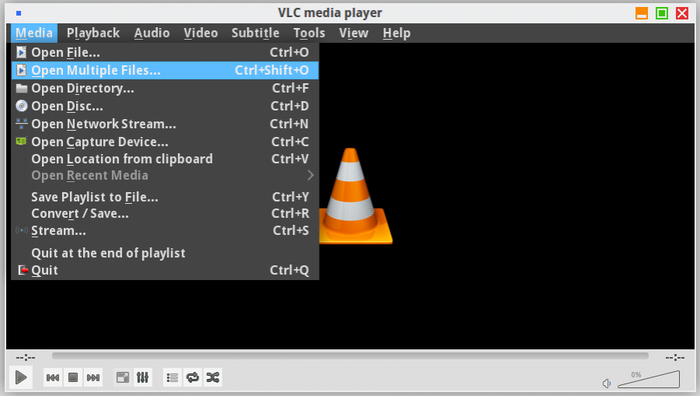
VLC: open a media from the "Media" menu
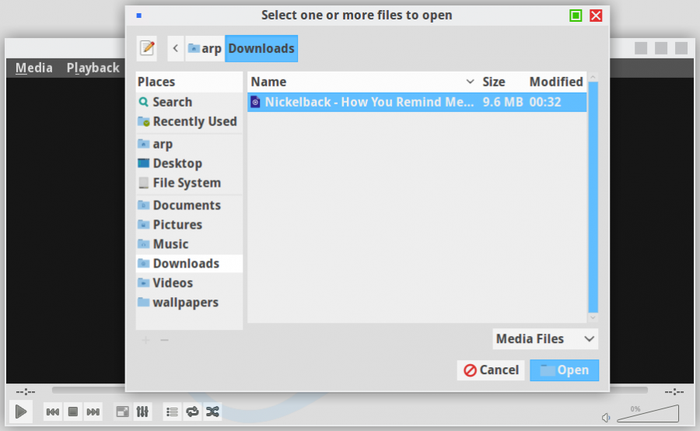
VLC: select the media you want
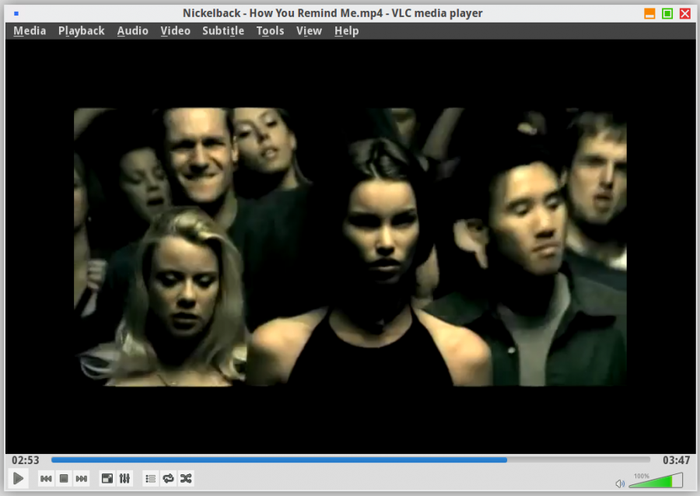
VLC in player mode
VLC can also play network streams (podcasts), listen to an online radio, capture the screen, as well as encode a stream to save it.
6.8.Listen to music
 Debian GNU/Linux comes with a media player for each DE. Some allow the management of a large music library, including sort management, play lists, cover artwork, etc (such as Amarok73 or Rhythmbox described in the following section), others are simple, lightweight and easy to master (Such as Audacious74 or XMMS75 ).
6.8.1.About audio format natively recognized
Wikipedia76 is my friend …
An audio file format is a file format for storing digital audio data on a computer system. The bit layout of the audio data (excluding metadata) is called the audio coding format and can be uncompressed, or compressed to reduce the file size, often using lossy compression. The industry has produced many formats for either production or distribution
The program element which transforms the signal into a file and the file back into a signal is called a codec 77 , an abbreviation for co der- dec oder.
Debian recognizes (among other things) the 4 main default formats (mp3, ogg, flac, wav). If you need to install codecs or non-free audio software , you will need to modify your repositories ( chap.8.1.3 ) to add the "contrib" and "non-free" sections.
6.8.2.Rhythmbox: your music player
Rhythmbox 78 is the default music player in the Gnome environment, which allows you to play and organize your music collection.
Here are its main features:
-
Sort by artists, albums or genres..
-
Playlist management.
-
Display of jackets and lyrics.
-
Management of podcasts and web-radios.
-
Support for portable players (MTP or iPod).
-
Support infrared remote controls.
-
Sharing and playing music on a local network.
At first launch, Rhythmbox scans your "Music" folder, but you can add more folders to your music library.
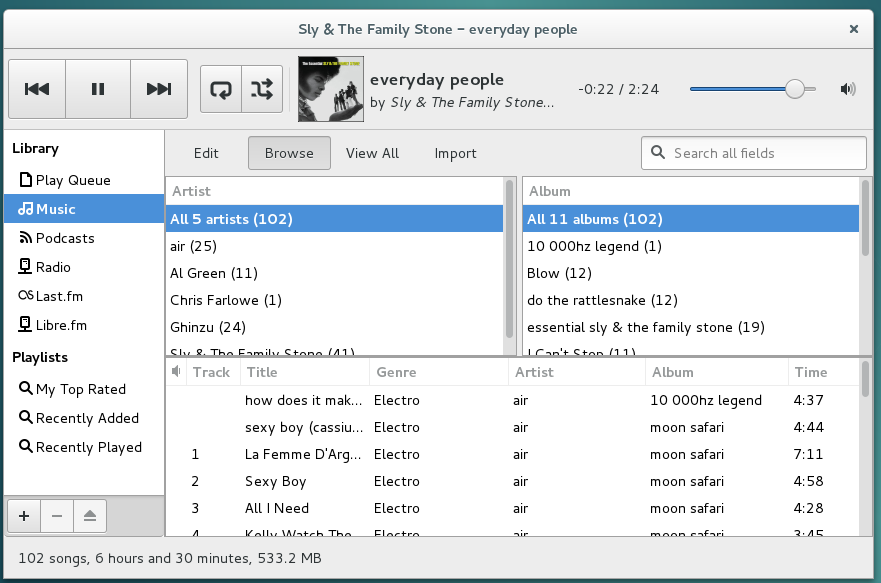
Rhythmbox: default view

Preferences menu
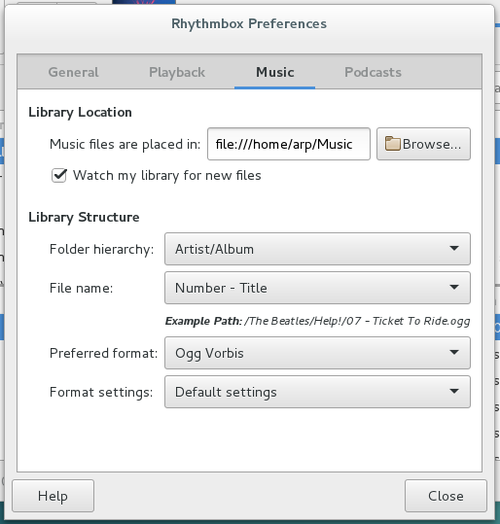
Rhythmbox: preferences settings
Rhythmbox integrates a plugin82 system that adds functionality to the player.
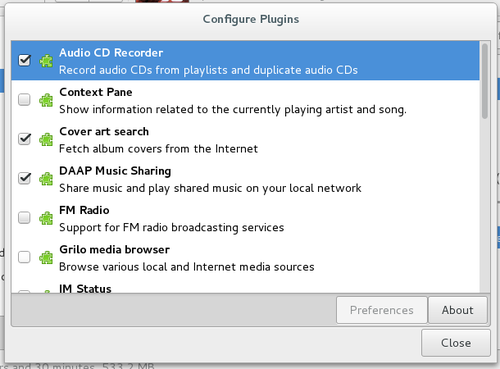
Rhythmbox: configure plugins
Default audio player of the Gnome desktop, it benefits from a complete integrated help:
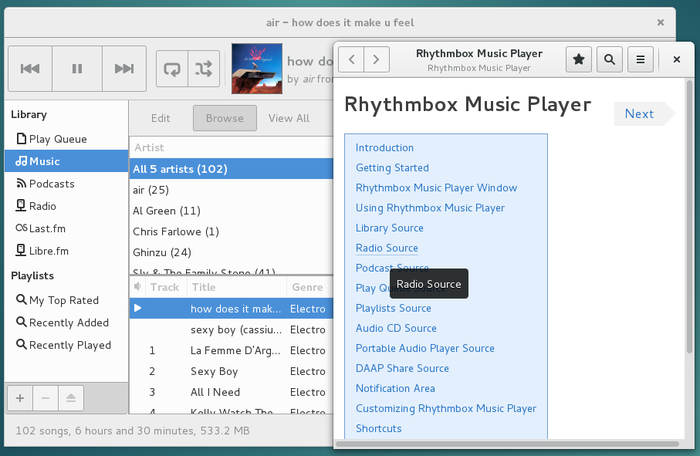
Rhythmbox: complete help
Main Desktop Environment have their own player: Xfce uses QuodLibet 83 and KDE includes Amarok 84 .
6.9.Work on word processor
 Debian
integrates by default the full
office
suite Libre
Office
which allows you to work on documents of any type format coming from different
office
suites.
Debian
integrates by default the full
office
suite Libre
Office
which allows you to work on documents of any type format coming from different
office
suites.
If you don't need such a comprehensive tool suite, you can use the Abiword 85 or Gnumeric 86 tools, lighter while maintaining a high level of compatibility .
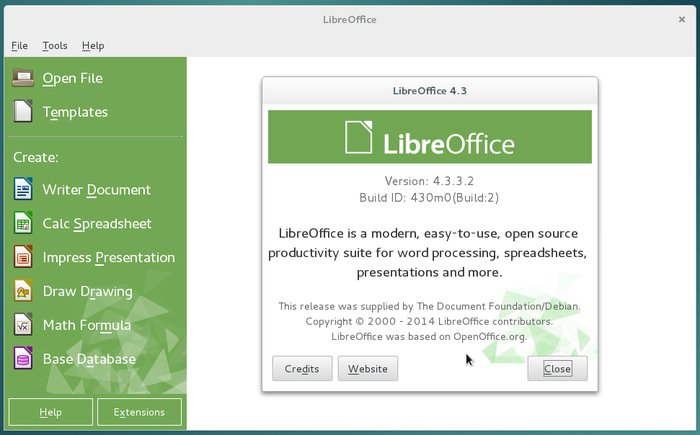
6.9.1.LibreOffice the free office productivity suite
Libre Office 87 is a free (as in freedom) office suite that offers tools for word processing (Writer), spreadsheet (Calc), presentation (Impress), drawing (Draw), database (Base) and editing mathematical formulas (Math).
There are many possibilities embedded in Libre Office . The official Wiki of the community is very well done and will provide you with an efficient and complete help: https://wiki.documentfoundation.org/Faq
Good reading  .
.
 The version of Libre
Office
offered by default on Debian "stable" can be a bit old (v4). If you want to install a newer version (v5), use the "
backport
s" (
see chap.8.2.3
).
The version of Libre
Office
offered by default on Debian "stable" can be a bit old (v4). If you want to install a newer version (v5), use the "
backport
s" (
see chap.8.2.3
).
6.10.Edit your photos with the Gimp
Debian includes the graphic manipulation software the Gimp .
 GIMP
, standing for
G
NU
I
mage
M
anipulation
P
rogram, is an image processing
software
. Often considered as a competitor of Adobe™ photoshop™, it is, at any rate, a safe alternative with all the same functionalities, and, on top of it, it is free!
GIMP
, standing for
G
NU
I
mage
M
anipulation
P
rogram, is an image processing
software
. Often considered as a competitor of Adobe™ photoshop™, it is, at any rate, a safe alternative with all the same functionalities, and, on top of it, it is free!

Available for a whole range of OS, it runs naturally on Linux, MacOsX, * BSD and Windows®.
There are already very good documentation concerning The GIMP, and this page is only to gather, in few lines, the most basic hints, without having to browse through dozens of sites hoping to find its happiness.
6.10.1.Interface Overview
At first launch, Gimp displays 3 windows with several elements:
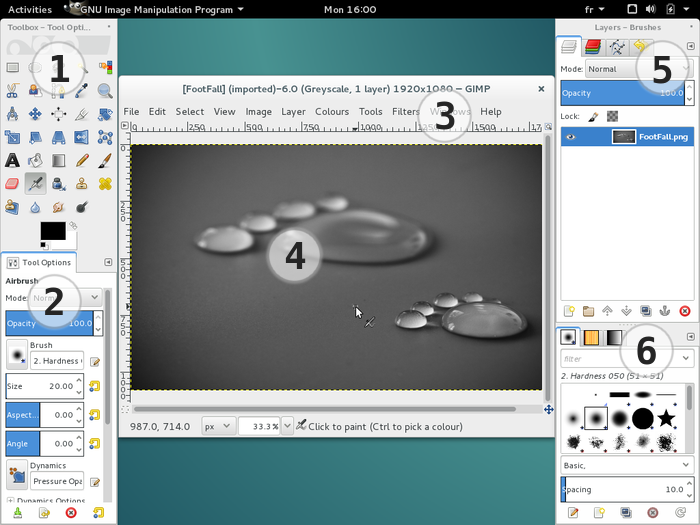
1 The tools box - 2 The tools options - 3 The Gimp menu bar - 4 The active picture - 5 & 6 The tabs displaying the values of tools and layers.
-
The toolbox contains the icons for the various Gimp tools. You can add or remove them from the menu bar > Edit > Preferences > Toolbox. The function of each tool is displayed on a pop-up window if selected.
-
The tool options show the parameter values of the tool being used: the size and hardness of the brush, for example, or the opacity of the filling…
-
The menu bar gives you access to all functions and possibilities of the Gimp.
-
The active image is displayed in the main window: the changes made are directly visible.
-
The right window contains various tabs that you can modify or delete from the small arrow at the top right of the tab.
By default, the first tab displays the active layers in the image.
 … What does those "layers" exactly means??
Gimp uses the principle of layers
, ie the superimposition of images for a final rendering. It is the same principle as recording a piece of music: the instruments are all recorded on separate "audio tracks", the voices also, then "mixed" all together to obtain the final piece of music.
For the layers of Gimp, it is the same: you separate the different elements on layers and the final image will be exported in the format of your choice (JPEG, PNG …).
The default format of Gimp is "xcf" , a format that allows to preserve the independence of the layers and thus, to be able to modify an element without touching the other layers.
6.10.2.First Tips
Prepare a folder with a copy of the images to modify:
It is often said, the backup is your friend and it is also true for image editing. Before working on your project, create a folder where you will place a copy of your original image as well as all the elements you want to add (other images to process, modify, your graphics resources in short).
Record your work regularly in ".xcf" format:
Gimp uses the default "xcf" format to save your project. This format allows to save the layers and therefore, permits a fine modification of your work. To save in xcf format, direction the menu "File"> "Save". Once your project is finalized, you can export your project in a compressed format (jpeg, png, gif) from the menu bar : "File" > "Export as".
Switch to single-window mode:
If the default interface with its 3 windows disturbs you, Gimp has provided a "single-window" mode available from the menu "Windows" > "Single window mode".
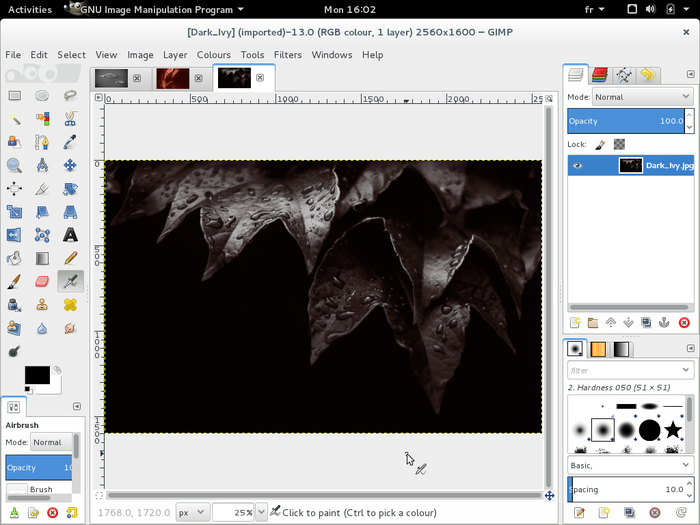
The Gimp in "single window" mode
Have Fun !
One way to discover
the Gimp
is to test, try, have fun editing your family photos for fun… Create a folder to play with Gimp and place your favorite photos or images and start to
gimp-it
 !
!
Tutorial
The Gimp website provides a large choice of tutorials where you could start to play: https://www.gimp.org/tutorials/
If Gimp print s only white pages, and the preview is desperately showing a blank page too, you can fix this problem by installing the gimp-guten print package in administrator mode ( see chap.3.8.3 ):
Then, to print a image, all you have to do is: "File > Print with Gutenprint". A page is open where you can set up your printer and print layout.
58 https://wiki.debian.org/fr/bcm43xx
59 https://wiki.debian.org/WiFi/HowToUse#Wicd
60 https://wikipedia.org/wiki/Common_Unix_Printing_System
61 http://welcome.solutions.brother.com/bsc/public_s/id/linux/en/download_prn.html
62 http://hplipopensource.com/hplip-web/index.html
63 https://wiki.debian.org/GDM
64 https://wiki.debian.org/LightDM
65 https://docs.kde.org/stable4/en/kde-workspace/kdm/configuring-kdm.html
66 https://www.mozilla.org/en/firefox/desktop/
68 https://wikipedia.org/wiki/Mozilla_Firefox
69 https://support.mozilla.org/en/products/firefox?as=u&utm_source=inproduct
70 https://addons.mozilla.org/en/firefox/extensions/
71 https://wiki.debian.org/Multimedia
72 https://www.videolan.org/vlc/
74 http://audacious-media-player.org/
75 https://xmms2.org/wiki/Main_Page
76 https://en.wikipedia.org/wiki/Audio_file_format
77 https://wikipedia.org/wiki/Codec
78 https://wiki.gnome.org/Apps/Rhythmbox
82 https://wikipedia.org/wiki/Plugins
83 https://quodlibet.readthedocs.io
84 https://en.wikipedia.org/wiki/Amarok_%28software%29
85 https://packages.debian.org/jessie/abiword